
Bathroom Panels vs Tiles: Why Choose Panels in 2026
Table of Contents
- Bathroom Panels vs Tiles: The Core Differences
- Why Bathroom Wall Panels Outperform Tiles
- Bathroom Wall Panels vs Tiles Cost: Real Numbers
- How to Install Shower Panels Over Tiles
- Maintenance of Bathroom Wall Panels: Long-Term Care
- Design Aesthetics: Tile-Effect Panels and Modern Finishes
- Common Misconceptions About Bathroom Panels
- Conclusion: Making the Right Choice for Your Bathroom
Last Updated: August 9, 2026
Bathroom Panels vs Tiles: The Core Differences
The choice between bathroom panels and traditional ceramic tiles has shifted dramatically over the past five years. Bathroom panels vs tiles represents one of the most significant decisions homeowners face during renovation projects. Traditional ceramic tiles are applied individually using grout, creating visible seams that require skilled labour and ongoing maintenance. Bathroom wall panels are large sheets of PVC or composite material that install as seamless, grout-free surfaces with pre-finished tile-effect designs or modern finishes.

At Wetwall Wonders, we've observed how this shift reflects genuine practical advantages. The question isn't whether one option is universally superior, it's understanding which solution matches your specific needs, budget, and timeline.
Why Bathroom Wall Panels Outperform Tiles
The performance advantages of bathroom wall panels become apparent during installation. While tiles require individual placement and grouting over weeks, panels install in days, translating directly into cost savings and reduced home disruption.
Grout-Free Installation and Seamless Finishes
The absence of grout is the defining feature separating modern bathroom panels from ceramic tiles. Grout-free design eliminates the hidden joints where moisture, mould, and mildew develop. Traditional tiles create hundreds of grout lines, each a potential entry point for water penetration and bacterial growth.
Bathroom panels achieve seamless finishes through tongue-and-groove joints or flush-fitting edges sealed with silicone. Water cannot seep behind the surface or accumulate in crevices. Grout is porous material that absorbs moisture and becomes a breeding ground for mould, particularly in poorly ventilated bathrooms. Panels eliminate this problem entirely. A simple wipe-down with a damp cloth keeps the surface pristine indefinitely.
Speed of Installation and Labour Savings
Installation time represents one of the most tangible advantages of bathroom panels. A typical tiled shower enclosure takes 5-7 days for professional completion, including substrate preparation, tiling, grouting, and curing. Bathroom panels accomplish the same result in 1-2 days.
This speed stems from the panel format itself. Rather than positioning hundreds of individual tiles, installers apply large sheets using adhesive and silicone. The process requires less precision than tiling because panels don't depend on perfectly aligned grout lines. For DIY installations, this difference becomes even more significant. Bathroom panels are genuinely accessible to non-professionals, whereas tiling demands considerable skill.
Superior Waterproofing and Mould Prevention
Bathroom wall panels are manufactured as 100% waterproof surfaces. Combined with proper silicone sealing at joints and edges, they create a complete moisture barrier. Water cannot penetrate the panel surface or accumulate behind it when installation follows manufacturer specifications.
Mould prevention becomes automatic with panels. Because moisture cannot reach the substrate or accumulate in seams, the conditions that allow mould growth simply don't exist. Homes with poor ventilation or high humidity levels, particularly common in UK bathrooms, see dramatic improvements in air quality and wall condition after switching from tiles to panels.
Bathroom Wall Panels vs Tiles Cost: Real Numbers
Cost comparison requires examining both material and labour expenses. For a standard 2.4m × 1.8m bathroom wall, bathroom panels typically cost between £40-£60 per square metre. A 4.3 square metre wall requires approximately 5-6 panels, totalling £240-£360 in materials, plus adhesive and silicone (typically £15-£25 additional).
Ceramic tiles cost £20-£40 per square metre initially, but this overlooks grouting materials, waterproofing membranes, and substrate preparation. For DIY installations, the cost advantage favours panels dramatically. Tiling demands precision and experience; most homeowners attempting DIY tiling encounter problems requiring professional correction. Bathroom panels are designed for DIY installation, producing professional results without specialist skills.
How to Install Shower Panels Over Tiles
One of the most practical advantages of bathroom panels is their ability to install directly over existing tiles, eliminating costly and disruptive tile removal.
Substrate Preparation and Surface Assessment
Before adhesive touches the wall, proper substrate preparation determines installation success. Existing tiles must be structurally sound and firmly attached with no hollow spots or movement. Test the surface by tapping across the tile plane with a rubber mallet, listening for solid, consistent sounds. Hollow taps indicate tiles that have separated and require removal.
Clean the tiled surface thoroughly using a degreaser and stiff brush. Fill any gaps or damaged grout lines flush with the tile surface using flexible caulk. Use a straightedge to identify problem areas exceeding 5mm variation over a 1.2m span. For walls with significant tile damage or movement, removal and re-boarding may be necessary.
Adhesive Application and Panel Fitting
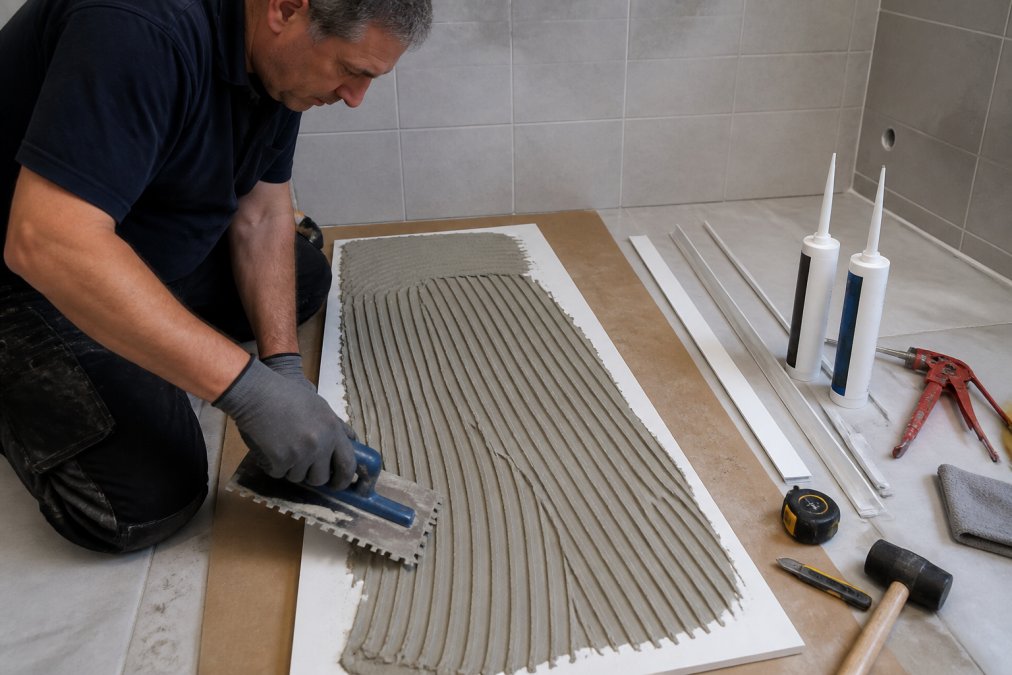
Apply adhesive designed specifically for bathroom panels using a notched trowel at 45 degrees to create uniform ridges. These ridges collapse as panels are pressed into place, creating full contact between adhesive and substrate. Position the first panel carefully with a spirit level to ensure vertical alignment. Press firmly into place, working from bottom to top to avoid trapping air.
Subsequent panels fit into the tongue-and-groove joints of the previous panel. Ensure these joints are tight, as gaps allow water to migrate behind panels. Apply adhesive to the substrate, not to panel edges, to avoid adhesive squeezing out of joints. Leave adhesive to cure for the time specified by the manufacturer (typically 24 hours) before applying silicone or exposing panels to moisture.
Silicone Sealing and Water-Tight Finishing
Silicone sealing completes the waterproofing system. Apply silicone bead along all external edges, internal corners, and where panels meet other surfaces using sanitary-grade silicone formulated for bathroom use. Maintain consistent bead width (approximately 8-10mm) and smooth immediately with a wet finger, pressing it into the joint and removing excess.
Pay particular attention to the junction between panels and shower trays or baths, where water contact is constant. Allow silicone to cure fully (typically 48 hours) before introducing water.
Maintenance of Bathroom Wall Panels: Long-Term Care
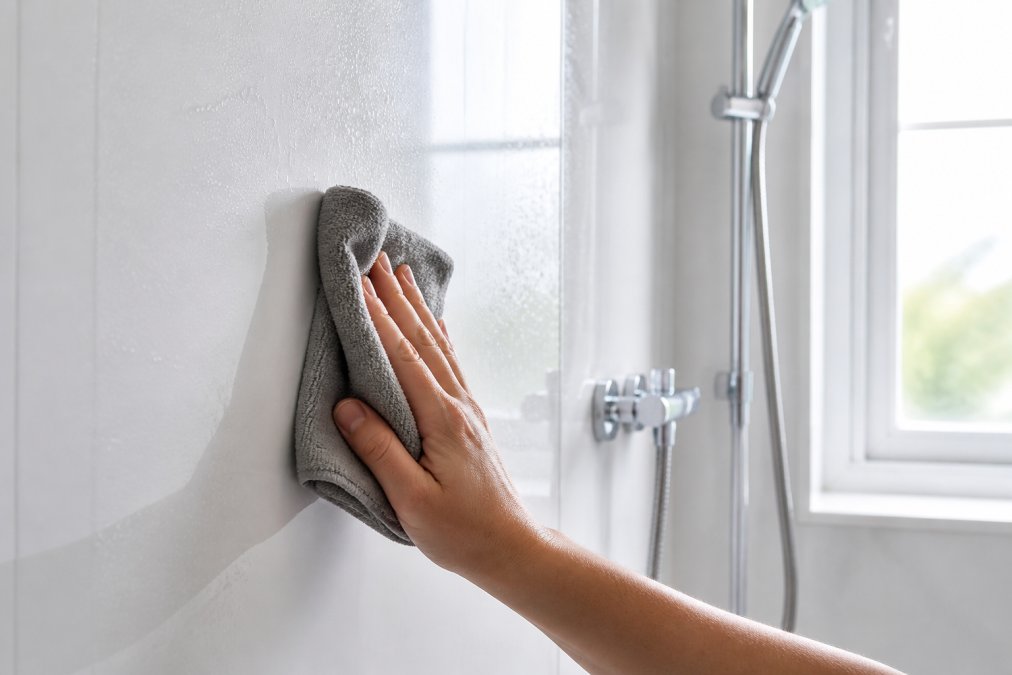
Weekly cleaning involves a simple wipe-down with a damp cloth. For stubborn marks or soap residue, a mild bathroom cleaner and soft cloth removes buildup without damaging the panel surface. Avoid abrasive scrubbers or harsh chemicals, which can dull the finish or cause discolouration.
Mould occasionally appears on panels, particularly in bathrooms with poor ventilation. A spray of household mould remover followed by a cloth wipe eliminates the problem. Unlike grout, where mould penetrates deep into porous material, panel surfaces stay clean with minimal intervention.
Silicone sealing around panel edges requires occasional inspection. Over years, silicone can shrink or separate slightly. Inspect seals annually, particularly in high-moisture areas. Resealing is straightforward: remove old silicone with a caulk removal tool, clean the joint thoroughly, and apply fresh silicone in 20-30 minutes.
Panel longevity depends primarily on quality adhesive application and proper silicone sealing during installation. Panels installed correctly last 20+ years without significant degradation.
Design Aesthetics: Tile-Effect Panels and Modern Finishes
Modern tile-effect panels replicate ceramic tile appearance so convincingly that casual observers cannot distinguish them from authentic tiles. Wetwall Wonders supplies tile-effect panels like the Decorwall Elegance Ultimo range, which captures the appearance of high-end ceramic tiles at a fraction of the cost and installation complexity. These panels feature authentic grout-line patterns printed onto the surface, creating the visual impression of individual tiles without any actual grout seams.

Beyond tile-effect designs, panels offer aesthetic options that traditional tiles cannot match: slatwall finishes, smooth high-gloss surfaces, and textured modern designs. Colour consistency represents another aesthetic advantage, ceramic tiles vary slightly between batches, while panels are manufactured as continuous sheets, ensuring perfect colour consistency across the entire installation. The seamless finish of panels creates visual continuity that grout-lined tiles cannot achieve, making bathrooms feel larger and more cohesive.
Common Misconceptions About Bathroom Panels
Misconception 1: Panels are less durable than tiles. Reality: Quality bathroom panels last 20+ years with proper installation and maintenance. They don't crack, chip, or discolour like tiles can.
Misconception 2: Water gets trapped behind panels. Reality: When installed correctly with proper adhesive and silicone sealing, panels create a complete moisture barrier. Installation errors, not panel design, cause water problems.
Misconception 3: Panels look cheap compared to tiles. Reality: Modern tile-effect panels replicate high-end ceramic tiles convincingly. The seamless finish actually appears more contemporary and refined than grout-lined tiles.
Misconception 4: DIY panel installation is risky. Reality: Panels are specifically designed for DIY installation, producing professional results without specialist skills.
Misconception 5: Panels are more expensive than tiles. Reality: Total project cost, including labour, substrate preparation, and long-term maintenance, typically favours panels by 30-40%.
Conclusion: Making the Right Choice for Your Bathroom
For most homeowners, bathroom panels deliver superior practical performance at lower total cost. The grout-free design eliminates mould and mildew problems, installation takes days rather than weeks, and maintenance requires only basic cleaning. Tiles remain appropriate for specific applications where authentic ceramic aesthetics matter, but for typical bathroom renovations, panels represent the more sensible modern choice.
Choosing the right bathroom wall solution shouldn't mean compromising between aesthetics, cost, and practicality. Wetwall Wonders supplies a complete range of bathroom panels, including tile-effect options like the Decorwall Elegance Ultimo Tile Cleveland (£59.00) and modern finishes such as the Kerradeco Stone Grey (£209.00), alongside all necessary installation accessories. Our selection of panel sizes, 250mm, 300mm, 500mm, and 900mm widths, ensures perfect fit for any bathroom layout, whilst our comprehensive adhesives and silicone products guarantee professional-quality installation results. Start your bathroom transformation with a solution designed for durability, ease of installation, and lasting visual appeal. UK Building Regulations for bathroom moisture control confirm that effective moisture barriers are essential in bathroom design, panels deliver this requirement more reliably than traditional tiling approaches.
| Aspect | Bathroom Panels | Ceramic Tiles |
|---|---|---|
| Installation Time | 1-2 days | 5-7 days |
| Labour Cost | ||
| Grout Required | No | Yes |
| Mould Risk | Minimal | High in grout lines |
| Maintenance | Weekly wipe-down | Regular grout cleaning |
| DIY Friendly | Yes | Requires skill |
| Lifespan | 20+ years | 15-20 years |
| Total Project Cost | Lower | Higher |
Frequently Asked Questions
Can I put bathroom panelling over existing tiles?
Yes, bathroom panels can be installed directly over tiles if the surface is clean, dry and stable. Proper substrate preparation is essential: ensure tiles are not loose, clean away any soap scum or mildew, and use a quality adhesive designed for wall panels. This approach saves time and cost compared to removing tiles first. However, inspect bowed walls carefully, if tiles are uneven, you may need to fill gaps or sand high spots before installation.
Are bathroom wall panels cheaper than tiling?
Bathroom panels typically cost less than ceramic tiles when you factor in labour and installation time. Decorwall Maxi Panels cost £54 per panel and install in hours rather than days. Tiles require grout, which demands skilled labour and takes considerably longer. Panels also eliminate the cost of professional grouting and re-grouting over time. For budget-conscious homeowners, panels deliver faster results at lower total cost.
How long do bathroom wall panels last, and how do they compare to tiles?
Quality PVC bathroom panels last 15-20+ years with proper maintenance, matching or exceeding tile longevity. Unlike grout, which cracks and harbours mould, panels remain seamless and water-tight. Panels resist moisture degradation, mildew and staining far better than grouted surfaces. The key difference: tiles degrade through grout failure; panels degrade only if adhesive or silicone fails, both rare with correct installation and quality products.
Do I need a professional to install bathroom wall panels, or can I DIY?
Most homeowners can install bathroom panels as a DIY project. The process is straightforward: prepare the substrate, apply adhesive, fit panels, and seal with silicone. No special tools are required beyond a spirit level, tape measure and caulking gun. Installation time is typically 4-8 hours for a standard bathroom. Professional installation ensures perfect alignment and warranty compliance, but DIY is absolutely achievable if you follow substrate preparation carefully and allow silicone to cure fully before exposing panels to water.
What happens if water gets behind bathroom wall panels?
Properly installed panels with quality adhesive and silicone create a water-tight barrier that prevents water penetration. Water cannot get behind panels if the substrate is dry, adhesive is applied correctly, and all joints are sealed with silicone. However, if installation is poor, loose adhesive, unsealed joints, or moisture already present in the substrate, water can accumulate. This is why substrate preparation and correct silicone application are critical. Quality products and installation eliminate this risk entirely.
Are bathroom wall panels outdated, or are they still a modern choice in 2026?
Bathroom panels are very much current in 2026. Modern tile-effect finishes like Dumawall and Decorwall Elegance Ultimo mimic ceramic aesthetics while offering superior practicality. Panels align with contemporary design trends favouring seamless, minimalist finishes and sustainable materials. They're chosen by interior designers and developers precisely because they deliver modern aesthetics without the maintenance burden of grout. Panels are not outdated, they're the smarter evolution of bathroom wall coverings.
What are the main disadvantages of bathroom wall panels I should know about?
The primary disadvantage is that poor installation can lead to adhesive failure or water ingress, but this is avoidable with proper substrate preparation and quality products. Panels cannot be patched like grout; damage requires panel replacement rather than a simple repair. They're less suitable for very high-temperature environments like commercial steam rooms. Finally, if you prefer the authentic look and feel of real ceramic tiles, panels, even tile-effect ones, may not fully replicate that aesthetic. For most residential bathrooms, these limitations are negligible.
This article was written using GrandRanker

