
Cutting Bathroom Wall Panels: Step-by-Step
Table of Contents
- Measuring the Wall and Planning Your Panel Layout
- Preparing the Wall and Work Area
- Tools for Cutting Bathroom Wall Panels
- Marking Accurate Cut Lines and Supporting Panels
- How to Cut Shower Wall Panels: The Main Cut
- How to Cut a Hole in a Bathroom Wall Panel
- How to Prevent Bathroom Wall Panels from Chipping
- Finishing Edges and Troubleshooting Poor Cuts
- Frequently Asked Questions
Last Updated: October 12, 2026
Measuring the Wall and Planning Your Panel Layout
Cutting bathroom wall panels starts before you touch a saw, get your measurements right or you'll waste panels and time.
Measure wall height and width, writing it down. Walls are rarely square, so measure at the top, middle, and bottom of each wall and note variations.
Next, plan your panel layout. The 250mm option from our Decorwall Elite Print range suits tight spaces and avoids awkward gaps, while 900mm Decorwall Maxi Panels cover more wall quickly but need careful planning around fixtures.


Sketch your layout on paper, marking windows, pipes, and shower enclosures.
Calculate how many panels you need by dividing your wall width by your chosen panel width. Round up.
Preparing the Wall and Work Area
The wall surface matters more than most DIYers realise. Damp or uneven walls cause panels to peel or bubble within months.
Fix water damage or mould first; moisture barriers and ventilation prevent later problems. Once dry, clean thoroughly and remove old tiles, wallpaper, or loose paint so adhesive bonds properly.

Fill large gaps with filler and sand smooth once dry, bumps and ridges show through panels.
Clear the bathroom of items that could get damaged. Close doors to contain dust. Wear a dust mask and eye protection.
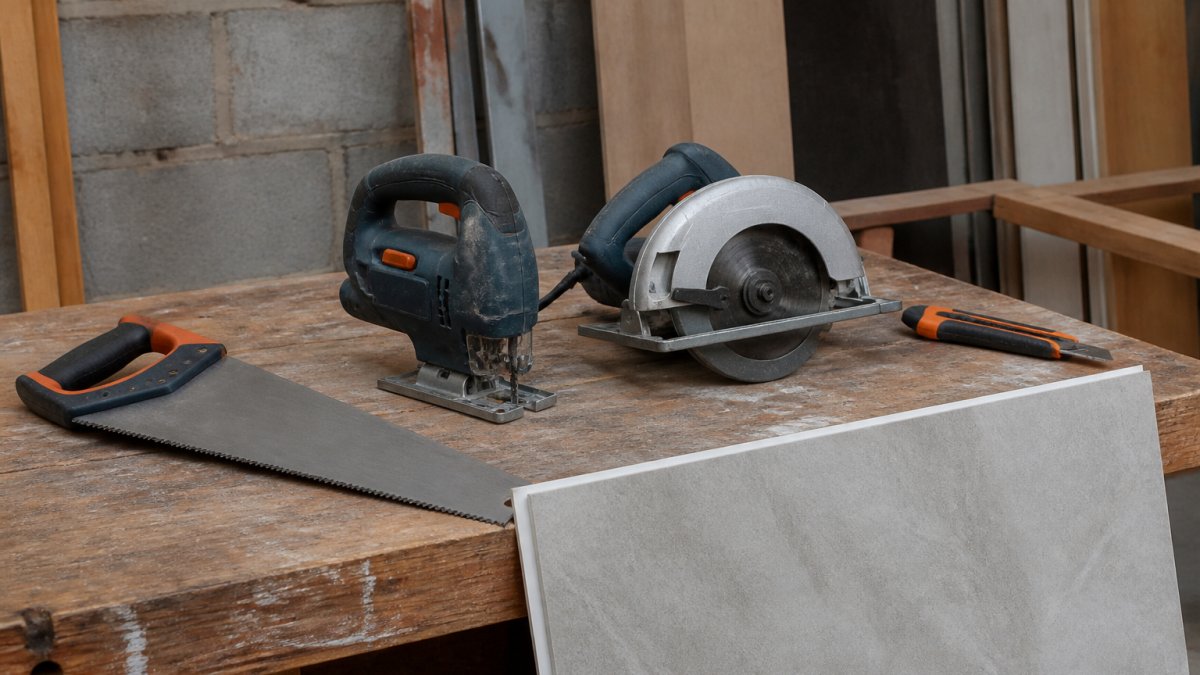
Tools for Cutting Bathroom Wall Panels
The right tool depends on the panel material, the cut type (straight, curve, or internal cut-out), and how visible the finished edge will be. A tool that cuts 8mm PVC cleanly can tear 10mm MDF, and one that sails through MDF can melt or chip PVC if pushed too fast. Match the tool to the material first, then to the cut.
Matching the tool to the panel material
PVC and composite panels (typically 5-10mm): A fine-tooth handsaw or jigsaw with a down-cut blade gives the cleanest edges.
MDF and timber-core panels (typically 8-10mm): A circular saw or fine-tooth handsaw cuts quickly and straight.
Acrylic-faced or high-gloss panels: These chip more readily than matt finishes. A high-tooth-count handsaw, or a jigsaw with a down-cut blade on slow speed, gives the best finish.
Tool-by-tool trade-offs
| Tool | Best for | Finish quality | Chipping risk | Speed |
|---|---|---|---|---|
| Fine-tooth handsaw | Straight cuts in PVC, MDF, timber | High with a sharp blade | Low if supported | Slow on thick panels |
| Jigsaw (down-cut blade) | Curves, holes, fixtures, internal cut-outs | High on PVC, medium on MDF | Medium, depends on blade and speed | Moderate |
| Circular saw (fine-tooth blade) | Long straight runs in MDF and timber | High on MDF, medium on PVC | Higher on PVC and gloss faces | Fast |
| Utility knife | Scoring thin PVC (around 5mm), marking | Medium, leaves a scored edge | Low if scored repeatedly | Slow, limited to thin panels |
| Hole saw (drill attachment) | Circular holes for pipes and fittings | High on PVC and MDF | Low if started slowly | Fast once engaged |
Blade selection by material
Tooth count is the biggest variable in cut quality:
- PVC and composite: 10 or more teeth per inch (TPI). Fewer teeth grab the material and produce rough, chipped edges.
- MDF and timber-core: 8-10 TPI. Too many teeth clogs the blade and burns the cut; too few tears the face.
- Acrylic-faced panels: 12+ TPI, or a specialist plastic-cutting blade. Treat it like cutting laminate.
Dull blades are the most common cause of chipping, burn marks, and wandering cuts. Replace the blade as soon as it stops cutting cleanly, forcing a dull blade is when kickback and slips happen.
What to have on the bench
- Tape measure and pencil
- Spirit level or long straight edge
- Painter's tape (for taping cut lines on visible faces)
Marking Accurate Cut Lines and Supporting Panels
Accuracy prevents wasted panels and poor-fitting seams, so mark cut lines clearly with a pencil and straight edge.
Measure twice, mark once.
Support the panel before cutting, unsupported panels flex or vibrate, causing rough cuts and breakage.
For large panels, use two support points, one near each end, to prevent sagging.
Check your tool is secure and sharp, a dull blade forces you to push harder, increasing slipping and chipping.
How to Cut Shower Wall Panels: The Main Cut
The main cut is the foundation of a good installation. Take your time here.
Start slowly and let the blade do the work, pushing hard causes chipping and rough edges.
Keep the blade perpendicular to the panel, angled cuts create visible gaps where panels meet.
For long straight cuts, use a track or guide to keep the blade straight and reduce chipping.
Decorwall Elite Print - Sandstone- 2700mm x 250mm x 8mm →
How to Cut a Hole in a Bathroom Wall Panel
Pipes, vents, and fixtures require holes. Cutting them wrong ruins panels.
Mark the hole carefully: measure from two edges to pinpoint the spot, then outline it in pencil.
For a circular hole, a hole saw on a drill cuts clean and fast.
Measure the hole before cutting, too small and the fixture won't fit, too large and gaps appear.
Cut the hole slightly larger than the fixture if you're using a trim ring or collar.
How to Prevent Bathroom Wall Panels from Chipping
Chipping almost always comes down to four causes: a dull or wrong-tooth-count blade tearing the material, an unsupported panel vibrating against the blade, cutting from the wrong face, or feeding the tool too fast. Fix the cause and the chip disappears.
Why panels chip, the mechanism
When a blade exits a panel, the fibres or polymer on the exit side have nothing holding them, so they tear away, the side facing the saw's rotation chips. That's why cutting from the back face pushes the chip onto the hidden side, and why taping a visible cut line works: the tape holds the fibres together as the blade exits.
Prevention by material
PVC and composite panels:
- Use 10+ TPI. Fewer teeth grab and tear.
- Score the cut line first with a utility knife, several passes along a straight edge, then cut with your main tool. The score line acts as a guide and reduces edge tear-out.
- Cut from the back face where possible.
- If the face is visible and glossy, tape the cut line with painter's tape before cutting.
MDF and timber-core panels:
- Use 8-10 TPI. Too many teeth burn the cut; too few splinter the face.
- Tape the cut line on the visible face. MDF face veneers splinter easily.
- Cut from the back face if the panel is reversible.
- Support both sides of the cut so the waste piece does not drop and bind the blade.
Acrylic-faced or high-gloss panels:
- Treat as laminate: 12+ TPI, slow feed, tape the line, cut from the back.
- Avoid circular saws unless you have a fine-tooth or plastic-cutting blade fitted.
Support and feed, the two variables people get wrong
Support the panel at two points minimum, one near each end, so it can't sag or vibrate, and support both sides of an internal cut-out. Let the blade do the work, pushing hard is the fastest way to chip an edge or bind a blade.
Cutting tolerances and expansion allowances
Panels expand and contract with temperature and humidity, and walls are rarely square. As a general guide:
- Leave a small clearance at edges and around fixtures rather than cutting tight, trims and sealant cover a few millimetres.
- Around pipes and fittings, cut slightly larger than the fixture if a trim ring or collar will cover the gap.
- Always check the manufacturer's installation guidance for the clearance they recommend, as tolerances vary between products and thicknesses. Manufacturer guidance overrides general advice.
Fixing a chip that has already happened
| Problem | Likely cause | Fix |
|---|---|---|
| Rough, splintered edge | Dull blade or too few teeth | Replace blade with correct TPI, recut if there is waste material |
| Chipped edge on the visible face | Cut from the wrong side, no tape, no support | Re-cut from the back face with tape and two support points |
| Melted or smeared PVC edge | Blade speed too high, blade clogged | Reduce speed, clean the blade, recut slowly |
| Curved or wavy cut line | Panel unsupported, tool not guided | Use two supports and a straight edge or track guide |
| Blade binding or kickback | Waste piece unsupported, pushing too hard | Support the waste piece, ease pressure, check blade sharpness |
| Hole too small or misaligned | Measurement or marking error | Measure from two edges, use a template, recut only if there is waste material |
Hiding a chip you cannot recut
If the panel is sound and the chip is on an edge that will be covered, an edge trim or end cap hides it cleanly. For visible edges that can't take trim, a thin bead of silicone smoothed with a wet finger seals the edge and disguises minor tear-out. Sanding with 220-grit or higher smooths a rough edge but won't restore a chipped face, keep it light.
Finishing Edges and Troubleshooting Poor Cuts
Finished edges make the difference between a DIY look and a professional one.
Use edge trim to finish cut edges. Our 8mm panel trim end cap slides over the edge for a clean, polished finish and hides imperfections, especially where panels meet corners or cut edges are visible.
Sand rough edges lightly with 220-grit or higher sandpaper to smooth the surface and help adhesive bond.
If a cut edge will be hidden behind trim or another panel, leave it as is.
Troubleshooting poor cuts:
| Problem | Cause | Fix |
|---|---|---|
| Rough, splintered edge | Dull blade, too much speed | Replace blade, cut slower |
| Chipped edge on visible face | Cutting from wrong side, no support | Cut from back side, add support points |
| Curved or wavy cut line | Unsupported panel, unstable tool | Use two supports, secure tool firmly |
| Blade binding or kickback | Waste piece not supported, pushing too hard | Support waste piece, ease pressure |
| Hole too small or misaligned | Incorrect measurement or marking | Measure twice, use template for marking |
If a cut is poor but the panel is undamaged, trim or edge pieces often hide the problem.
Cutting bathroom wall panels correctly saves time and money. At Wetwall Wonders, we supply everything you need for a successful installation, from high-quality panels like our Decorwall Maxi Panels to adhesive and trim pieces.
Frequently Asked Questions
What is the best tool for cutting bathroom wall panels?
The best tool depends on your cut type. A fine-tooth saw handles straight cuts cleanly and costs less than power tools. A jigsaw cuts curves and awkward shapes around fixtures. A circular saw works for long straight cuts but requires careful technique to avoid chipping. A utility knife scores thin panels for snap cuts. For most DIY jobs, a fine-tooth saw and jigsaw combination covers 90% of cutting needs.
How do you cut bathroom wall panels without chipping them?
Use a fine-tooth saw blade (80+ teeth) to reduce splintering. Support the panel firmly on a flat surface close to your cut line to minimise vibration. Mark your cut with a pencil and straight edge, then score along the line first before cutting fully through. If using a circular saw or jigsaw, cut from the back face of the panel to hide any minor chipping. Wear safety glasses and work slowly, rushing causes ragged edges.
Can you cut bathroom wall panels with a jigsaw?
Yes, a jigsaw is ideal for cutting curves, circles, and shapes around bathroom fixtures like pipes and window openings. Use a fine-tooth blade and support the panel securely. Mark your cut line clearly with a pencil and straight edge. Cut slowly and let the blade do the work; forcing the jigsaw causes chipping and uneven edges. A jigsaw gives you more control than a circular saw for complex cuts.
Should you cut bathroom wall panels face up or face down?
Cut with the visible face up if using a fine-tooth saw or jigsaw, as these tools create clean edges on the top surface. If using a circular saw, cut with the visible face down, because circular saws produce chipping on the top surface. Always support the panel close to your cut line to prevent flexing and vibration, which cause rough edges regardless of orientation.

