
How to Calculate Wall Panels for Your Bathroom
Table of Contents
- How to Calculate Wall Panels Needed for Your Bathroom
- How to Measure for Bathroom Wall Panels
- Understanding Bathroom Wall Panel Sizes
- Step-by-Step Calculation for Panel Quantities
- Accounting for Doors, Windows, and Obstructions
- Calculating Wall Panel Waste Allowance
- Using a Bathroom Wall Panel Calculator
- Worked Example: Calculating Panels for a Typical Bathroom
- Frequently Asked Questions
Last Updated: October 13, 2026
How to Calculate Wall Panels Needed for Your Bathroom
Learning how to calculate wall panels bathroom needs saves money and prevents frustrating gaps or leftover materials.
At Wetwall Wonders, we help homeowners and installers tackle this daily.
This guide covers measuring accurately, calculating quantities, handling obstructions like doors and windows, and accounting for waste.
How to Measure for Bathroom Wall Panels
Accurate measurements are the foundation of a correct panel calculation. Measure each wall separately. Don't assume walls are the same size even if they look similar.
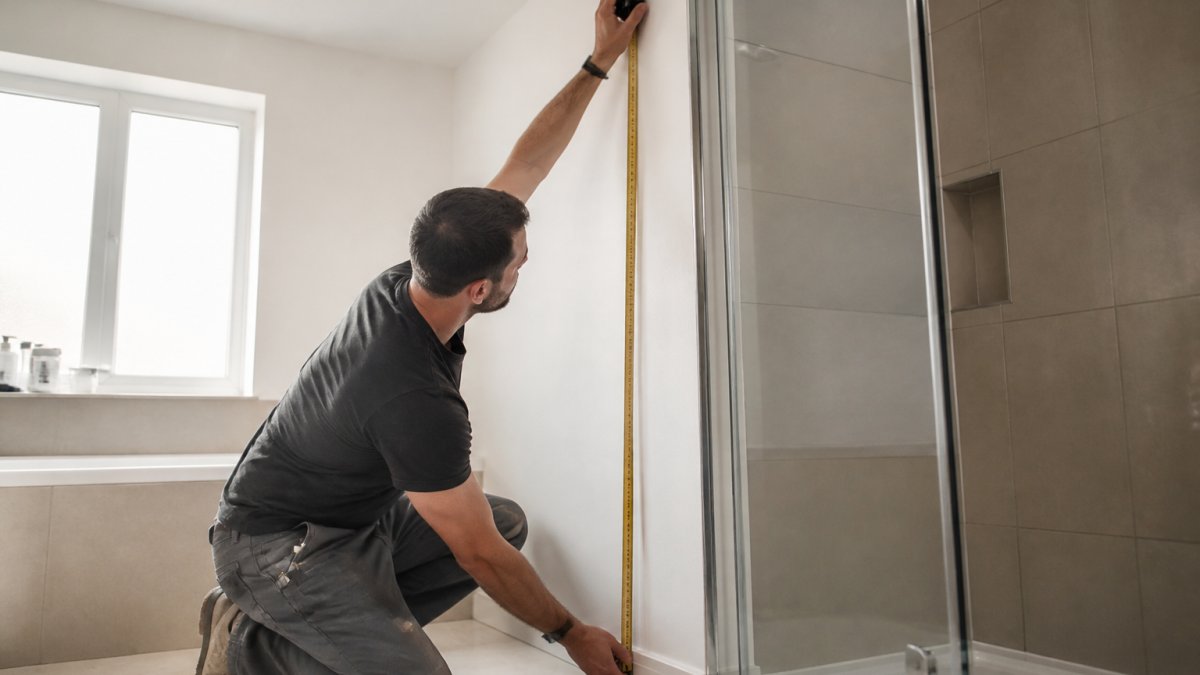
Measuring each wall separately
Measure one wall at a time.
Label each wall (e.g., "Wall A: 2400mm wide x 2200mm high") to prevent confusion later.
Measure at three points, bottom, middle, and top, and use the largest reading. Bathrooms often have uneven walls, and this ensures full coverage without gaps.
Recording wall height and width
Write measurements in millimetres, since all panel sizes are listed that way.
Create a simple list:
- Wall A: 2400mm wide × 2200mm high
- Wall B: 1800mm wide × 2200mm high
- Wall C: 1200mm wide × 2200mm high
You'll reference these numbers repeatedly as you calculate panel quantities.
Understanding Bathroom Wall Panel Sizes
Wall panels come in standard widths, most commonly 250mm, 300mm, 500mm, and 900mm, with heights typically 2400mm to 2700mm.
At Wetwall Wonders, we stock sizes for different layouts: Decorwall Elegance panels at 300mm width suit tight spaces, while Decorwall Elite Print panels (2700mm long, 250mm wide) suit narrow walls or feature sections.

Wider panels (500mm, 900mm) cover more area with fewer seams; narrower panels (250mm, 300mm) suit small ensuites where wide panels cause awkward cuts or waste.
A narrow ensuite might use 250mm or 300mm panels; a larger bathroom can handle 500mm or 900mm.
Step-by-Step Calculation for Panel Quantities
To calculate wall panels bathroom requirements takes just a few minutes once you have your measurements and panel width.
Dividing wall width by panel width
Divide your wall width in millimetres by your chosen panel width.
Example: a 2400mm wall with 300mm-wide panels gives 2400 ÷ 300 = 8 panels, your base calculation before rounding.
Rounding up to whole panels
Always round up to the next whole number, you cannot buy a partial panel.
8.5 means 9 panels; 7.2 means 8 panels.
Panels are cut to fit, not stretched. Order exactly 8 for a 2400mm wall and you'll run short once you account for cuts, seams, and corners.
Repeating the calculation for each wall
Repeat for every wall:
Wall A: 2400mm ÷ 300mm = 8 panels Wall B: 1800mm ÷ 300mm = 6 panels Wall C: 1200mm ÷ 300mm = 4 panels
Total: 8 + 6 + 4 = 18 panels, your starting point before doors, windows, and waste.
Accounting for Doors, Windows, and Obstructions
Most bathrooms have a door, and many have a window, vent, niche, or shower enclosure. Each opening changes your panel count, but not always as expected. The common mistake is subtracting the full area of every opening; in practice, panel layout, offcuts, and trim positions decide whether an opening reduces your count at all.
When to subtract an opening
Subtract an opening only when the wall either side is wide enough for a full panel or usable offcut. If a strip beside a door or window is narrower than half your panel width, you can't economically fill it with a cut panel, you'll run a full panel past the opening and trim it, so the opening doesn't reduce your count.
Worked example using 300mm-wide panels:
- Door opening: 800mm wide × 2000mm high. 800 ÷ 300 = 2.67, rounded up to 3 panels of width. But if the wall is 1200mm wide and the door sits centrally, you have roughly 200mm of wall on each side, too narrow to take a panel. In that case you do not subtract; you run panels across and cut around the frame.
- Window opening: 800mm wide × 1000mm high. If the window sits high on the wall with a full panel below it, the opening may only remove one panel of width, not three, because the panel below the window is still needed.
Doors
Measure the door to the outside of the frame, not the leaf. Standard UK internal openings are commonly 762-838mm wide and 1981-2040mm high, but always measure yours, older properties vary. If the door reaches the floor and panels stop above it, the door has no effect on the count.
Decorwall Maxi Panels-Beige Marble 2400mm x 900mm x 10mm →
Windows
Measure the reveal, not the glass. A deep reveal may need a trim or return panel, adding material rather than removing it. A small window (say 600mm × 900mm) within a single panel width usually doesn't reduce the count, you just cut the opening out of one panel.
Niches and recesses
A niche is a subtraction in area but an addition in cuts. Unless it spans more than one panel width, treat it as a cut-out and don't reduce your total. If it interrupts two or more panels, subtract the panels it replaces but add one back for offcut risk.
Shower enclosures and ceilings
Decide early whether your calculation covers walls only or also the shower enclosure and ceiling. A full-height enclosure on two walls can add 2-4 panels. A panelled ceiling adds roughly floor area ÷ panel width, a 2400mm × 1800mm ceiling with 300mm panels needs 2400 ÷ 300 = 8 panels, cut to 1800mm.
Calculating Wall Panel Waste Allowance
Even experienced installers waste material, cuts don't always land perfectly. Plan for it.
Add 10-15% to your total as a waste allowance.
18 panels before waste becomes 20-21 panels ordered.
For under 10 panels, add 2 extra regardless of percentage; for larger bathrooms, 15% is a reasonable target.
This extra stock prevents mid-installation shortages, and leftovers are useful for future repairs or touch-ups.
Using a Bathroom Wall Panel Calculator
Many suppliers, including Wetwall Wonders, offer online calculators.
A calculator is fast and reduces math errors, but understanding the manual process helps you spot mistakes and adjust if needed.
If you use a calculator, verify the result: does the panel count look reasonable, and could you fit them without excessive cuts?
Worked Example: Calculating Panels for a Typical Bathroom
This example uses a small UK bathroom (2400mm × 1800mm, 2200mm ceiling) with a door on the short wall, a window on the long wall, and a corner shower enclosure. It shows how corners, joins, ceilings, and irregular walls change the final order.
The bathroom:
- Wall A (long, behind the bath): 2400mm wide × 2200mm high
- Wall B (short, with the door): 1800mm wide × 2200mm high
- Wall C (long, with the window): 2400mm wide × 2200mm high
- Wall D (short, with the shower): 1800mm wide × 2200mm high
- Door opening: 800mm wide × 2000mm high, on Wall B
- Window opening: 900mm wide × 1000mm high, on Wall C
- Shower enclosure: 900mm × 900mm in the corner of Walls C and D
- Panels: 300mm wide × 2400mm long
Step 1: Measure each wall at three points
Bathroom walls are rarely square. Measure width at floor, mid-height, and ceiling; if readings differ, say 2395mm, 2400mm, 2410mm, use the largest (2410mm). Do the same for height to prevent gaps or ill-fitting panels.
Step 2: Calculate each wall
- Wall A: 2410 ÷ 300 = 8.03, round up to 9 panels
- Wall B: 1805 ÷ 300 = 6.02, round up to 7 panels
- Wall C: 2410 ÷ 300 = 8.03, round up to 9 panels
- Wall D: 1805 ÷ 300 = 6.02, round up to 7 panels
Subtotal: 9 + 7 + 9 + 7 = 32 panels
Step 3: Decide on openings
- Door on Wall B: 800mm wide. The wall is 1805mm, so the strips either side are roughly 500mm each, wider than half a panel. Subtract the door: 800 ÷ 300 = 2.67, round up to 3 panels. Wall B becomes 7 − 3 = 4 panels.
- Window on Wall C: 900mm wide × 1000mm high. The window sits high, with a full panel below it. It removes one panel of width, not three. Wall C becomes 9 − 1 = 8 panels.
Revised subtotal: 9 + 4 + 8 + 7 = 28 panels
Step 4: Add the shower enclosure
If you are panelling inside the shower enclosure as well as the surrounding walls, add the two enclosure walls. A 900mm-wide enclosure wall needs 900 ÷ 300 = 3 panels. Two enclosure walls = 6 panels. If the enclosure is tiled instead, do not add these.
Subtotal with shower: 28 + 6 = 34 panels
Step 5: Decide on the ceiling
A 2400mm × 1800mm ceiling using 300mm-wide panels: 2400 ÷ 300 = 8 runs, each cut to 1800mm. That is 8 panels of ceiling material. If you are not panelling the ceiling, skip this step.
Subtotal with ceiling: 34 + 8 = 42 panels
Step 6: Account for corners and joins
Every internal corner needs a trim or silicone joint, and every external corner needs a corner profile. These don't change the panel count but do change the order. Allow one length of trim per corner per wall height, plus one per panel join. Here: four internal corners × 2200mm = 8800mm of trim, plus joins.
Step 7: Add waste allowance
Add 10-15% for cuts, damage, and future repairs: 42 × 1.15 = 48.3, rounded to 49 panels. For a smaller job, say 12 panels before waste, add 2 regardless of percentage.
Your order: 49 panels, plus trims, adhesive, and sealant.
| Step | Action | Notes |
|---|---|---|
| 1 | Measure each wall at three points | Use the largest reading; work in millimetres |
| 2 | Divide each wall width by panel width | Round up to the next whole number |
| 3 | Decide on doors and windows | Subtract only if strips beside the opening are wide enough |
| 4 | Add shower enclosure and ceiling if panelling them | Enclosure walls and ceiling are separate calculations |
| 5 | Allow for corners and joins | Trims, not panels, but they affect the order |
| 6 | Add 10-15% waste | Extra panels for cuts, damage, and future repairs |
Frequently Asked Questions
How do I calculate how many wall panels I need for my bathroom?
Measure each wall's width and height in millimetres. Divide the wall width by your chosen panel width to find how many panels fit across. Round up to the nearest whole number. If covering partial height, divide the coverage height by panel height. Multiply panels across by panels high. Repeat for each wall, then add a 10% waste allowance. For narrow spaces using 250mm or 300mm panels, this method ensures you avoid awkward gaps and seams.
Should I subtract doors and windows when calculating wall panel quantities?
Yes. Measure the width and height of each opening, then calculate how many panels that opening would require. Subtract this from your total panel count. However, keep spare panels for cutting around frames and for future repairs. A 10% waste allowance helps cover these adjustments and protects against installation errors.
What bathroom wall panel sizes does Wetwall Wonders offer?
Wetwall Wonders stocks panels in multiple widths including 250mm, 300mm, 500mm, and 900mm, with lengths typically 2400mm to 2700mm. The Decorwall Maxi Panels measure 2400mm × 900mm, ideal for large wall areas. Decorwall Elite Print comes in 2700mm × 250mm, perfect for narrower spaces or accent features. Decorwall Elegance Mineral panels are 300mm wide, offering flexibility for tight ensuites and creating varied design layouts.
How much extra should I allow for cutting and waste?
Add 10% to your final panel count to account for waste during cutting, fitting around corners and openings, and spare panels for future repairs. For example, if your calculation shows 20 panels needed, order 22. This buffer prevents delays from running short and gives you replacements if panels are damaged during installation.

