
Do Bathroom Panels Need Sealant? A Complete Guide
Table of Contents
- Do Bathroom Panels Actually Need Sealant?
- Why Sealant Matters for Bathroom Panels
- Best Silicone Sealant for Shower Panels
- How to Install Shower Wall Panels with Proper Sealing
- Curing Time for Bathroom Silicone and Adhesives
- Common Sealant Failures and How to Avoid Them
- What Happens If You Don't Seal Bathroom Panels
- Conclusion
Last Updated: August 8, 2026
Do Bathroom Panels Actually Need Sealant?
The short answer is yes, bathroom panels need sealant. Water finds its way into gaps, adhesive bonds weaken, and mould grows behind the panels where you can't see it until damage is severe.
This guide walks you through why sealant matters, which products work best, and how to apply them properly so your bathroom panels stay watertight and attractive for years.
Why Sealant Matters for Bathroom Panels
Bathroom panels operate in an environment designed to defeat most materials: constant moisture, temperature swings, and water spray from every angle. Sealant serves two critical functions that adhesive alone cannot provide.
Water ingress and moisture barriers
Panel joints are the weak points where water accumulates. Even adhesive-bonded panels create microscopic gaps at seams. Over time, moisture penetrates behind the panels, reaching the substrate and wall structure beneath. Once water gets behind panels, it pools against damp-proof membranes, saturates plasterboard, and creates conditions for mould.
Silicone sealant creates a watertight seal that adhesive cannot match. A proper bead applied along panel joints and corners creates a flexible, continuous barrier that water cannot breach. The sealant remains pliable as the building shifts with temperature and humidity changes, maintaining its seal where rigid adhesive might crack.
Unsealed panels experience water ingress within weeks in high-moisture areas like shower enclosures. Sealed panels, when applied properly, remain dry behind the surface for the life of the installation.
Preventing mould and fungal growth
Mould thrives in moisture and colonises quickly on damp plasterboard and timber studs. Once water gets behind unsealed panels, mould establishes silently. By the time you notice discolouration or smell the problem, the mould has already spread deep into the wall structure.
Fungicidal sealants add another layer of defence by inhibiting mould growth directly on the sealant surface. The real protection, though, is preventing water from getting behind the panels in the first place. A continuous, properly applied sealant bead stops water at the surface, which stops mould at the source.
Best Silicone Sealant for Shower Panels
Not all silicone sealants perform equally in bathroom environments. The chemistry and formulation matter significantly.
Solvent-free vs acetoxy-cure options
Two main types of silicone sealant dominate bathroom applications: solvent-free (neutral-cure) and acetoxy-cure. Acetoxy-cure sealants release acetic acid as they cure, cure faster (24 hours), and cost less. However, they're more prone to degradation in high-moisture environments and become brittle with age.
Solvent-free (neutral-cure) sealants cure more slowly (48-72 hours) but remain flexible as they age and handle moisture better. For bathroom applications, solvent-free is generally considered a stronger choice, particularly in shower enclosures where the sealant faces constant water exposure.
Wetwall Wonders supplies [GP200 General Purpose Silicone(/products/gp200-general-purpose-silicone-sealant) Sealant | wetwallwonders.com], which is an acetoxy-cure product at £24.00 per pack of three. For high-moisture areas like shower enclosures, a solvent-free option can provide longer-term durability and better resistance to moisture degradation.
Sanitary-grade and fungicidal properties
Sanitary-grade sealants are formulated specifically for bathroom and kitchen use and include fungicidal additives that actively resist mould growth. These products cost more than basic silicones, but in bathrooms, the investment pays back through reduced maintenance and longer sealant life.
Fungicidal sealants contain biocides that prevent mould colonisation on the sealant surface itself, particularly valuable in areas prone to condensation or poor air circulation. When choosing a sealant, look for products explicitly labelled as sanitary-grade and fungicidal.
How to Install Shower Wall Panels with Proper Sealing
Installation quality determines whether your sealant works. Poor substrate preparation or incorrect adhesive application undermines even the best sealant.
Substrate preparation and surface adhesion
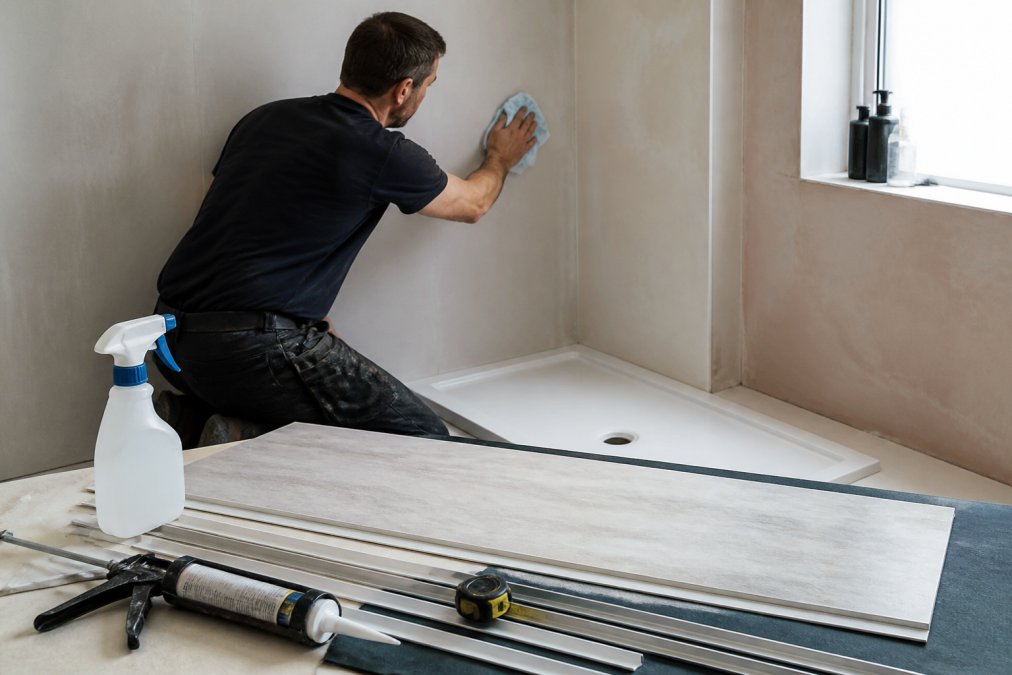
The substrate must be clean, dry, and stable. Start by removing any old tiles, wallpaper, or loose material. If the wall is damp, identify and fix the moisture source before installing panels. Panels trap moisture; they don't stop it.
Clean the substrate thoroughly. Dust, grease, and residue prevent adhesive from gripping properly. Use a damp cloth to wipe down the wall, then allow it to dry completely. For existing tiled walls, sand the tile surface lightly to improve adhesion, then clean thoroughly.
Applying adhesive and positioning panels
Use a panel-specific adhesive, not general-purpose construction adhesive. Wetwall Wonders supplies Decorwall Panel Adhesive Pro at £9.00 per 310 ml cartridge and Decorwall Megabond Adhesive at £9.00 per 295 ml cartridge. Both are designed for panel installation and provide strong, flexible bonds.

Apply adhesive using a caulking gun in a bead pattern. For large panels, apply beads around the perimeter and across the back surface in a grid pattern, typically every 300-400mm. Press each panel firmly into place, working from bottom to top. Use a level to ensure vertical alignment. Allow adhesive to cure fully, typically 24 hours, before applying sealant.
Sealing joints and corners correctly
Once adhesive has cured fully, seal all panel joints and corners with silicone sealant. Apply sealant along the full height of each joint using a continuous bead. The bead should be slightly concave, not bulging outward, to shed water better.
Internal corners are water traps. Apply sealant generously along the full corner, then smooth it with a wet finger or caulking tool to create a concave profile. External corners need sealant along the joint line, or use corner trim for a cleaner finish and better water barrier.
A proper bead is typically 6-8mm wide and slightly recessed into the joint. Allow sealant to cure fully before exposing the installation to water.
Curing Time for Bathroom Silicone and Adhesives
Curing time is a common source of failure. Impatient installers expose installations to water before sealant has fully cured, which weakens the seal.
Adhesive typically cures in 24 hours at room temperature. Silicone sealant cures more slowly, requiring 48-72 hours to reach full strength. During this period, the sealant should not be exposed to water or significant movement. Bathroom exhaust fans should run during curing to remove moisture.
Temperature affects cure significantly; products cure faster in warm conditions and slower in cold. In a cold bathroom in winter, allow extra time or use a heater to maintain ambient temperature above 15°C during cure.
The difference between 24-hour and 72-hour full cure is the difference between a sealant that holds and one that fails within months.
Common Sealant Failures and How to Avoid Them
Sealant fails for specific, preventable reasons.
Signs your sealant is failing
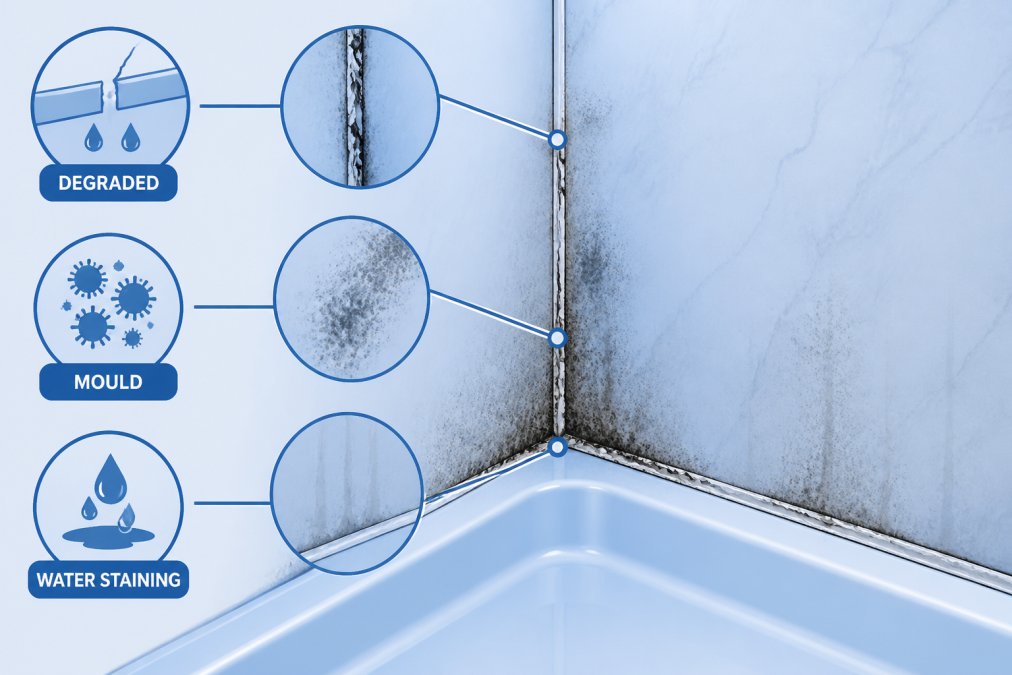
Discolouration is often the first sign. Mould appears as black or grey spots on the sealant surface, typically starting at corners or along the top edge where water pools. Shrinkage is another early warning; if the bead pulls away from the joint, creating a visible gap, the sealant is failing.
Cracking or brittleness indicates the sealant has degraded, typically after several years of moisture exposure. Peeling or separation from the panel surface is a sign of poor adhesion, usually from inadequate substrate preparation or using the wrong sealant type.
All these signs mean the sealant needs replacement before water penetrates behind panels.
Troubleshooting leaks and water damage
Water damage behind panels shows up as soft spots in the substrate, discolouration on adjacent walls, or musty smells. If you notice water damage, remove affected panels immediately to assess the substrate. Water-damaged plasterboard loses structural integrity and requires replacement.
Prevent this by maintaining sealant proactively. Inspect sealant annually, particularly in high-moisture areas. Replace any sealant showing signs of failure before water can penetrate.
If leaks develop despite proper initial sealing, the issue is usually sealant failure, substrate movement that cracked the sealant, or water finding a path around the sealed area at trim junctions or where panels meet the floor or ceiling. Seal these areas with additional sealant or use trim designed to shed water.
What Happens If You Don't Seal Bathroom Panels
Without sealant, water enters panel joints immediately. Within weeks, moisture accumulates behind the panels. Adhesive softens as it absorbs water, and its bond strength degrades. Panels begin to shift or separate, and mould colonises the damp substrate.
Within months, the installation fails visibly. Panels become loose or separate entirely. The substrate is water-damaged and requires replacement. The cost of fixing this damage is several times the cost of applying sealant correctly during installation.
Water damage in walls also creates health hazards. Mould spores circulate through the bathroom and into adjacent rooms, posing risks to people with respiratory sensitivities. Unsealed panels also look poor, with water staining and mould discolouration appearing within the first year.
Sealant is not optional. It's the difference between an installation that lasts a decade and one that fails within a year.
Bathroom panel installations fail when sealant is treated as optional or applied poorly. Wetwall Wonders supplies everything you need for a professional installation: adhesives like Decorwall Panel Adhesive Pro and Megabond Adhesive for secure bonding, and sealants like GP200 General Purpose Silicone for watertight sealing. Proper substrate preparation, correct adhesive application, and thorough sealant coverage ensure your panels stay watertight and attractive for years. Start with quality materials, follow the installation steps carefully, and allow full curing time before water exposure.

Frequently Asked Questions
Do bathroom panels absolutely need sealant?
Most modern bathroom panels require sealant at joints and edges to maintain waterproof integrity. Without it, water ingress occurs behind panels, causing mould, structural damage, and panel failure within months. Some premium grout-free panels claim reduced sealant needs, but edges and corners still require protection. Skipping sealant entirely is not recommended unless your panels are specifically designed for dry areas only.
What's the best silicone sealant for shower panels?
Choose a sanitary-grade, solvent-free silicone with fungicidal properties for shower panels. The GP200 General Purpose Silicone Sealant offers multi-purpose coverage with acetoxy cure and built-in fungicide, making it ideal for bathroom moisture environments. Look for products that resist mould growth and provide flexible joints to accommodate thermal expansion. Avoid standard caulks; bathroom-specific sealants deliver superior bond strength and durability.
How long does bathroom panel sealant take to cure?
Curing time typically ranges from 24 to 48 hours for most bathroom silicones, though full strength develops over 7 days. During this period, avoid exposing seals to water or humidity. Check your specific product instructions, as acetoxy-cure sealants may cure faster than solvent-free alternatives. Proper curing is critical for watertight seals and mould resistance. Do not use the shower until sealant has fully cured.
What happens if water gets behind bathroom panels?
Water behind panels causes rapid mould growth, softening of substrate material, adhesive failure, and structural damage to walls. Moisture barriers fail without proper sealant, allowing water ingress into cavities. Once mould takes hold, it becomes difficult and costly to remove. Prevention through correct sealant application is far cheaper than remediation. If leaks occur, remove affected panels immediately, dry the substrate thoroughly, and reseal before reinstalling.
This article was written using GrandRanker

