
How to Install Bathroom Wall Panels: Step-by-Step Guide
Table of Contents
- What You'll Need: Tools for Bathroom Wall Panels
- Preparing Your Walls Before Installation
- Best Adhesive for Bathroom Wall Panels
- How to Install Bathroom Wall Panels: The Full Step-by-Step Process
- Bathroom Wall Panel Installation Mistakes to Avoid
- Cutting Around Fixtures and Dealing with Uneven Walls
- How Long Does It Take to Install Bathroom Panels?
- Maintenance and Long-Term Care for Bathroom Wall Panels
Last Updated: August 4, 2026
Bathroom renovation projects commonly use wall panelling as an alternative to traditional tiling. Knowing how to install bathroom wall panels correctly ensures a watertight, professional finish that lasts. This guide from Wetwall Wonders walks you through every stage, from surface preparation to final sealing, including adhesive choices, common mistakes, and how to handle awkward cuts and uneven walls.
What You'll Need: Tools for Bathroom Wall Panels
Getting your tools together before you start prevents frustrating mid-job trips to the hardware shop.
Cutting tools:
- Fine-tooth saw or hacksaw for clean cuts on PVC and laminate panels
- Jigsaw for curved or irregular cuts around fixtures
- Mitre box for accurate angled cuts on corner trims
Measurement and alignment:
- Tape measure and pencil
- Spirit level (at least 1.2 metres long)
- Plumb line or chalk line for vertical reference points
Fixing and finishing:
- Notched adhesive spreader or caulking gun
- Sealant gun for silicone application
- Roller or flat block for pressing panels firmly into adhesive
- Damp cloth for wiping excess silicone
Materials:
- Bathroom wall panels (PVC, laminate, or tongue and groove)
- Panel adhesive suitable for moisture-resistant substrates
- Silicone sealant in matching or neutral colour
- Profiles and trims: internal corners, external corners, end caps, J-trim, and H-trim
- Wooden battens if installing over uneven surfaces
- Tanking membrane if the substrate has any history of moisture ingress
| Tool / Material | Purpose | Essential? |
|---|---|---|
| Spirit level | Checking plumb and level alignment | Yes |
| Fine-tooth blade / hacksaw | Clean cuts on PVC and laminate | Yes |
| Caulking gun | Applying adhesive and silicone sealant | Yes |
| Plumb line | Setting out vertical reference lines | Yes |
| J-trim / H-trim | Finishing exposed edges and joins | Yes |
| Wooden battens | Levelling uneven walls | Situational |
| Tanking membrane | Sealing moisture-prone substrates | Situational |
| Jigsaw | Cutting around pipes and fixtures | Situational |
Preparing Your Walls Before Installation
Poor surface preparation is the most common reason bathroom wall panels fail prematurely. Skipping this stage leads to bubbling and delamination.
Checking for Moisture and Fixing the Substrate
Press firmly on the existing surface across the whole wall. Any flex, hollow sound, or soft spots indicate a substrate issue that needs resolving before panels go up. Plasterboard in wet areas must be moisture-resistant; standard plasterboard will absorb water and compromise the bond.
If installing over existing tiles, check that every tile is firmly bonded. Remove any loose tiles and fill voids with suitable filler, then allow it to cure fully.
For walls with a history of damp or any sign of efflorescence, apply a tanking membrane before proceeding. According to guidance on damp-proofing and moisture control in buildings, addressing moisture at the substrate level is critical to the longevity of any surface finish in wet environments.
De-grease the surface thoroughly using a proprietary de-greaser or sugar soap solution, then allow the wall to dry completely. Any grease, dust, or residue will prevent the adhesive from bonding correctly.
Marking Plumb Lines and Setting Out
Use a spirit level and pencil to draw a true vertical plumb line at the starting point of your installation. If starting in a corner, measure out from the corner by the width of one panel plus the depth of your internal corner trim, then draw your vertical reference line there. This accounts for the fact that most bathroom corners are not perfectly square.
Mark horizontal reference lines too, particularly if installing panels with a tile-effect pattern that needs to stay level across the wall.
Best Adhesive for Bathroom Wall Panels
Choosing the right adhesive matters more than most people realise. Not all construction adhesives are waterproof, and using the wrong product in a wet area will result in bond failure within months.
The right adhesive for bathroom wall panels is a moisture-resistant, solvent-free grab adhesive formulated for use on PVC, laminate, and wet-area substrates. Solvent-based adhesives can react with PVC panels, causing warping or discolouration.
Key properties to look for:
- Moisture-resistant: The adhesive must maintain its bond in a permanently damp environment
- Flexible when cured: Bathrooms experience thermal movement; a rigid adhesive will crack under stress
- Compatible with your substrate: Check the adhesive is rated for use on tiles, plasterboard, or whatever surface you're bonding to
- Appropriate open time: Most grab adhesives give 10-15 minutes of working time
Apply adhesive in vertical beads, roughly 150-200mm apart, or follow the panel manufacturer's specific guidance. Avoid applying adhesive around the full perimeter only, as this can trap air and moisture behind the panel.
How to Install Bathroom Wall Panels: The Full Step-by-Step Process
Installing bathroom wall panels follows a logical sequence. Work methodically and dry-fit before committing to adhesive.
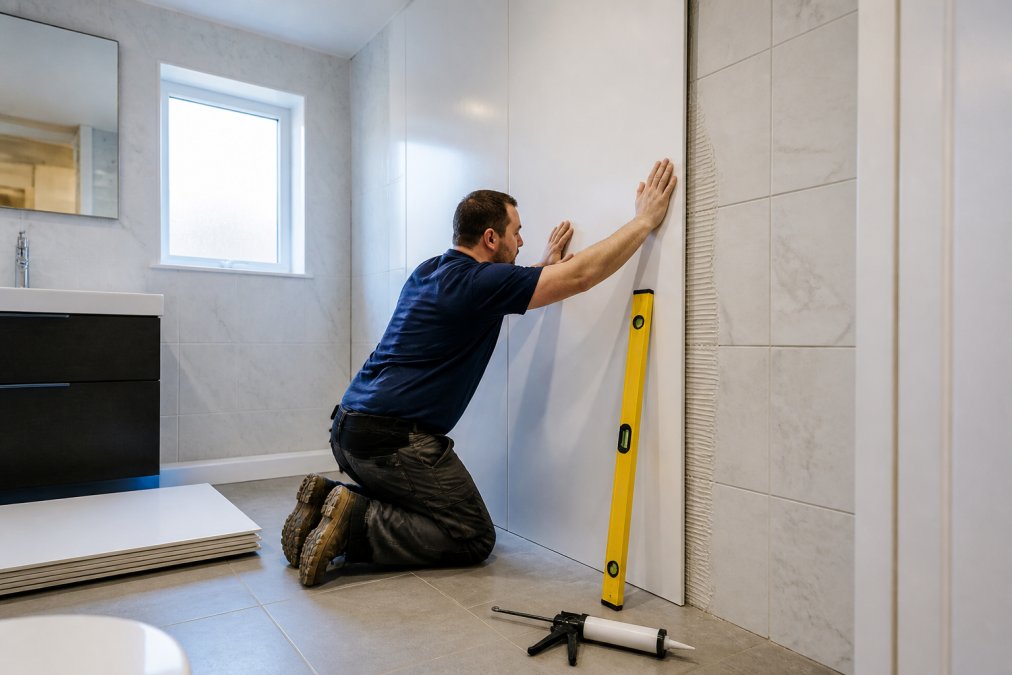
Step 1: Measure, Mark and Dry Fit Your Panels
Measure the wall height and width accurately, accounting for any skirting, ceiling trim, or floor coverings. Cut your first panel to height, then dry fit it against the wall without adhesive to check the fit.
Dry fitting is essential. It's where you catch measurement errors, confirm your plumb line is correct, and check that profiles or trims sit flush. Plan your layout so you don't end up with a very thin sliver of panel at the end of the run; adjust your starting position so the final panel is at least half-width.
Step 2: Cut Panels to Size
For a clean, professional edge, use a fine-tooth saw or hacksaw. Cut with the decorative face upward to minimise chipping on the visible surface.
For mitre cuts on external corners, use a mitre box to achieve a consistent 45-degree angle. Test the mitre cut against the corner before applying adhesive.
When cutting around pipes or socket boxes, use a jigsaw and work slowly. Mark the cut line clearly and leave a 2-3mm expansion gap around any fixed penetration, which will be covered by silicone sealant.
Step 3: Apply Adhesive and Fix the First Panel
Apply adhesive to the back of the panel in vertical beads, not to the wall. This gives you better control over coverage and prevents the adhesive from skinning over before you're ready.
Press the panel firmly against the wall, aligning it precisely with your plumb line. Apply even pressure across the full surface using a roller or flat block. Check with your spirit level immediately, making small adjustments before the adhesive grabs.
The first panel sets the reference for everything that follows. Take the time to get it exactly right.
Step 4: Fit Profiles, Trims and Corner Pieces
Profiles separate a professional-looking installation from an amateur one. Internal corner trim is used where two panels meet in a concave corner; external corner trim is used on protruding corners. H-trim joins two panels in the field; J-trim finishes an exposed edge.
Fix profiles before the adjacent panel. Most profiles clip or slide onto the panel edge, so the sequence is: fix first panel, slide profile onto its edge, then slot the second panel into the other side of the profile. Apply a thin bead of silicone sealant inside the profile channel before fitting for additional waterproofing.
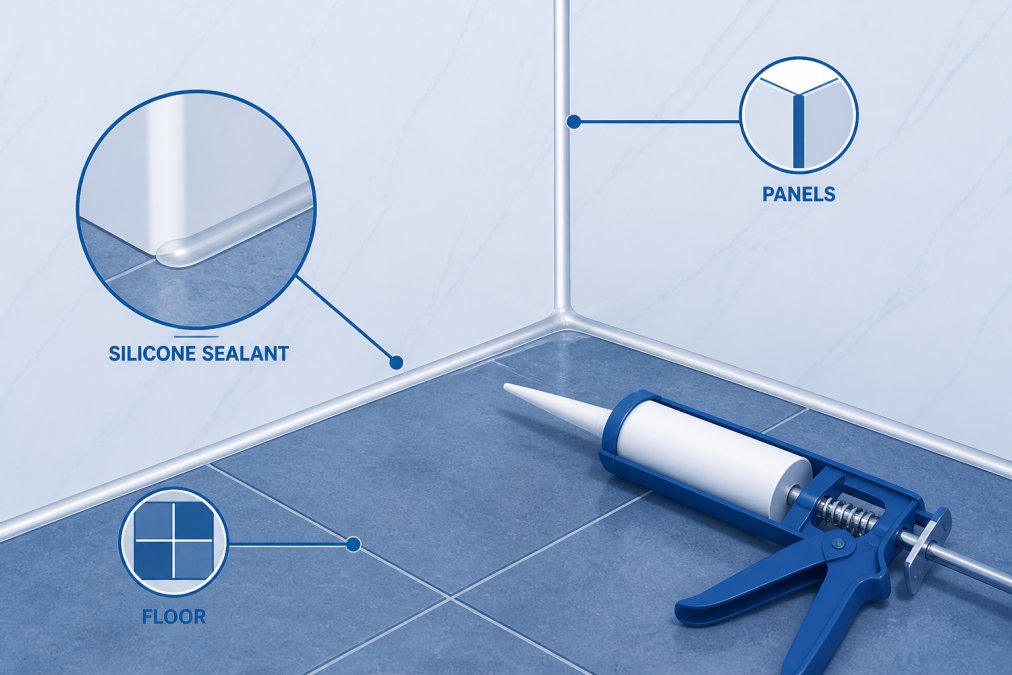
Step 5: Seal All Edges with Silicone Sealant
Silicone sealant is the final moisture barrier. Use a bathroom-grade, mould-resistant silicone in a matching or complementary colour.
Apply a continuous bead along every joint where the panels meet the bath, shower tray, floor, or ceiling. Use a sealant gun for consistent bead width, then smooth with a wet finger or sealant tool in a single pass. Wipe away any excess immediately with a damp cloth before it begins to cure.
Do not rush the curing time. Most bathroom silicones require 24 hours to cure fully before the area is exposed to water. According to British Standards Institution guidance on sealants for joints in buildings, correct application and adequate cure time are essential for long-term joint performance in wet areas.
Bathroom Wall Panel Installation Mistakes to Avoid
Not checking plumb before starting. A wall that looks vertical often isn't. Always verify with a spirit level and plumb line before fixing anything.
Skipping the dry fit. Applying adhesive to a panel that hasn't been test-fitted first leads to rushed corrections while the adhesive is grabbing.
Using the wrong adhesive. A general-purpose construction adhesive is not the same as a moisture-resistant panel adhesive. The distinction matters enormously in a wet environment.
Leaving gaps in the silicone bead. A single gap in the sealant line around a bath or shower tray is enough to allow water behind the panels. Apply the bead in one continuous pass and check it thoroughly.
Not leaving an expansion gap. PVC panels expand and contract with temperature changes. A small expansion gap at the top and bottom of the panel run, covered by trim, prevents buckling.
Over-tightening corner profiles. Forcing a panel into a corner profile that's too tight can bow the panel. The profile should allow the panel to sit flat without stress.
Cutting Around Fixtures and Dealing with Uneven Walls
For pipes, shower heads, and tap bodies, measure the centre point of the fixture from the floor and from the nearest panel edge. Transfer those measurements to the panel face, mark the cut circle or slot, and use a jigsaw or hole saw to cut it out. Always cut slightly undersize and test the fit before committing.
For socket boxes and recessed shelves, use a jigsaw and work to the marked line carefully. Leave a 2-3mm gap around the fitting to allow for the silicone seal and any minor movement.
Uneven walls are common, particularly in older UK properties. If the wall deviation is minor, a flexible adhesive with a thick bead can bridge small gaps. For walls significantly out of plumb or with undulations greater than about 5mm, fix wooden battens to the wall first, packing them out with shims until they're true and level. The panels then fix to the battens rather than directly to the wall surface.
How Long Does It Take to Install Bathroom Panels?
Installing bathroom wall panels in a standard UK bathroom typically takes one to two days for a competent DIYer. A professional fitter working alone can usually complete the same job in a single day.
The breakdown looks roughly like this:
- Surface preparation and marking out: 2-3 hours
- Cutting and dry fitting all panels: 1-2 hours
- Fixing panels with adhesive: 2-4 hours depending on wall count
- Fitting profiles and trims: 1-2 hours
- Silicone sealing and finishing: 1 hour
- Adhesive and silicone cure time: 24 hours before water exposure
The biggest variable is the condition of the existing walls. A bathroom with flat, sound plasterboard will install faster than one with uneven masonry or loose tiles that need remedial work first.
Maintenance and Long-Term Care for Bathroom Wall Panels
Bathroom wall panels require minimal maintenance compared to tiles. There are no grout lines to harbour mould, and the surface is easy to wipe down.
Regular cleaning: Wipe panels down with a soft cloth and a mild, non-abrasive bathroom cleaner. Avoid abrasive pads or harsh chemical cleaners, particularly on gloss-finish panels.
Inspecting the silicone: Check the silicone sealant lines once or twice a year, particularly around the bath, shower tray, and floor. If you spot any deterioration, remove the old sealant completely using a silicone remover tool, clean the surface thoroughly, and re-apply fresh bathroom silicone.
Addressing moisture behind panels: If you notice any panels beginning to bow or feel soft, investigate promptly. This usually indicates water has found a way behind the panel, most commonly through a failed silicone joint. Catching it early means a simple re-seal; leaving it means potential substrate damage.
Avoiding impact damage: PVC and laminate panels are durable but not indestructible. Avoid placing heavy objects against them and be careful with sharp-edged items near the surface.
According to guidance on bathroom ventilation and moisture management, adequate ventilation is one of the most important factors in preventing long-term moisture-related damage in bathrooms. An extractor fan that meets the ventilation requirements set out in Approved Document F of the Building Regulations will significantly reduce the condensation load on your wall panels and extend their service life.
For specific product care guidance, always refer to the documentation supplied with your panels, as maintenance requirements can vary between PVC, laminate, and other panel types.
Getting bathroom wall panels right comes down to preparation, the correct materials, and working in the right sequence. Wetwall Wonders supplies a comprehensive range of high-quality wall panels in sizes from 250mm to 900mm, including Dumawall tile-effect and Linerio slatwall options, alongside all the installation accessories, adhesives, and silicones needed to complete the job properly. Browse the full range at Wetwall Wonders and get everything for your installation in one order.
Frequently Asked Questions
Are bathroom wall panels easy to install yourself?
Most homeowners find bathroom wall panels straightforward to fit with basic DIY skills. PVC and laminate panels are designed for DIY installation: they require no specialist tools beyond a fine-tooth hacksaw or jigsaw, a spirit level, a caulking gun, and the correct adhesive. The key is thorough surface preparation and taking your time on the dry fit before committing any adhesive. Smaller panel widths, such as 250mm or 300mm options, are particularly manageable in tight spaces like ensuites.
Can you install bathroom wall panels directly onto plasterboard?
Yes, you can install bathroom wall panels onto plasterboard, provided the board is sound, dry, and properly secured. For wet areas such as showers, it is strongly advisable to apply a tanking membrane to the plasterboard first, or use a moisture-resistant board as your substrate. Standard plasterboard that is repeatedly exposed to steam and splash without protection can deteriorate behind the panels over time, which is one of the most common causes of panel failure and mould growth.
What is the best adhesive for bathroom wall panels?
A solvent-free grab adhesive or a dedicated panel adhesive is generally the best choice for bathroom wall panels. Solvent-based adhesives can react with PVC and laminate panels, causing warping or bubbling. Always check the panel manufacturer's recommendations before buying adhesive. Apply in vertical strips or a serpentine pattern, leave a short open time as directed, then press the panel firmly into place. For tongue and groove systems, adhesive is applied to the substrate rather than the panel face.
How do you seal the edges of bathroom wall panels to prevent water ingress?
All exposed edges, internal corners, external corners, and the join between the panel and the bath or shower tray must be sealed with a waterproof silicone sealant. Use a caulking gun to apply a continuous, unbroken bead and smooth it immediately with a wet finger or sealant tool. Profiles such as J-trim, H-trim, and end caps help create a neat finished edge and reduce the length of bare sealant runs. Never leave a gap unsealed, as water behind panels is the primary cause of mould and substrate damage.
Do you need to remove old tiles before fitting bathroom wall panels?
Not always. Panels can be installed over existing tiles if the tiles are fully adhered, flat, and free from loose or hollow sections. Tapping each tile will reveal any that have lifted. However, fitting over tiles raises the wall surface slightly, which can affect how fixtures such as sockets, shower valves, and bath taps sit. If tiles are uneven or partially loose, removing them and starting from a clean substrate will produce a better, longer-lasting result.
How long does it take to install bathroom wall panels?
A typical bathroom with three or four walls takes most competent DIYers one to two days to panel, including surface preparation and allowing adhesive to cure. A straightforward shower enclosure can often be completed in half a day. Factors that add time include cutting around multiple fixtures, dealing with uneven walls that need battening out, and waiting for silicone sealant to fully cure before the shower or bath is used, which usually takes 24 hours.
This article was written using GrandRanker

