
How to Maintain Textured Wetwall Panels: 2026 Guide
Table of Contents
- What You'll Need to Maintain Textured Wetwall Panels
- Daily and Weekly Cleaning Routine
- Best Cleaning Products for Bathroom Wall Panels
- How to Remove Limescale from Shower Panels
- Preventing Mould on Bathroom Wall Panels
- Deep Cleaning Textured Grooves and Joint Maintenance
- Long-Term Sealant Care and Protecting Surface Finish
- Frequently Asked Questions
Last Updated: September 20, 2026
What You'll Need to Maintain Textured Wetwall Panels
Maintaining textured wetwall panels comes down to one simple rule: clean little and often with the right tools, never with harsh ones. A textured wetwall is a wall panel with a moulded surface that mimics tile, stone or slat effects. The texture looks great and hides marks well, but it also traps soap scum in its grooves.
That is why so many homeowners find their panels look dull within a year. At Wetwall Wonders, we supply panels and the accessories that keep them in shape.
Here is your basic kit:
- A soft sponge or microfiber cloth
- A squeegee for the shower enclosure
- Mild detergent or washing-up liquid
- Diluted white vinegar for limescale
- A non-abrasive cleaner for weekly wipe-downs
- A soft-bristled brush for grooves
The NHS guidance on preventing mould in the home is worth a read too, since moisture control matters as much as cleaning.
Daily and Weekly Cleaning Routine
A quick daily rinse and squeegee takes under a minute and prevents most stain build-up. Weekly, add a mild detergent wipe-down. That is the whole routine.
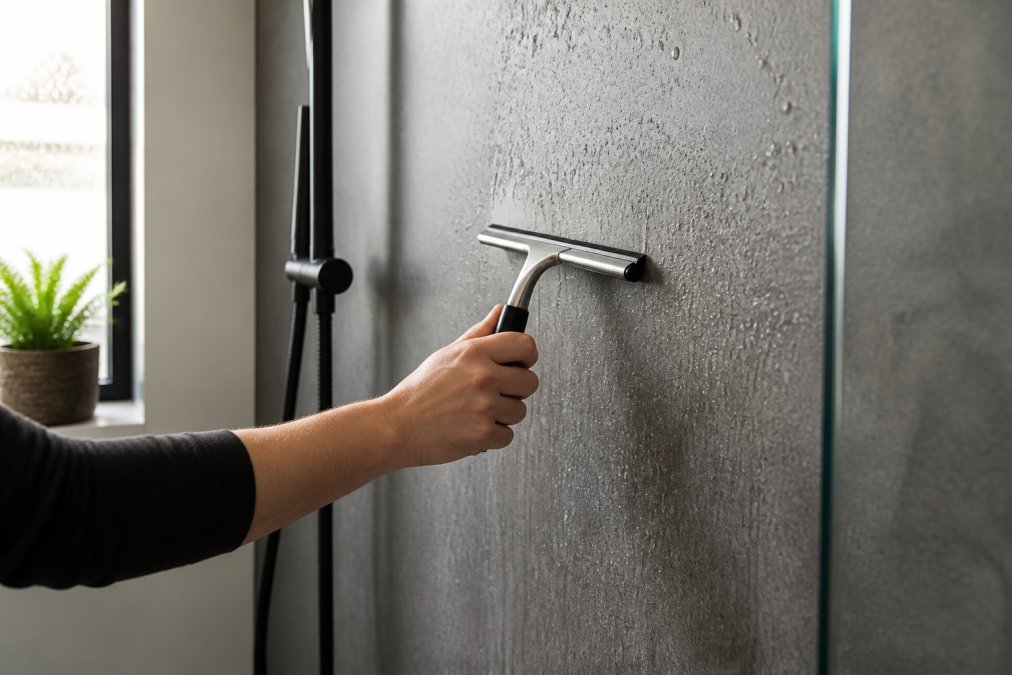
Daily, after every shower:
- Rinse the panels with warm water
- Pull a squeegee down the surface, top to bottom
- Leave the door or curtain open for airflow
Weekly, once over with a damp cloth:
- Mix a few drops of mild detergent in warm water
- Wipe the whole panel, working with the grain of the texture
- Rinse thoroughly so no residue dries on the surface
- Dry with a clean microfiber cloth
That is it. No scrubbing, no bleach sprays, no abrasive pads. Cleaning frequency matters more than cleaning effort.
Best Cleaning Products for Bathroom Wall Panels
The best cleaning products for bathroom wall panels are mild, pH-neutral and free of abrasives. Anything labelled "scratch-free" or "bathroom-safe" is usually fine. But textured panels have a moulded surface with fine relief, and that changes what a cleaner can safely do. A product that is harmless on a flat gloss panel can dull or discolour a textured one because residue settles in the grooves and is harder to rinse away.
This is the part most guides skip. Here is a chemical compatibility breakdown for the products you are most likely to reach for.
| Product | Safe on textured panels? | Why |
|---|---|---|
| Mild washing-up liquid | Yes | pH-neutral, rinses clean, no residue |
| pH-neutral bathroom spray | Yes | Formulated for sanitaryware, no abrasives |
| Diluted white vinegar (1:4) | Yes, with care | Acidic; fine on most finishes but test first |
| Citric-acid descaler | Yes, diluted | Works on limescale; do not leave to dwell |
| Non-abrasive cream cleaner | Yes | Check the label for grit particles |
| Specialist panel cleaner | Yes | Made for the substrate; follow the dilution |
| Neat bleach | No | Attacks the surface finish and sealant over time |
| Solvent-based sprays | No | Can cloud or craze the moulded surface |
| Scouring powder | No | Abrasive grit scratches the texture permanently |
| Wire wool or abrasive pads | No | Same problem, worse |
| Limescale remover (strong acid) | No | Etches the finish if left to dwell |
A few practical rules sit behind that table:
- Dilute everything. Even a safe product used neat can leave a film in the grooves that attracts dirt.
- Test on a hidden patch first. The back of a panel behind a fixed unit or near the floor is ideal.
- Rinse thoroughly. Residue is the enemy of a textured surface because it dries in the relief.
- Never mix products. Bleach plus acid creates chlorine gas; bleach plus ammonia creates chloramine vapour. Both are genuinely dangerous in a small bathroom.
Look for these on the label:
- Mild detergent or soap-based cleaners
- Non-abrasive cream cleaners
- Diluted white vinegar (one part vinegar, four parts water)
- Specialist panel cleaners from your panel supplier
Avoid these entirely:
- Scouring powders and cream cleansers with grit
- Wire wool or abrasive sponges
- Solvent-based sprays and neat bleach
A soft sponge and microfiber cloth do most of the work. You rarely need anything stronger.
How to Remove Limescale from Shower Panels
Limescale comes off textured shower panels with diluted white vinegar and a soft brush. Leave it for a few minutes, then rinse. Hard water leaves chalky white marks that build up in the grooves first, because the relief holds a thin film of water after every shower and that water evaporates slowly, depositing its minerals in place.
Here is the method:
- Mix one part white vinegar with four parts warm water
- Spray or wipe it onto the affected area
- Wait five minutes, no longer
- Work a soft-bristled brush along the grooves
- Rinse thoroughly and dry with a microfiber cloth
Managing hard water long term
If your water is very hard, a squeegee after every shower is the cheapest limescale prevention there is. Beyond that, a few habits make a real difference:
- Squeegee every shower, no exceptions. Removing the water before it evaporates removes the minerals before they deposit.
- Wipe the grooves weekly. A soft-bristled brush with mild detergent lifts the early film before it hardens.
- Descale monthly, not yearly. A five-minute diluted-vinegar treatment once a month is far easier than chipping off a year of scale.
- Consider a water softener or filter. If scale returns within days, the supply itself is the problem and no cleaning routine will outrun it.
- Dry the enclosure after cleaning. Leaving the door open and the fan running speeds evaporation and reduces the next deposit.
Preventing Mould on Bathroom Wall Panels
Mould needs moisture, warmth and a food source, so preventing mould on bathroom wall panels is really about moisture control. Ventilate, dry the surface, and keep the silicone sealant clean.

- Run the extractor fan during and after showers
- Open a window when you can
- Squeegee panels dry after use
- Check the sealant line every few months
- Fix any leaks or drips straight away
Deep Cleaning Textured Grooves and Joint Maintenance
Deep cleaning textured grooves needs a soft-bristled brush and a little patience, not more chemicals. Work along the groove, not across it. Joint maintenance is the other half of the job.
- Brush along the grooves with a mild detergent solution
- Rinse with clean water, then dry
- Check the joints and corners for gaps
- Remove any loose or discoloured sealant
- Re-seal with a mould-resistant silicone
Long-Term Sealant Care and Protecting Surface Finish
Protecting the surface finish over the long term is mostly about the sealant line and your cleaning habits. Silicone does not last forever. Expect to inspect it twice a year and replace it every few years.
What to check:
- Cracks, gaps or lifting edges
- Black spots that will not clean off
- Water sitting behind the panel edge
A few habits protect the finish long term:
- Keep using a squeegee, every single day
- Stick to mild detergent and microfiber cloth
- Never scrub with abrasives
- Re-seal before water gets behind the panel
Frequently Asked Questions
How do you clean textured bathroom wall panels without damaging them?
Use a soft sponge or microfiber cloth with warm water and a mild detergent. Avoid abrasive pads, scourers or harsh chemicals that can scratch the surface finish. For stubborn marks, apply a non-abrasive cleaner and rinse thoroughly. A squeegee after each shower reduces the need for heavy cleaning. Always test any new product on a hidden area first. This approach keeps textured wetwall panels hygienic and protects the surface integrity.
What is the best way to remove limescale from textured wetwall?
Mix diluted white vinegar with water and spray onto the limescale, leave for a few minutes, then wipe with a damp cloth. For heavier build-up, repeat the process. Avoid acidic cleaners on silicone sealant as they can degrade it. Rinse thoroughly afterwards. Regular use of a squeegee and a weekly wipe-down prevents limescale from hardening. This method is safe for most textured panels and helps maintain a low-maintenance bathroom environment.
Can you use bleach on textured shower wall panels?
Bleach is not recommended for regular cleaning of textured wetwall panels because it can discolour the surface and weaken silicone sealant over time. For mould spots, use a dedicated mould remover that is safe for plastics, or a diluted white vinegar solution. Always check the panel manufacturer's guidelines. If you must use bleach, dilute it heavily and rinse immediately. Preventing moisture build-up with good ventilation is a better long-term strategy.
How often should you deep clean textured bathroom panels?
A deep clean every two to four weeks is sufficient for most households, depending on usage and water hardness. In hard water areas or busy bathrooms, aim for every two weeks. Daily squeegeeing and weekly wipe-downs reduce the need for frequent deep cleaning. Focus on textured grooves and joints where residue and limescale collect. Regular maintenance protects the surface finish and extends the life of your panels.
Maintaining textured panels is a small habit, not a big job. The catch is that most people reach for the strongest cleaner they can find, which is exactly the wrong move on a textured surface. At Wetwall Wonders, we stock panels in 250mm, 300mm, 500mm and 900mm sizes, plus the silicones, adhesives and trims to finish the job properly. Get started with Wetwall Wonders and keep your panels looking sharp with a one-minute daily routine.

