
How to Remove Old Silicone Sealant from Shower Panels
Table of Contents
- Why Old Silicone Sealant Fails and What It Leaves Behind
- Tools and Materials You Need for Silicone Removal
- Step-by-Step: How to Remove Silicone Sealant from Shower Panels
- The Best Silicone Remover for Bathroom Panels
- How to Prepare Shower Panels for Re-sealing
- How to Apply Silicone Sealant to Bathroom Panels
- Common Mistakes to Avoid When Removing Silicone Sealant
- Conclusion
- Frequently Asked Questions
Last Updated: September 23, 2026
Why Old Silicone Sealant Fails and What It Leaves Behind
Silicone sealant is a flexible, waterproof material used to seal the joints where shower panels meet trays, tiles, and frames, keeping water out of the gaps that would otherwise let moisture creep behind your panels. When it fails, you notice fast.

Tools and Materials You Need for Silicone Removal
You will need:
- A silicone scraper tool or plastic blade (never metal on plastic panels)
- A utility knife with a fresh blade
- Silicone remover or softening gel
- Methylated spirits for degreasing
- A clean cloth and an old toothbrush
- Silicone gun and a new cartridge of sanitary sealant
- Masking tape
- Gloves and eye protection
For a full breakdown of which products suit which surface, see our guide to the best silicone remover for bathroom panels options available.
Step-by-Step: How to Remove Silicone Sealant from Shower Panels
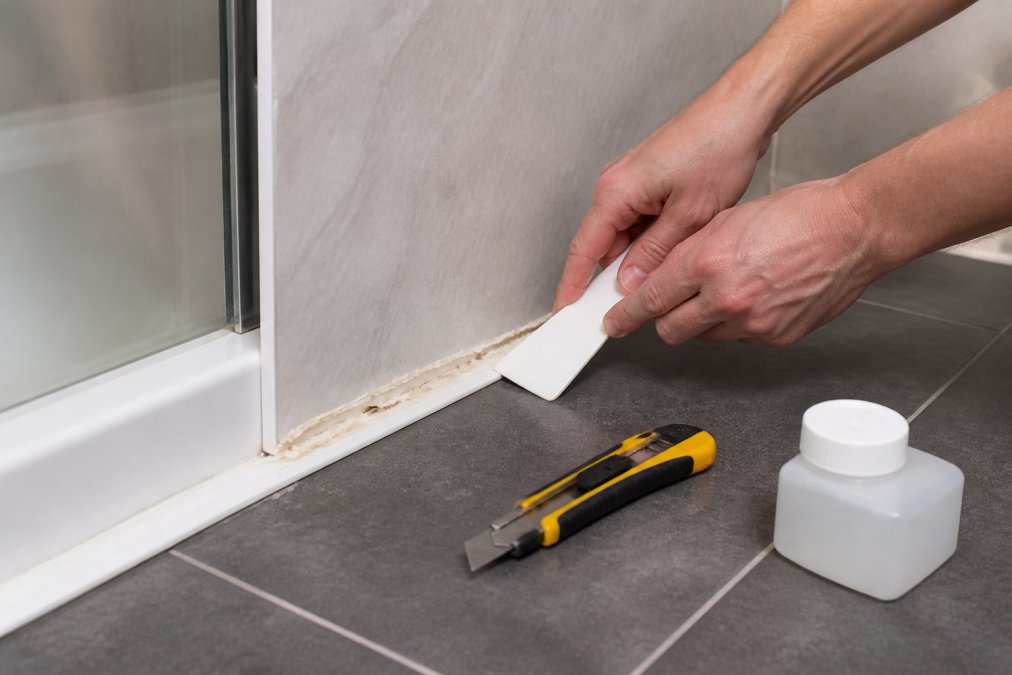
Removing old silicone sealant from shower panels takes about 30 to 60 minutes for a standard enclosure. Work in small sections and let the chemicals do the hard work. First identify your panel material and sealant type, because the wrong blade or solvent can permanently mark acrylic or PVC.
Before You Start: Identify the Panel and the Sealant
Shower panels fall into three broad groups, and each behaves differently under a blade:
- Acrylic and ABS-capped panels are the most scratch-prone. A fingernail can leave a mark. Use only a plastic scraper and a solvent labelled safe for acrylics.
- Glass panels are hard but chip at the edges. A razor blade held almost flat is acceptable on glass, but never on the frame or the tray.
- PVC and composite panels sit between the two. They resist light scraping but can cloud if you use an aggressive solvent.
Step 1: Cut Along the Sealant Edges
Run your utility knife along both edges of the bead, where the sealant meets the panel and the tray, angling the blade flat against the surface. You are slicing the bond, not carving the panel.
Step 2: Soften the Silicone with Chemical Removers
Silicone softening gel breaks down the cured silicone so it scrapes away cleanly. Apply it along the joint and leave it for the time stated on the label, usually several hours for a thick bead. Some gels need 24 hours on an old, hardened bead.
Step 3: Scrape and Lift the Silicone Away
Use your plastic scraper to lift the softened silicone in one continuous strip where possible, pulling towards you at a shallow angle. For stubborn patches, reapply the gel and wait again.
Step 4: Clean Off Residue and Prepare the Surface
Wipe the joint with methylated spirits to remove silicone residue and grease. A clean joint is the difference between a seal that lasts and one that peels within a month.
Disposing of the Waste
Silicone waste is not recyclable and should not go down the drain, because solvent residue can carry into waterways. Wrap cured silicone strips and gel-soaked cloths in a sealed bag and put them in general waste. Check your local council's guidance on solvent-based products before tipping leftover remover down the sink, most advise a household waste recycling centre instead.
The Best Silicone Remover for Bathroom Panels
The best silicone remover for bathroom panels is a gel-based solvent that clings to vertical joints without running. Liquid removers drip down the panel before they can work, wasting product and leaving you scraping harder.
Look for three things:
GP200 General Purpose Silicone Sealant →
- Gel consistency so it stays where you put it
- Safe for plastics and acrylics so it does not cloud the panel
- Low odour because bathrooms have poor airflow during a job
How to Prepare Shower Panels for Re-sealing
Preparing shower panels for re-sealing matters more than the sealant itself. A perfect bead on a dirty joint will fail; a decent bead on a spotless joint will last years. This is where most DIY re-seals go wrong, because the joint can look clean and still be contaminated.
Follow these steps:
- Wipe the joint with methylated spirits and let it dry fully
- Remove every trace of old silicone, including thin films you can feel but not see
- Check the joint is completely dry, with no moisture in the gap
- Run masking tape along both sides of the joint for a clean line
- Make sure the room is warm, since sealant cures poorly in cold, damp air
Why New Sealant Fails to Stick, Even When the Joint Looks Clean
If you have removed old silicone, cleaned the joint, and the new bead still peels within weeks, the cause is almost always one of the following. Work through them in order.
- Residual solvent or oil film. Silicone removers and methylated spirits leave a thin residue that feels dry but repels fresh sealant. Wipe the joint a second time with a clean cloth and fresh methylated spirits, then let it flash off for at least 15 minutes before sealing.
- Soap scum and limescale. These form a chalky layer that silicone cannot grip. A mild limescale remover, rinsed and dried thoroughly, is usually enough. Do not use an oily bathroom cleaner, the surfactants leave a film.
- Silicone contamination from your own hands or cloth. Once you have touched old silicone, your fingers carry silicone oil. Wear nitrile gloves for the cleaning stage and use a fresh cloth, not the one you used to wipe the old bead.
- A damp or cold substrate. Sealant needs a dry surface and a room above roughly 15°C to cure properly. In a cold bathroom, run the shower on hot for a few minutes to warm the room, then let the surfaces dry completely before sealing.
- Sealing over acrylic caulk residue. If the original joint was caulk, not silicone, traces of it will stop silicone bonding. Soften any remaining caulk with warm soapy water and lift it with a plastic blade before degreasing.
A Quick Adhesion Test Before You Commit
If you are unsure whether the joint is truly clean, run a 50 mm test bead in an inconspicuous corner. Leave it 24 hours, then try to peel it with a fingernail. If it lifts cleanly, the surface is still contaminated; if it tears and leaves residue behind, the bond is good. This costs a few minutes and saves a full re-do.
How to Apply Silicone Sealant to Bathroom Panels
Applying silicone sealant to bathroom panels is a five-minute job once the surface is ready. Load a cartridge of sanitary sealant into your silicone gun and cut the nozzle at 45 degrees.
| Job | Product | Price | Best For |
|---|---|---|---|
| Sealing joints | GP200 Silicone Sealant (3 pack) | £24.00 | Bathrooms, shower rooms, wet areas |
| Bonding panels | Decorwall Panel Adhesive Pro | £9.00 | Fixing panels to most surfaces |
| General bonding | Decorwall Megabond Adhesive | £9.00 | Glass, marble, brick, underwater use |
Common Mistakes to Avoid When Removing Silicone Sealant
Most removal jobs go wrong in the same few ways. Avoid these and you will save a second attempt.
- Using a metal blade on plastic panels. It scratches the surface and traps mould for good.
- Sealing over old silicone. New sealant will not bond to old sealant, so the joint fails again.
- Skipping the degreasing step. Grease and soap film stop the new bead from sticking.
- Rushing the softening gel. Give it the full time on the label, or you will scrape too hard.
- Sealing a wet joint. Trapped moisture causes failed adhesion and black mould.
Conclusion
Removing old silicone sealant is fiddly, but most homeowners can do it in an afternoon with the right tools and a bit of patience. The real work is not the scraping, it is the cleaning and drying that comes after.
Frequently Asked Questions
What is the best tool to remove silicone from shower panels?
A plastic scraper or a dedicated silicone removal tool with a plastic blade works best because it lifts cured silicone without scratching acrylic or laminate panels. Avoid metal blades and steel wool, which leave permanent marks. For stubborn spots, soften the sealant first with a chemical silicone remover or silicone softening gel, then scrape at a shallow angle. A utility knife is useful for cutting along the joint edges, but keep the blade flat against the panel and use light pressure.
Will silicone remover damage plastic shower panels?
Most silicone removers are solvent-based and can dull or crack certain plastics if left on too long. Always test a small hidden area first and check the label for plastic compatibility. Apply the remover only to the silicone bead, not the surrounding panel, and wipe it off within the time stated on the product. For acrylic and plastic panels, a silicone softening gel is often safer than a liquid solvent because it stays where you put it and limits contact with the panel surface.
How do you get stubborn silicone residue off bathroom panels?
Stubborn residue needs a two-step approach: chemical breakdown followed by mechanical removal. Apply a silicone softening gel, leave it for the recommended time, then scrape with a plastic blade. For thin films, wipe with methylated spirits on a microfibre cloth. If residue remains in grout lines or textured areas, use a nylon brush with warm soapy water. Never use abrasive pads, which scratch the surface and create places for mould to return.
Can I apply new silicone over old silicone on shower panels?
No. New silicone sealant will not bond properly to cured silicone, and the joint will fail within weeks. You must remove all old sealant, clean the surface with methylated spirits, and let it dry completely before applying a fresh bead. Use a sanitary sealant with fungicide, such as GP200 General Purpose Silicone Sealant, which is mould resistant and suitable for high-humidity areas. A clean, dry, residue-free surface is the only way to get a waterproof seal that lasts.

