
How to Waterproof Bathroom Wall Panel Seams
Table of Contents
- Why Seams Fail: What Actually Causes Leaks Behind Panels
- Tools and Materials You Need Before You Start
- Step 1: Preparing the Wall and Panel Edges
- Step 2: Waterproofing Behind Shower Panels Before They Go Up
- Step 3: Sealing Tongue-and-Groove Joints and Vertical Seams
- Choosing the Best Silicone Sealant for Shower Panels
- Step 4: Silicone at Corners, Edges and End Caps
- Bathroom Wall Panel Installation Mistakes That Cause Leaks
- Maintaining Your Seals Long-Term
- Frequently Asked Questions
Last Updated: September 17, 2026
Why Seams Fail: What Actually Causes Leaks Behind Panels
Water almost never gets behind a bathroom wall panel through the panel itself. It gets in at the seams. Every joint, corner and end cap is a gap waiting for water, and once moisture sits behind a panel, mould and rot follow.
Three things cause most seam failures:
- No waterproof membrane behind the panels. Panels are the finish, not the waterproofing.
- A broken or thin bead of sealant. Gaps in a continuous bead let water track sideways.
- Movement. Cheap adhesive lets panels shift, and the seal tears.
Tools and Materials You Need Before You Start
Gather everything before you start, stopping mid-job leaves adhesive curing with nothing to bond to.
You will need:
- Sanitary grade silicone and a sealant gun
- Panel adhesive, such as a hybrid polymer or water-based panel adhesive
- A caulking tool and smoothing spatula
- Silicone remover and a clean cloth
- Methylated spirits for degreasing
- Corner profiles and end caps
- A spirit level and a fine-tooth saw
Step 1: Preparing the Wall and Panel Edges
Substrate preparation decides whether your adhesive bond holds. A dusty, greasy or damp wall rejects even the best sealant.

Work through these steps:
- Strip old sealant and trims completely. Scrape, don't peel.
- Fill any cracks or holes in the plaster with filler and let it dry.
- Sand the surface flat and wipe away all dust.
- Clean with methylated spirits and let it evaporate fully.
- Check the wall is dry, sound and dust-free before panels go up.
Step 2: Waterproofing Behind Shower Panels Before They Go Up
Waterproofing behind shower panels means tanking the wall before installation, not just sealing visible joints afterwards, so water never reaches the plasterboard if a seam fails.
Step 3: Sealing Tongue-and-Groove Joints and Vertical Seams
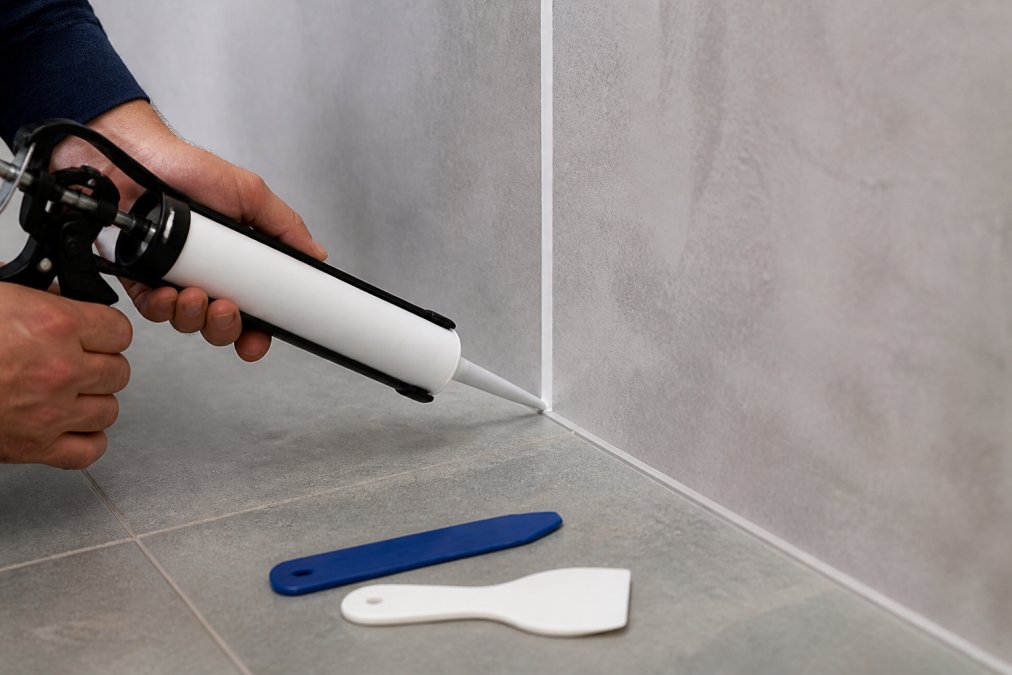
Choosing the Best Silicone Sealant for Shower Panels
The best silicone sealant for shower panels is a sanitary grade, mould-resistant product with fungicide, standard sealants break down in wet, warm conditions.

Look for these on the label:
- Sanitary grade rating (often marked as suitable for sanitary areas or wet rooms)
- Fungicide for mould resistance
- Permanently flexible once cured
- Strong adhesion to plastics and glazed surfaces
- Neutral-cure or acetoxy-cure, depending on your panel material
Matching the sealant to the panel material
- PVC panels: Non-porous and smooth. Acetoxy-cure silicones bond well, but PVC expands and contracts noticeably with heat, so the sealant must stay permanently flexible. A rigid or low-flex sealant will crack along the seam within a heating season.
- Acrylic panels: Also non-porous, but more prone to surface stress cracking. Avoid acetoxy-cure silicones on acrylic, as the acetic acid released during cure can attack the surface. A neutral-cure silicone or hybrid polymer is the safer match.
- Composite and laminate panels: Often have a textured or slightly porous face. These may need a primer or a sealant formulated for porous surfaces to get a reliable bond. Test a small offcut first.
- Tongue-and-groove edges: The mechanical fit does most of the work, so a thinner bead of flexible sealant is enough. Over-filling can push the panels apart as the sealant cures.
Acetoxy versus neutral cure: what actually differs
Cheap sealant is a false economy. A seal that fails in a year costs more in rework than a better product costs upfront.
Step 4: Silicone at Corners, Edges and End Caps
Corners and edges take more water than flat seams. This is where leaks start, so slow down here.
Work through each one:
GP200 General Purpose Silicone Sealant →
- Internal corners: fit a corner profile, then seal both sides with a full bead.
- External corners: use a trim or profile, and seal the joint where it meets each panel.
- Edges: run silicone where the panel meets the tray, bath or floor.
- End caps: push caps fully home, then seal the joint line.
Bathroom Wall Panel Installation Mistakes That Cause Leaks
Bathroom wall panel installation mistakes almost always trace back to skipped prep or rushed sealing. The most common:
| Mistake | What Happens | The Fix |
|---|---|---|
| Panels fitted over damp walls | Mould grows behind panels | Tank and dry the wall first |
| Broken sealant bead | Water tracks behind panels | Apply one continuous bead |
| No waterproof membrane | Structure gets wet | Tank the full wet zone |
| Cheap non-sanitary silicone | Seal fails, mould appears | Use sanitary grade sealant |
| Panels fitted tight to edges | Panels crack as they expand | Leave an expansion gap under trims |
| Shower used too soon | Seal washes out | Wait the full curing time |
Maintaining Your Seals Long-Term
Silicone seals don't last forever, and that's fine as long as you check them. Inspect every seam twice a year, more often in a heavily used shower, to catch a failing seal before water gets behind the panel, by the time you see damp on an adjacent wall, the damage is done.
Spot the leak: visual signs a seal is failing
Most failures announce themselves long before water appears. Check every seam, corner and end cap for:
- Discolouration: A yellow or brown tinge along the bead, or a dark line where the sealant meets the panel, usually means water is tracking behind the edge. Wiping it away and seeing it return within days confirms the seal has broken.
- Black spotting that won't wipe off: Surface mould cleans off. Mould that has rooted into the sealant or the gap behind it does not. This is a sign the bead has lost its fungicide protection or has separated from the panel.
- Lifting or peeling edges: Run a fingernail along the bead. If the edge lifts cleanly away from the panel, the bond has failed even if the bead looks intact.
- Shrinkage or pull-back: Silicone can shrink slightly as it ages, leaving a hairline gap at the panel edge. This is common where panels move with heat.
- Cracks or crazing: Fine cracks across the bead mean the sealant has lost flexibility. This is more common with cheap or over-cured products.
- Soft or tacky patches: A bead that stays soft or feels sticky has not cured properly, often because it was applied too thick or over a damp surface.
- Loose trims or end caps: If a trim moves when pressed, the seal behind it has likely failed.
Never patch a failing seal with fresh silicone on top. It looks fixed for a few weeks, then peels away and takes the old bead with it. Cut the old sealant out completely before re-sealing.
How to re-seal a failed seam
Re-sealing is a small job done properly. Patching over the top is not re-sealing.
- Cut out the old sealant with a silicone remover or a sharp blade, working along the seam rather than digging into the panel.
- Clean the joint with methylated spirits and let it evaporate fully. New silicone will not bond to old, dirty sealant or to a damp surface.
- Check the gap behind the seal. If the panel has moved or the joint is wider than before, the underlying cause is movement, not the sealant.
- Apply a fresh continuous bead of the correct sealant for your panel material, as covered above.
- Tool it once and leave it to cure for the full time on the tube before the shower is used.
Material-specific maintenance
- PVC and acrylic panels: Check the bead at the panel edges and around any cut-outs, as these are the first places to lift. Acrylic panels can stress-crack if cleaned with harsh solvents, so stick to mild bathroom cleaner.
- Composite and laminate panels: The textured face can hold soap scum against the bead, which speeds up mould growth. Clean the seam line specifically, not just the panel face.
- Tongue-and-groove joints: These rely on the mechanical fit, so a thin bead is normal. If the bead has disappeared entirely, check whether the panels have shifted before re-sealing.
Cleaning without wrecking the seal
Clean with a mild bathroom cleaner and a soft cloth. Avoid abrasive scrubs, bleach-heavy sprays and limescale removers that sit on the seal, as these break the sealant down faster. Rinse and dry the seam so no residue sits against the bead.
Inspect twice a year, look for discolouration, rooted mould and lifting edges, and re-seal by cutting out the old bead rather than patching over it. Catching a failing seal early is the difference between a ten-minute re-seal and a panel removal job.
Frequently Asked Questions
Do you need to waterproof behind wet wall panels?
Yes, if the substrate is porous or in a high-humidity zone. Panels themselves are impermeable, but water can still reach the wall through unsealed seams or failed silicone. Apply a waterproof membrane or tanking slurry to the substrate before fitting panels, especially inside a shower enclosure. This gives you a second line of defence if a seam ever fails. It also protects the wall structure from long-term damp and mould growth.
What is the best sealant for bathroom wall panel seams?
A sanitary-grade silicone with fungicide is the right choice. Look for one that stays permanently flexible, cures fast and adheres to non-porous surfaces like acrylic and laminate panels. The GP200 General Purpose Silicone Sealant from Wetwall Wonders (£24.00 for a pack of 3) is UKCA approved, mould resistant and suitable for high-humidity areas. Avoid silicone without fungicide, as it will discolour and lose its seal within months in a shower.
Can you use silicone to seal shower wall panels?
Yes, silicone is the standard sealant for shower wall panel seams. Use a continuous bead along every joint, corner and edge, then tool it smooth with a caulking tool or a finger dipped in soapy water. The key is to apply silicone to a clean, dry surface and let it cure fully, usually 24 hours, before exposing it to water. A flexible sealant accommodates panel expansion without cracking.
How do you prevent mould in bathroom wall panel joints?
Mould grows where water sits. Prevent it by sealing every joint with a fungicidal silicone, keeping the bathroom ventilated and wiping seams dry after showers. Check silicone lines every six months for lifting or black spots. If mould appears on the silicone itself, cut it out and reapply rather than scrubbing, because the seal is already compromised. Proper substrate preparation and a watertight seal are your best defences.

