
Textured Wetwall Panels Review: Pricing & Pros
Table of Contents
- Textured Wetwall Panels Review: What You Get for Your Money
- Pricing Breakdown: Textured Wetwall Panels Cost Per Square Metre
- Pros and Cons of Wet Wall Panels: An Honest Assessment
- Bathroom Wall Panel Installation Cost: What to Expect
- Tile Effect Wall Panels vs Real Tiles: Which Wins?
- Durability, Maintenance and Long-Term Value
- Verdict: Who Should Buy Textured Wetwall Panels?
- Frequently Asked Questions
Last Updated: September 14, 2026
Textured Wetwall Panels Review: What You Get for Your Money
Textured wetwall panels are rigid, waterproof boards that mimic stone, slate or wood and glue or click over existing walls. This review from Wetwall Wonders examines what you get for the money.
Textured panels win on installation time and moisture resistance. They lose on resale authenticity and repairability.
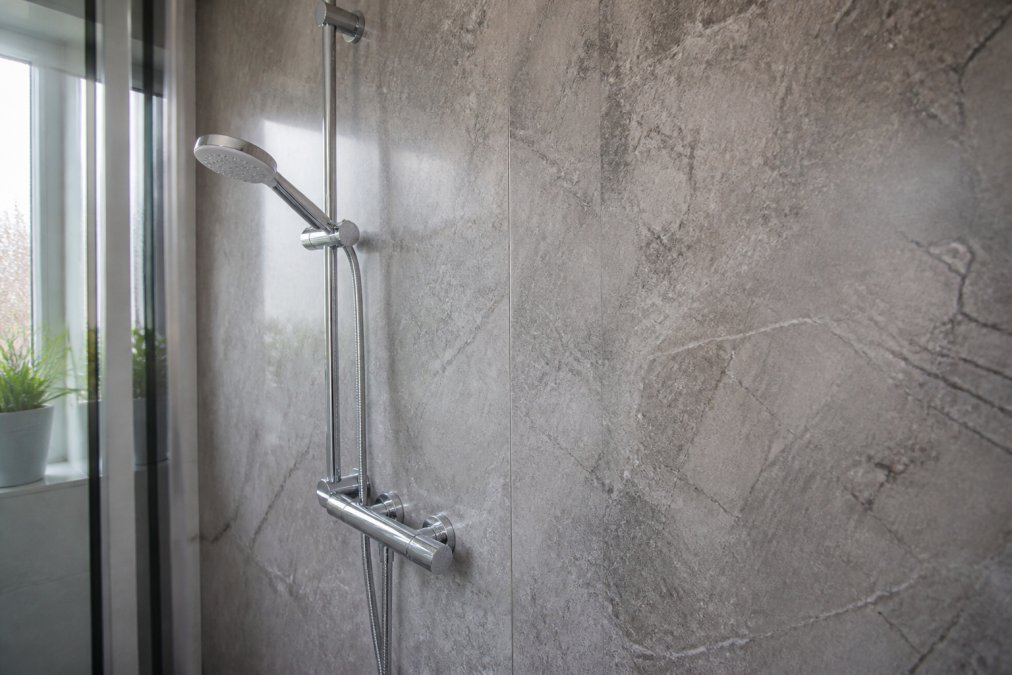
The Kerradeco Stone Range: Five Finishes, One Price
Kerradeco Stone comes in five finishes, Grey, Moon, Misty, Ivory and Anthracite, each £209.00 per pack, so the choice is purely aesthetic.
Each pack holds 8 boards of 1350mm x 295mm x 9mm, covering 3.186 m². The 9mm solid-core PVC resists the flexing that opens seams over time, and the 295mm width suits full-wall cladding and splashbacks.
Pricing Breakdown: Textured Wetwall Panels Cost Per Square Metre
At £209.00 for 3.186 m², Kerradeco Stone works out at roughly £65.60 per square metre, the honest starting point for any textured wetwall panels pricing comparison, because it is a real pack price rather than a headline rate excluding trim and adhesive. Real stone or porcelain costs more once labour is counted; budget flat PVC costs less but looks it.

| Cost Component | Typical Approach | Notes |
|---|---|---|
| Panels | £209.00 per 3.186 m² pack | Kerradeco Stone, all five finishes |
| Adhesive | Separate purchase | High-grab panel adhesive |
| Silicone | Separate purchase | Mould-resistant, sanitary grade |
| Trims | Separate purchase | Internal, external and end caps |
| Tools | Usually already owned | Fine-tooth saw, j roller, spacers |
What Else You'll Need to Budget For
Panels are never the whole bill: adhesive, sanitary silicone and trims add to the total, and skimping on any undermines the installation.
Buying panels and accessories from one supplier removes the commonest DIY frustration: discovering mid-install that you need a trim nobody stocks locally.
Total Project Cost: A Worked Example
Per-square-metre pricing tells you what a board costs, not what the job costs. Here is a typical 2.4 m × 2.4 m shower enclosure wall, roughly 5.76 m².
Materials, DIY route:
- Panels: two packs of Kerradeco Stone at £209.00 each = £418.00 (6.372 m², leaving offcuts for a repair)
- High-grab panel adhesive: £12-£20 per tube, two to three tubes
- Sanitary silicone: £6-£12 per cartridge, one to two cartridges
- Internal and external corner trim, end caps: £15-£30
- Fine-tooth saw blade, j roller, spacers: £20-£40 if not already owned
A realistic DIY materials total lands between £480 and £560, with panels roughly three-quarters of it. The labour is your own weekend.
Fitted route:
Professional fitting is usually quoted per job, reflecting area size, substrate making good and travel. Over sound existing tiles, most fitters quote half a day to a full day; over a stripped-back wall needing boarding, expect labour to roughly double. The biggest variable in any fitted quote is not the panels, it is what is behind them.
The Cost Nobody Quotes: Strip-Out and Disposal
Coming from a full tile strip-out, add a day for removal and disposal, often the largest line in the budget and the one most estimates omit. That is why 'panels over tiles' is so popular: it removes this line entirely, provided the tiles are sound and flat.
Cost Per Year, Not Cost Per Square Metre
For anyone staying put, cost per year of service is more useful. A tiled shower wall carries an upfront cost plus recurring re-grouting, resealing and cleaning products; a panel wall has near-zero maintenance, with no grout to fail and no porous joint to re-seal. Over ten years the gap narrows considerably, which is a stronger case than the per-square-metre headline suggests.
Where the Money Actually Goes Wrong
The commonest budget failure is not overspending on panels but underspending on the three things that make an installation last: adhesive, silicone and substrate preparation. A £209.00 pack fixed with the wrong adhesive, or sealed with decorator's caulk, fails long before the board does.
Pros and Cons of Wet Wall Panels: An Honest Assessment
The pros and cons of wet wall panels come down to speed and moisture resistance versus authenticity and repairability.
Pros:
- Grout-free surface means no scrubbing, no re-grouting, no discoloured joints
- 100% waterproof PVC construction handles direct shower spray and steam
- Installation over existing tiles is possible, avoiding a full strip-out
- Seamless finish across large runs with tongue-and-groove joints
- Warm to the touch compared with ceramic, so less condensation forms
Cons:
- Textured finishes read as convincing at arm's length, not under close inspection
- A deep gouge cannot be polished out the way a tile can be replaced
- Cheap boards telegraph every bump in the substrate beneath them
- Resale buyers may view panels as a cover-up rather than an upgrade
Repairability deserves emphasis: one cracked tile is replaced alone, but one damaged panel generally means replacing the run back to the nearest joint.
Bathroom Wall Panel Installation Cost: What to Expect
Bathroom wall panel installation cost splits into two numbers: the DIY route, where you pay materials and your own weekend, and the fitted route, where labour dominates.
A competent DIYer can clad a standard shower enclosure in a day: measure, cut with a fine-tooth saw, apply adhesive in vertical beads, press the board home, space the joints. The fiddly parts are cutting around pipework and getting the first board truly plumb, because every later board inherits that error. Professional fitting typically takes half a day to a day, depending on substrate making good.
Tile Effect Wall Panels vs Real Tiles: Which Wins?
Tile effect wall panels beat real tiles on installation time, maintenance and moisture resistance; real tiles win on longevity, repairability and resale perception. The answer depends on how long you intend to stay.
Panels go up in a fraction of the time: no adhesive bed to cure, no grout to seal. A tiled shower needs 24 hours before grouting plus sealing time; panels are usable the same day (tiles.org.uk).
Maintenance is the wider gap. Grout is porous: it discolours, harbours mould and needs sealing periodically. A grout-free panel surface wipes clean with a non-abrasive cloth, for anyone who has spent a Saturday with a grout pen, that alone justifies the switch.
Where tiles still win: a well-laid porcelain wall is a permanent fixture that adds perceived value at sale, while panels are durable but not structural, and a surveyor treats them as a cosmetic layer.
Durability, Maintenance and Long-Term Value
A 9mm solid-core PVC board does not rot, swell or delaminate like MDF or timber-based alternatives, a strong argument in a bathroom where humidity never fully drops.
But durability in a wet area is not the panel alone: it is the panel, the substrate beneath it and the seal around it working together. Most long-term problems blamed on panels are problems with one of the other two.
Substrate Preparation: The Part That Decides Everything
A textured panel is a thin, semi-flexible skin that follows whatever is behind it, the most important fact about its long-term performance, and the one most guides skip.
Over plasterboard: The ideal substrate if dry, sound and flat. Damp or blown board telegraphs through the panel, so check for hollow-sounding areas first. In a shower, use moisture-resistant plasterboard with a tanking membrane in a high-spray zone (gov.uk).
Over existing tiles: Popular because it avoids a strip-out, but only works if tiles are firmly bonded and flat. A drummy tile, hollow when tapped, will come loose and take the panel with it. Glossy tiles need a key or primer before adhesive grips; deep or uneven joints can show through a thin panel over time.
Over bare brick or block: These need battening or boarding first. Adhesive alone will not bridge the unevenness, and the panel will follow every course of brickwork.
Over painted walls: Sound, well-bonded paint is usually fine; flaking or distempered paint is not, it releases and the panel comes with it.
A common pattern in failed installations: a panel perfect on day one shows ripples or open joints six to twelve months later. Almost always the substrate moved, the panel did not fail, it reported the failure underneath it.
Structural Integrity Over Time
A solid-core PVC board does not absorb water, support mould growth, or lose strength with repeated wetting and drying. Its dimensional stability keeps tongue-and-groove joints tight when boards are fixed correctly.
Heat and movement compromise that stability: behind a radiator or under sustained high heat, PVC expands and contracts more than at room temperature. Allow a small expansion gap top and bottom, hidden behind trim, and joints stay closed.
Cleaning Without Damaging the Finish
Cleaning is straightforward. Warm water, a soft cloth, and a non-abrasive bathroom cleaner handle everyday marks. Avoid cream cleaners and scouring pads, which dull the textured surface.
Textured finishes need one extra habit: a soft brush or microfibre cloth worked into the grain, because soap residue and hard-water deposits collect there. Do not regularly use solvent-based cleaners or high-concentration bleach, both dull the surface over time (National Infection Prevention and Control Manual).
Repairing a Damaged Panel
This is the question guides never answer and buyers most worry about: a textured panel cannot be invisibly repaired the way a tile can be replaced.
Light scratches: A scuff can often be softened with a colour-matched touch-up pen or matching sealant worked into the mark. Not invisible, but at normal viewing distance it disappears.
Deep gouges or dents: These cannot be polished out, the texture is part of the board, not a coating. The options are to live with it, relocate the board to a less visible position, or replace it.
Replacing a board: Because boards are glued with tongue-and-groove joints, replacing one mid-run means cutting it out carefully and fitting a replacement. Cut along the joint lines, remove the damaged board, clean back the adhesive, fix the new board. It leaves a visible joint line unless done at a natural break.
The mitigation: Buy one spare pack, or keep the original offcuts. A board matching the original batch is the difference between a repair that blends and one that does not.
The Failure Modes, and What Actually Causes Them
The failure modes are predictable, and almost always installation rather than product failures:
- Water behind the panel. Caused by an incomplete silicone bead at the base or around penetrations. Once water tracks behind a board, it has nowhere to drain.
- Peeling edges. Caused by too little adhesive, or by adhesive applied in the wrong pattern. Vertical beads allow air to escape; a solid bed traps it.
- Bubbling. Almost always a substrate problem. Panels do not create bubbles; the surface beneath them does.
- Open joints. Caused by fixing boards rigidly with no allowance for thermal movement, or by a substrate that has moved after installation.
On environmental impact, PVC is not zero-impact, but it is long-lived and low-maintenance, avoiding the repeated chemical cleaning and re-grouting tiles demand. Boards are lightweight, cutting transport emissions versus ceramic, and an undamaged panel can often be reused rather than sent to waste.
Verdict: Who Should Buy Textured Wetwall Panels?
Buy textured wetwall panels if you want a waterproof, grout-free, genuinely good-looking wall without hiring a tiler. Skip them if you are renovating to sell and your buyer expects traditional tiling.
The Kerradeco Stone range makes a convincing case at £209.00 per pack. Five finishes at one price removes the usual upsell trap, the 9mm solid-core build suits a wet area, and 3.186 m² per pack clads a standard shower enclosure with offcuts to spare. At normal viewing distance, Stone Anthracite reads as slate.

The honest caveat is repairability and resale perception. If either matters more than installation speed, tiles remain the safer choice.
The real challenge with any bathroom renovation is not choosing a finish, it is sourcing every component from one place so the job does not stall halfway through. Wetwall Wonders supplies the panels, the adhesives, the silicones and the trims together, so nothing arrives late or mismatched. Browse the Kerradeco Stone range in all five finishes, or explore the wider wall panel sizes from 250mm through to 900mm and the Linerio slatwall options if you want a different look. Get started with Wetwall Wonders and finish the job in a weekend rather than a fortnight.
Frequently Asked Questions
How much do textured wetwall panels cost per square metre?
The Kerradeco Stone range from Wetwall Wonders costs £209.00 per pack. Each pack contains 8 boards covering 3.186 m2, which works out at approximately £65.60 per square metre for the panels alone. You will also need to budget for adhesive, silicone, and trims, which typically add £20 to £40 per square metre depending on the size of your project. For a standard shower enclosure of around 6 m2, expect to spend roughly £400 to £500 on materials.
What are the disadvantages of wet wall panels?
The main drawbacks are the upfront material cost compared to budget ceramic tiles, and the fact that panels can be damaged by sharp impacts, which may require replacing a full board rather than a single tile. However, the grout-free surface and faster installation are significant advantages, particularly in shower enclosures where mould in grout lines is a common problem.
Can you install textured wetwall panels over existing tiles?
Yes, provided the existing tiles are firmly bonded, flat, and free from loose sections or significant unevenness. You will need a suitable high-grip adhesive and may need to abrade glossy tiles first to give the adhesive a key. If tiles are hollow or lifting, remove them before installing panels. Installing over tiles saves the cost and mess of removal, but always check that the added thickness of panels plus adhesive will not interfere with shower screens, door frames, or pipework.
Are textured wetwall panels as durable as traditional ceramic tiles?
Textured PVC panels resist water, steam, and condensation just as well as ceramic tiles, and they will not crack if a heavy object strikes them. The key difference is surface hardness: tiles withstand scuffs and scratches better over decades, while panels can be marked by sharp edges. A well-installed panel system from a quality range is durable, and individual boards can be replaced if damaged without redoing the entire wall.
Do textured wetwall panels require special cleaning products?
No specialist products are needed. A soft cloth or sponge with warm soapy water is enough for routine cleaning. Avoid abrasive scouring pads and solvent-based cleaners, which can dull the textured finish over time. In hard water areas, a diluted limescale remover sprayed on and wiped off will keep stone-effect panels looking sharp. Because there is no grout, you skip the scrubbing that tiled walls demand, which is one of the main reasons homeowners choose panels for shower enclosures.

