
5 Best Waterproof Wall Panel Brands: 2026 Comparison
Table of Contents
- Quick Comparison: Top Waterproof Wall Panel Brands for 2026
- 1. Decorwall Elite Print: Best for Small Bathrooms and Tight Spaces
- 2. Kerradeco Stone: Best for Realistic Stone Textures and Coverage
- 3. Decorwall Maxi Panels: Best for Large, Seamless Wet Room Walls
- 4. Dumawall+ High Gloss: Best for High-Impact, Contemporary Shine
- 5. Decorwall Elegance Ultimo: Best for Hygienic, Grout-Free Tile Effects
- Pros and Cons of Bathroom Wall Panels vs Tiles
- Bathroom Wall Panel Installation Guide: Substrate Prep and Fitting
- Frequently Asked Questions
Last Updated: September 10, 2026
Quick Comparison: Top Waterproof Wall Panel Brands for 2026
The best waterproof wall panel brands in 2026 balance realistic finishes, panel thickness and genuine water-tightness, and the strongest options now come from PVC and SPC systems rather than traditional tile. Wetwall Wonders stocks a full range of these boards, and this guide compares five standout choices, from compact 250mm panels for tight ensuites to 900mm maxi boards for seamless wet rooms. Below, we break down what each brand does best, where it falls short, and how to choose without overspending.
A waterproof wall panel is a rigid, moisture-proof sheet, usually PVC, SPC or laminate, fixed to bathroom walls as a grout-free alternative to ceramic tiles. Because there is no grout to absorb water or harbour mould, panels stay hygienic with a simple wipe-down (the CDC).
| Brand / Range | Panel Size | Price | Best For |
|---|---|---|---|
| Decorwall Elite Print | 2700 x 250 x 8mm | £11.00 | Small bathrooms |
| Kerradeco Stone | 1350 x 295 x 9mm (pack of 8) | £209.00 | Stone textures |
| Decorwall Maxi | 2400 x 900 x 10mm | £54.00 | Wet room walls |
| Dumawall+ High Gloss | 650 x 375 x 5mm (pack of 8) | £3.95 | High-impact shine |
| Decorwall Elegance Ultimo | 2700 x 500 x 8mm | £59.00 | Tile-effect, grout-free |
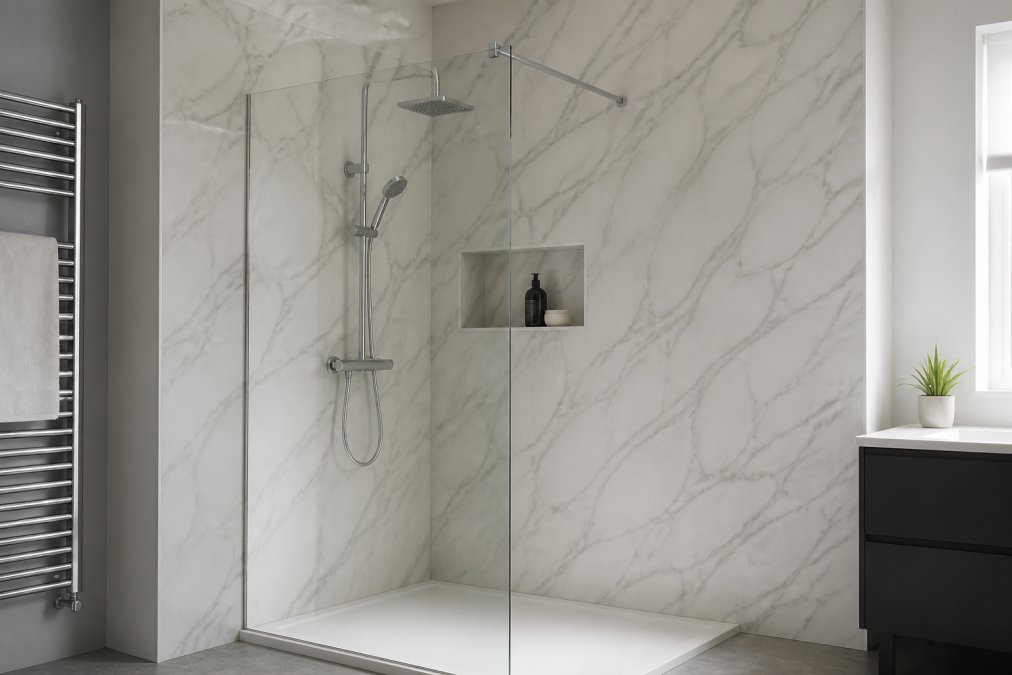
1. Decorwall Elite Print: Best for Small Bathrooms and Tight Spaces
The Decorwall Elite Print in Arctic Grey is the pick for narrow ensuites and awkward corners. At 2700mm x 250mm x 8mm, the slim profile slots into tight spaces where a 900mm board simply will not fit, and the flush-fitting design means fewer visible seams. It is 100% waterproof and needs no grouting, so maintenance is a warm-cloth wipe.

The trade-off is coverage: at 250mm wide, you will fit more boards per wall, so factor in extra trims and adhesive. At £11.00 per panel, though, the cost stays low even on a full refit.
2. Kerradeco Stone: Best for Realistic Stone Textures and Coverage
Kerradeco Stone Grey wins on finish. The premium PVC boards mimic natural stone closely, and each pack of eight 1350mm x 295mm x 9mm panels covers 3.186m², enough for a standard shower enclosure. The 9mm thickness gives a sturdier feel than thinner budget boards.

Where it falls short: the shorter 1350mm length means more horizontal seams on tall walls, so plan your layout carefully. At £209.00 per pack, it suits homeowners who want the stone look without the weight or sealing of real stone.
3. Decorwall Maxi Panels: Best for Large, Seamless Wet Room Walls
For wet rooms, the Decorwall Maxi Panels in Beige Marble are hard to beat. The 2400mm x 900mm x 10mm boards cover a large area with minimal joins, and the tongue and groove design locks together for a water-tight, seamless finish. They are 100% waterproof and backed by a 5-year guarantee (europa.eu).

The 10mm thickness adds rigidity, which matters on larger spans. At £54.00 per panel, a full wet room costs more upfront, but the reduced seam count cuts both fitting time and future leak risk.
4. Dumawall+ High Gloss: Best for High-Impact, Contemporary Shine
Dumawall+ High Gloss Mura delivers a sharp contemporary look. The heavy-duty PVC panels carry a bright, reflective finish and a micro grout line that reads like tile without any crumbly grouting to clean. They are 100% waterproof, UV-resistant and colourfast.
Each pack of eight 650mm x 375mm x 5mm panels covers 1.95m², and the small format makes them easy to handle and transport. The 5mm thickness is the thinnest here, so it flexes more on uneven walls. At £3.95 per pack, it is the cheapest way to test a glossy finish.
5. Decorwall Elegance Ultimo: Best for Hygienic, Grout-Free Tile Effects
The Decorwall Elegance Ultimo Tile Cleveland gives you the tile look with none of the grout. The 2700mm x 500mm x 8mm panels are 100% waterproof and lead-free, and the smooth, pore-free surface leaves nowhere for mould to build. A warm cloth is all you need to keep them clean.
The flush-fitting finish hides joins well, and the 500mm width balances coverage against handling. At £59.00 per panel, it is the strongest choice for anyone who wants a hygienic, tile-effect wall in a bathroom, wet room or kitchen.
Pros and Cons of Bathroom Wall Panels vs Tiles
Most guides compare panels and tiles on looks alone. The decision usually turns on money, time and how the wall behaves over five to ten years, so here is the honest breakdown, including the DIY-versus-professional cost picture that most brand listicles skip.
The cost comparison that actually matters
A like-for-like comparison has to include labour, because that is where tiles pull away from panels.
- Panels, DIY: The boards themselves are the main cost. Slim 250mm boards start around £11.00 each, mid-size tile-effect panels run £54.00-£59.00, and a pack of eight stone-effect boards is around £209.00. Add adhesive, silicone and trims, and a typical shower enclosure is a modest materials-only spend.
- Panels, professional fit: You are paying for a fitter's time, not a tiler's. Because panels are adhesive-fixed and click together, a competent installer covers a shower enclosure in a fraction of the time a tiled job takes, which is why the labour line is materially lower.
- Tiles, professional fit: You pay for tiles, adhesive, grout, spacers, trim and, critically, a tiler's day rate. Tiling is slow, skilled work, and the labour often exceeds the material cost on a standard bathroom.
The practical takeaway: panels win on total installed cost in almost every wet-area refit, and the gap widens the larger the area. Tiles only close it when you are doing a small splashback and already own the tools.
Where panels win
- No grout, no mould trap. A grout-free surface has nowhere for mould to establish, so the wipe-down maintenance routine stays simple for the life of the wall.
- Faster fitting. Adhesive and tongue-and-groove joints mean no mixing, no drying time between courses, and no grouting day.
- Warmer and less brittle. Panels feel warm to the touch and resist the hairline cracking that tiles can suffer when a substrate moves.
- Better on uneven walls. Because panels are fixed over a prepared substrate rather than bedded individually, minor irregularities are easier to manage than with tile.
Where panels fall short
- Fewer bespoke designs. Tile ranges still offer more one-off patterns, mosaics and edge details.
- Patching is harder. A damaged tile can be swapped individually; a damaged panel usually means replacing the whole board, so buy a spare at the time of fitting.
- Substrate still matters. Panels hide a bad wall, they do not fix it, see the installation section below.
Where tiles win
- Design choice and resale familiarity. Buyers recognise tile, and the range of finishes is unmatched.
- Individual replacement. One cracked tile is a small job.
Where tiles fall short
- Grout is the weak point. It discolours, needs sealing, and is the single most common source of mould complaints in wet rooms (the EPA).
- Slower, messier, dearer. Tiling generates dust, takes days, and carries the highest labour cost of the two options.
Bathroom Wall Panel Installation Guide: Substrate Prep and Fitting
This is the section most guides rush. Substrate preparation is where panel installations succeed or fail, and it is the detail that separates a wall that stays watertight for a decade from one that traps moisture behind the boards within a year.
What walls can you panel over?
The short answer is: almost any sound, flat, dry wall, but each substrate has its own rule.
- Plasterboard: Suitable in dry areas and, if moisture-resistant board, in some wet areas. It must be dry, firmly fixed and free of loose paper or crumbling edges. Never panel over damp plasterboard; trapped moisture has nowhere to go.
- Existing tiles: A common and convenient option, provided the tiles are firmly bonded, flat and clean. Loose or hollow tiles must be removed first, and glossy tiles need a key or a suitable primer so the adhesive grips. Build-up is the trade-off, you lose a little room depth at every wall.
- Bare plaster: Must be fully cured. Fresh plaster releases moisture for days, and fixing panels over it traps that moisture against the wall. Fill cracks, remove loose material, and let it dry completely.
- Brick or block: Requires battens or a levelling layer to create a flat, true surface before panels go on.
- Painted walls: Sound paint is usually fine, but flaking or gloss finishes need sanding or priming so the adhesive bonds.
Getting the wall flat and dry
Flatness is not cosmetic, it is structural. Uneven walls create stress points and gaps where water can creep behind a panel. Check with a straight edge, fill hollows, sand high spots, and allow any filler or fresh plaster to dry fully before you start. A wall that is flat, clean and dry is the whole game.
Planning the layout
Before any adhesive is applied, dry-lay the panels and decide where the joins fall. Push seams towards corners, behind fixtures or into low-visibility zones. On tall walls, plan for the panel length you have, shorter boards mean more horizontal seams, so position them deliberately rather than by accident. Mark your starting line with a spirit level; a single out-of-true first panel throws every subsequent board.
Fixing the panels
- Apply adhesive in vertical beads, not a solid bed, so the panel can be pressed flat and any trapped air can escape.
- Press each panel firmly into place and check it is plumb before moving on.
- Lock tongue-and-groove joints fully home, a partially engaged joint is a future leak path.
- Work from your starting line outwards, keeping joints tight and consistent.
- Finish with trims and profiles at edges, corners and the top of the wall for a clean, sealed line.
Sealing, the step that decides everything
Every edge, corner, joint and fixture penetration needs a continuous bead of waterproof silicone. This is where most DIY jobs fail: skipping sealant at the base or around pipework lets water track behind the panel, where it cannot dry out.
DIY or professional?
If your walls are flat, dry and sound, panels are genuinely DIY-friendly, adhesive, a level, a silicone gun and patience are most of the toolkit. Call in a professional if the substrate is uneven, if you are panelling over suspect existing tiles, or if the wall has any damp history. Fixing the wall first is always cheaper than fixing a failed installation later.
Frequently Asked Questions
Are waterproof wall panels better than tiles for a shower?
Waterproof wall panels are 100% water-tight and require no grouting, which eliminates the main cause of mould and black staining in showers. Tiles need regular sealing and grout cleaning to stay hygienic. Panels like Decorwall and Dumawall+ are quicker to fit and easier to wipe down, making them a practical tile alternative for wet rooms and busy bathrooms.
Do waterproof wall panels require professional installation?
Most tongue and groove panels are DIY-friendly. You need a level substrate, adhesive, silicone, and basic tools. Brands like Decorwall Maxi use a click-fit system that one person can handle. If your walls are uneven or you are fitting a large wet room, a professional fitter will save time and ensure a water-tight seal around trays and corners.
How much do waterproof shower panels cost?
Cost varies by brand and panel size. Decorwall Elite Print starts at £11.00 for a 2700mm x 250mm panel, while Kerradeco packs covering 3.186m2 cost £209.00. Decorwall Maxi Panels are £54.00 per board. Factor in adhesive, silicone, and trims. DIY fitting avoids labour costs, but professional installation adds to the total.
Which waterproof wall panel brand is most durable?
Durability depends on thickness and material. Dumawall+ High Gloss panels are solid and UV-resistant. Decorwall Maxi Panels offer a 5-year guarantee and 10mm thickness. Kerradeco boards are 9mm thick with premium PVC. All resist moisture and impact, but thicker panels generally handle heavy daily use better.
Can I install waterproof wall panels over existing tiles?
Yes, if the existing tiles are firmly attached and the surface is flat. You can bond panels directly using a suitable adhesive, which saves removal time and cost. However, uneven or loose tiles must be repaired first. For a guaranteed water-tight finish, check that the substrate is clean and dry before applying adhesive and sealant.
Renovating a bathroom should not mean weeks of grouting and sealing. Wetwall Wonders supplies waterproof wall panels in 250mm, 300mm, 500mm and 900mm widths, alongside the adhesives, silicones and trims that complete a water-tight fit in one order. With finishes from marble effect to high-gloss tile looks, you can match any scheme without chasing parts from three suppliers. Get started with Wetwall Wonders and fit a seamless, low-maintenance wall you can clean with a single cloth.

