
Narrow Wall Panels for Ensuites: A 2026 Guide
Table of Contents
- Why Narrow Wall Panels Suit Ensuite Layouts
- PVC Bathroom Wall Panels vs Tiles: Key Differences
- Choosing the Right Narrow Panel Width for Your Space
- Bathroom Wall Panel Installation Guide: Steps for Success
- Small Ensuite Design Ideas to Maximise the Space
- What It Costs to Panel a Narrow Ensuite
- Common Mistakes to Avoid When Fitting Narrow Panels
- Conclusion
- Frequently Asked Questions
Last Updated: September 8, 2026
Why Narrow Wall Panels Suit Ensuite Layouts
Most ensuites share one defining constraint: a lack of floor space combined with awkward wall geometry. Using narrow wall panels for ensuites solves the fitting puzzle that standard-width boards create, because a 250mm or 300mm format bends around tight corners, boxing-in runs, and window reveals without leaving unsightly cut-offs elsewhere. This guide from Wetwall Wonders explains how to choose, fit, and finish these panels so your small shower room looks intentional rather than improvised.
The technical advantage is straightforward. A narrow wall panel is a moisture-resistant cladding board, typically 8mm thick, designed to cover walls without grout lines. Where a 900mm board might force you to cut 400mm off one side and waste it, a 250mm panel lets you distribute the offcut across multiple seams, hiding the maths of an awkward room. Below, we'll show you exactly how this works in practice, covering widths, installation, costs, and the mistakes that cause panels to fail.
PVC Bathroom Wall Panels vs Tiles: Key Differences
The core decision is whether to tile or panel. PVC bathroom wall panels are a grout-free, waterproof alternative to ceramic tiling, and they win on installation speed and long-term maintenance. A tiled wall demands a flat substrate, adhesive, grout, and sealing, with future cleaning of grout lines built into the job. Panels, by contrast, fix directly to the wall with adhesive and seal at the joints with silicone, giving you a seamless, hygienic surface that wipes clean.
| Factor | PVC Wall Panels | Ceramic Tiles |
|---|---|---|
| Waterproofing | 100% waterproof core | Waterproof only if grout sealed |
| Maintenance | Wipe clean, no grout | Grout lines need scrubbing |
| Installation | DIY-friendly, adhesive fix | Skilled labour, multiple stages |
| Wall prep | Needs flat, sound surface | Needs flat, sound surface |
| Waste on narrow walls | Low with 250mm/300mm | High, tiles cut to fit |
For a compact ensuite, the practical difference is the absence of grout. Grout is porous, and in a wet room or shower enclosure it becomes the first place moisture and mould take hold. Panels remove that failure point entirely, which is why they suit damp, poorly ventilated spaces. The trade-off is impact resistance: tiles are harder and more scratch-resistant, so if you regularly drop heavy objects against the wall, tiling is the tougher option.
Choosing the Right Narrow Panel Width for Your Space
Choosing the correct width is a measurement exercise, not a preference. Measure each wall run and divide it by the panel widths you are considering to see which format produces the fewest sliver cuts. The aim is to avoid any cut narrower than half a panel width, since those look accidental and weaken the seam.
250mm Panels for Tight Corners and Awkward Walls
A 250mm panel is the specialist tool for genuinely tight spaces. It suits boxing-in around pipework, the wall behind a toilet, and runs interrupted by a window or niche, because the narrow format tracks the obstructions closely. At Wetwall Wonders, the Decorwall Elite Print range in 250mm width is a strong fit here, with options like Arctic Grey and Sandstone priced at £11.00 per 2.7m board. The downside is more seams, which means more silicone to keep clean, so reserve 250mm for the walls that need it.


Comparing 250mm vs 300mm vs 500mm Formats
The 300mm format is the balanced middle ground, offering fewer joints than 250mm while still navigating moderate obstructions. A 500mm board is faster to install across long, uninterrupted runs and produces a cleaner, more seamless look, but it wastes more material on complex walls. For most ensuites, a hybrid approach delivers the best result: 300mm or 500mm on the main shower wall, and 250mm on the awkward returns and boxing-in sections.
Bathroom Wall Panel Installation Guide: Steps for Success
A bathroom wall panel installation guide worth following starts with substrate preparation, because adhesive failure is the leading cause of panels lifting. The wall must be clean, dry, and flat; any loose plaster or old adhesive must be removed, and the surface primed if recommended by the adhesive manufacturer. Industry best practice suggests preparing the substrate thoroughly to ensure adhesion. Guidance on surface preparation for wall finishes
- Measure and cut all panels for the wall, marking cut-outs for pipework and fittings.
- Apply installation adhesive in vertical ribbons to the back of the panel, not the wall.
- Press the panel into place and check it with a spirit level before the adhesive sets.
- Work across the wall, fitting tongue-and-groove joints and wiping off excess adhesive.
- Seal every joint, edge, and corner with a mould-resistant silicone sealant.
- Fit trim profiles, end caps, and internal or external corners to finish the edges.
The vertical orientation of panels runs the seams floor to ceiling, which suits narrow walls because it draws the eye upward and reduces horizontal cutting. For a splashback or a half-wall, horizontal installation works, but it requires more panels and creates more joints to seal.
Small Ensuite Design Ideas to Maximise the Space
Light colours and continuous surfaces make a small ensuite feel larger, and narrow panels support this by running clean vertical lines that add perceived height. A light grey or sandstone finish across the shower enclosure and main walls creates a seamless, spa-like backdrop, while a darker slatwall or tile-effect panel on one feature wall adds depth without closing the room in.
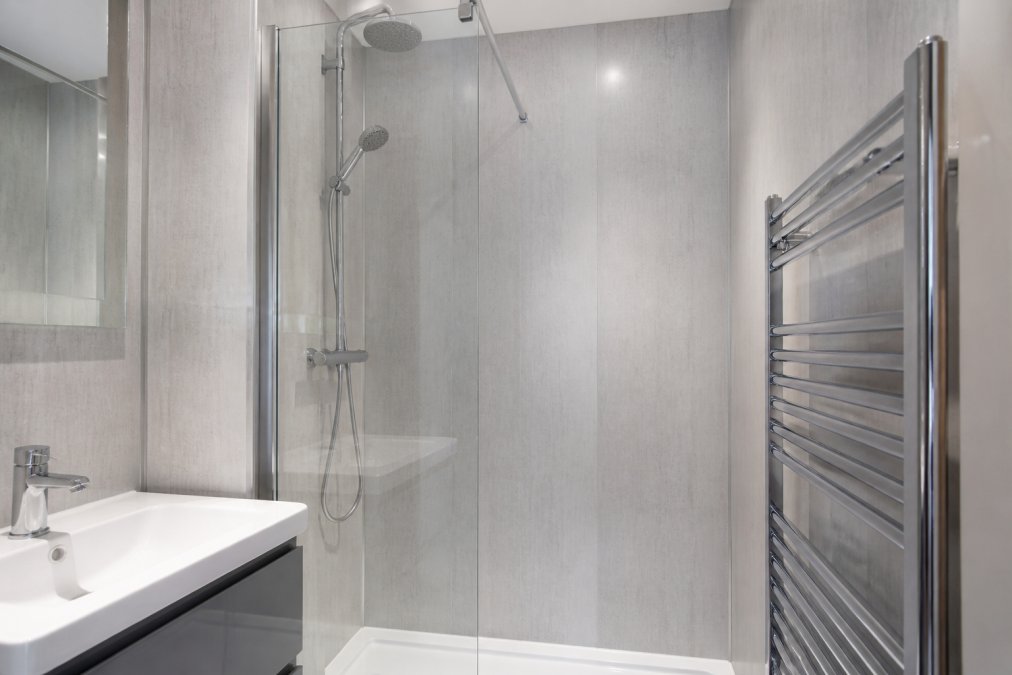
A glass shower screen instead of a curtain keeps the sightline open, and a wall-mounted toilet frees floor space that a concealed cistern unit would otherwise claim. Since narrow panels are space-saving by design, you can use a recessed niche for toiletries rather than a bulky caddy, maintaining the clean, hygienic line of the wall. The goal is to minimise visual clutter so the compact room reads as deliberate.
What It Costs to Panel a Narrow Ensuite
Panelling a narrow ensuite is a cost-effective alternative to tiling once you factor in labour. A typical ensuite wall area sits around 10 to 12 square metres, and the material cost depends on your chosen width and finish. The Decorwall Elite Print 250mm panels at Wetwall Wonders cost £11.00 per board, with each 2.7m board covering 0.675 square metres. You will also need adhesive, silicone sealant, and trim profiles, which are available alongside the panels. Average bathroom renovation costs UK
The real saving is installation time. A competent DIYer can panel an ensuite over a weekend, whereas tiling the same space often takes several days across drying stages. For a homeowner avoiding a paid fitter, that difference is substantial. For a professional, it means more jobs completed per week. The per-square-metre price of panels is comparable to mid-range tiles, but the all-in cost, including adhesive, trims, and labour, tends to favour panelling.
Common Mistakes to Avoid When Fitting Narrow Panels
The most common mistake is ignoring the substrate. Panels are only as flat as the wall behind them, and a bowed wall produces a visible ripple at every seam. Check with a straight edge and correct with plaster or a shim before you cut a single board. A common pitfall is also failing to account for the weight of the panels, which can lead to adhesive failure if not applied correctly.
- Skipping the primer: a dusty or porous wall weakens the adhesive bond.
- Over-tightening joints: forcing tongue-and-groove joints can crack the panel edge.
- Sealing with the wrong silicone: use a mould-resistant sealant rated for wet areas, not a general-purpose one.
- Forgetting expansion: leave a small gap at the top and bottom for thermal movement.
Adhesive failure and moisture ingress are the two failure modes that give panels a bad reputation, and both trace back to preparation. If water gets behind a panel because a joint was sealed poorly, the result is mould and delamination. Fitting panels correctly, with proper sub-surface preparation and full silicone sealing, prevents this entirely. The panels themselves are waterproof; the installation is what keeps water out.
Conclusion
Using narrow wall panels for ensuites is the smart response to awkward geometry, tight corners, and the constant battle against moisture. The 250mm and 300mm formats solve fitting problems that wide boards create, and a grout-free, waterproof surface removes the maintenance headache of tiling. Measure your walls, choose the width that minimises waste, prepare the substrate properly, and seal every joint with silicone.
Wetwall Wonders supplies 250mm Decorwall panels in finishes like Arctic Grey and Palermo, plus the adhesives, silicones, and trim profiles you need. Get started with Wetwall Wonders and panel your ensuite in a weekend.
Frequently Asked Questions
Can I use narrow wall panels in a bathroom with a shower?
Yes. Narrow PVC bathroom wall panels are 100% waterproof and designed for shower enclosures and wet rooms. The tongue-and-groove joint and silicone sealant create a seamless, grout-free surface that prevents moisture reaching the wall behind. For best results, use the recommended installation adhesive and seal all edges with silicone to maintain a damp-proof barrier.
Are narrow wall panels easier to install in small spaces than full-size boards?
Generally, yes. A 2700mm x 250mm panel weighs roughly 1.66kg, making it manageable for one person to handle in a compact ensuite. Narrower widths also allow you to cut panels to fit around pipework and awkward corners with less waste than a full 900mm board. This DIY-friendly format reduces the risk of damaging a large sheet during installation.
What are the downsides of using PVC panels instead of tiles?
The main downsides are impact resistance and colour choice. PVC panels can dent if struck with a hard object, and the range of finishes is smaller than the infinite variety of tiles. You must also prepare the wall surface correctly, as adhesive failure is the most common cause of panels peeling away. For most ensuite applications, the low maintenance and speed of installation outweigh these factors.
Will narrow vertical panels make my small ensuite feel taller?
Yes. Installing panels in a vertical orientation draws the eye upward, creating the illusion of a higher ceiling in a compact room. This makes vertical narrow panels a smart choice for ensuites with standard 2400mm ceilings. Pairing them with a light colour finish and good lighting amplifies the effect further.

