
7 Best Bathroom Wall Panels for Small Showers (2026)
Table of Contents
- Why Wall Panels Beat Tiles in a Small Shower
- What to Look For in Bathroom Wall Panels for Tight Spaces
-
The 7 Best Bathroom Wall Panels for Small Showers
- 1. Decorwall Maxi Panel Gloss White: Best for Brightening a Dark Ensuite
- 2. Decorwall Maxi Panel Gloss Bianco Gold: Best for a Premium Look on a Budget
- 3. Decorwall Maxi Panel Matt Misty Stone: Best for Hiding Water Spots
- 4. Decorwall Maxi Panel Beige Marble: Best for a Warm, Natural Feel
- 5. Decorwall Elite Print Arctic Grey: Best 250mm Panel for Narrow Walls
- 6. Decorwall Elite Print Storm Grey: Best for a Modern Matt Finish
- 7. Decorwall Elegance Mineral Calcite: Best Stone Effect for a Feature Wall
- How to Install Bathroom Wall Panels in a Small Enclosure
- Bathroom Wall Panel Installation Cost per Square Metre
- Small Shower Renovation Ideas: Visual Tricks That Work
- Common Installation Mistakes to Avoid
- Final Verdict: Which Panel Should You Pick?
- Frequently Asked Questions
Last Updated: September 4, 2026
Why Wall Panels Beat Tiles in a Small Shower
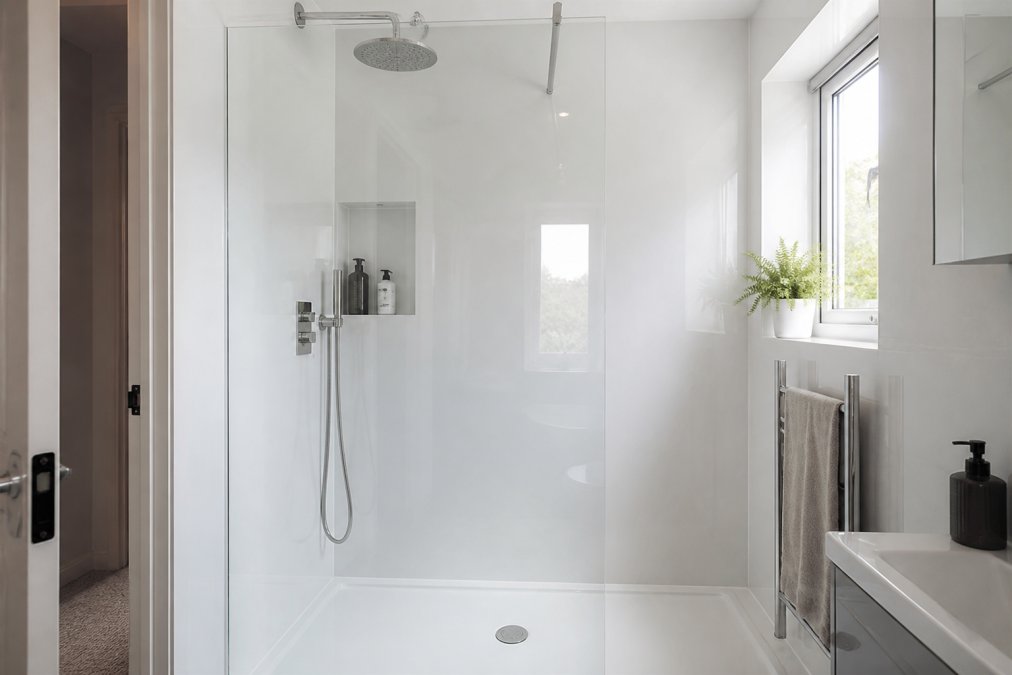
Tiling a compact shower creates grout lines that trap soap scum and demand constant scrubbing. Bathroom wall panels eliminate that with a seamless, waterproof surface that wipes clean in seconds. In tight spaces, fewer joints mean fewer places for moisture to hide and fewer visual interruptions that make a small room feel boxy.
Choosing the best bathroom wall panels for small showers comes down to understanding how panel width, finish, and installation method interact with your specific enclosure dimensions. This guide from Wetwall Wonders breaks down what to look for, and how to install them without calling in a professional fitter.
A common mistake is assuming all panels behave the same in a confined space. A 900mm-wide panel reduces seam count, while a 250mm plank suits walls with awkward dimensions. Match panel geometry to your wall measurements rather than simply picking the nicest colour.
What to Look For in Bathroom Wall Panels for Tight Spaces
Waterproofing is non-negotiable: every panel we recommend is 100% waterproof and suitable for shower enclosures, wet rooms, and bathroom walls. Moisture resistance prevents the bubbling and peeling that occurs when water penetrates a poorly sealed surface.
Panel Width: 250mm vs 300mm vs 900mm
Panel width determines how many seams your shower will have. A 900mm Maxi Panel covers most walls with a single vertical joint. Narrower 250mm and 300mm planks offer flexibility for obstacles like window reveals or pipework, but introduce more joints that need sealing. For an enclosure under 900mm wide, one wide panel per wall is the cleanest solution.
Finish: High-Gloss vs Matt for Light Reflection
High-gloss finishes reflect light and make a dark ensuite feel larger. Matt finishes absorb light but hide water spots and fingerprints better. If your shower has no natural light, prioritise gloss; if you hate wiping water marks, matt is the practical choice.
The 7 Best Bathroom Wall Panels for Small Showers
All seven panels below come from Wetwall Wonders' Decorwall range. Each is 100% waterproof, UK fire rated, and carries a 5-year guarantee. Prices are per panel.
| Panel | Width | Finish | Price | Best For |
|---|---|---|---|---|
| Decorwall Maxi Gloss White | 900mm | Gloss | £59.00 | Brightening a dark ensuite |
| Decorwall Maxi Gloss Bianco Gold | 900mm | Gloss | £59.00 | Premium look on a budget |
| Decorwall Maxi Matt Misty Stone | 900mm | Matt | £59.00 | Hiding water spots |
| Decorwall Maxi Beige Marble | 900mm | Gloss | £54.00 | Warm, natural feel |
| Decorwall Elite Arctic Grey | 250mm | Matt | £11.00 | Narrow walls and awkward dimensions |
| Decorwall Elite Storm Grey | 250mm | Matt | £11.00 | Modern matt finish |
| Decorwall Elegance Calcite | 300mm | Stone effect | £22.00 | Feature wall texture |
1. Decorwall Maxi Panel Gloss White: Best for Brightening a Dark Ensuite
A 900mm-wide gloss white panel reflects light across the enclosure, making a windowless shower feel open and airy (energy.gov). The UV-protected surface resists yellowing, and the 10mm thickness provides solid impact resistance. At £59.00 per 2400mm x 900mm panel, it covers most walls with one or two boards.
2. Decorwall Maxi Panel Gloss Bianco Gold: Best for a Premium Look on a Budget
Subtle gold veining across a white gloss base delivers a designer aesthetic without the price tag of natural stone. The tongue and groove profile creates a seamless joint, so the pattern flows uninterrupted across the wall. Ideal for a hotel-quality ensuite finish.
3. Decorwall Maxi Panel Matt Misty Stone: Best for Hiding Water Spots
Hard water leaves obvious marks on gloss surfaces. The matt finish on this Misty Stone panel scatters light, so limescale and water spots stay invisible between cleans. The stone-effect texture adds depth without overwhelming a small space.
4. Decorwall Maxi Panel Beige Marble: Best for a Warm, Natural Feel
Cool greys dominate modern bathrooms, but a warm beige marble tone softens the space and pairs well with brass or chrome fixtures. At £54.00, this is the most affordable Maxi option while still delivering the full 5-year guarantee and tongue and groove installation.

5. Decorwall Elite Print Arctic Grey: Best 250mm Panel for Narrow Walls
When your shower wall is narrower than 900mm, cutting down a Maxi Panel wastes material and leaves an unfinished edge. The 2700mm x 250mm Elite Print plank in Arctic Grey fits tight spaces with minimal cutting. Weighing just 1.66kg per plank, it is genuinely DIY-friendly.
6. Decorwall Elite Print Storm Grey: Best for a Modern Matt Finish
Storm Grey offers a deeper, more dramatic tone than Arctic Grey while keeping the same 250mm width and flush-fitting design. The matt surface is hygienic and non-porous, so soap scum has nothing to grip onto. Pair it with a gloss feature wall for contrast.
7. Decorwall Elegance Mineral Calcite: Best Stone Effect for a Feature Wall
The Elegance range uses a limestone-core composite that feels more substantial than standard PVC cladding. At 300mm wide and 8mm thick, the Calcite panel creates a convincing stone texture that works brilliantly as a single feature wall behind the shower controls.
How to Install Bathroom Wall Panels in a Small Enclosure
Installing panels in a compact shower is more about logistics than technique. In a space where you can barely turn around, the biggest challenge is manoeuvring a 2.4m-long panel without damaging it or your walls.
The Pre-Fit Dry Run
Before mixing adhesive, do a dry run. Offer each cut panel up to its designated wall. In a small shower, walls are rarely perfectly plumb or square. A dry run reveals where the panel needs shaving to fit flush against an out-of-square corner or where the shower tray lip interferes. Mark the panel with a pencil, then cut it laid flat on a stable work surface. Never trim a panel while holding it in place, this is how edges get chipped and fingers get cut.
Cutting for Obstructions and Tight Corners
A small shower often means a window sill, soap niche, or pipework is within the panel area. For a window reveal, measure its depth and cut the panel to butt up against it, sealing the joint with a trim profile. For a niche, cut the panel to fit around the niche's outer frame rather than cutting an inset hole, this creates a more watertight seal and is easier to execute.
PVC panels are easier to cut than limestone-core composite panels. A fine-tooth saw (10 TPI or higher) is essential. For a perfectly straight cut, score the decorative surface firmly with a sharp utility knife, then snap the panel along the score line, similar to cutting plasterboard. This is far more accurate in a confined space than running a circular saw.
Handling and Manoeuvring in a Small Space
A 900mm x 2400mm panel is unwieldy, and in a small bathroom you often cannot lay it flat on the floor. Cut the panel to length before bringing it into the room: measure floor-to-ceiling height, subtract the 2-3mm expansion gap at each end, and cut in the hallway or another open area. Apply adhesive in vertical beads (about 100mm apart) with the panel leaning against a wall to prevent adhesive getting on your clothes or the floor as you manoeuvre it into place.
Sealing the Bottom Edge
The joint between the panel and the shower tray is the most vulnerable point in a small shower. Rather than just running a bead of silicone, install a PVC trim profile that clips onto the bottom edge of the panel and overlaps the shower tray lip. This creates a mechanical barrier against water, with silicone as a secondary seal, particularly important where the tray is close to the wall and splash-back is likely.
The Solo Installer's Trick
If working alone, a 900mm panel is heavy and awkward to hold while checking it is plumb. Cut two pieces of 2x4 to the exact distance between the panel's top edge and the ceiling. Once the panel is pressed into the adhesive, wedge these props between the panel top and the ceiling to hold it firmly while the adhesive cures, freeing your hands to check the spirit level and adjust position.
Bathroom Wall Panel Installation Cost per Square Metre
The cost of bathroom wall panel installation depends on whether you DIY or hire a fitter. Panels range from £11.00 for a 250mm Elite Print plank to £59.00 for a 900mm Maxi Panel. A typical small shower enclosure measuring roughly 2 metres square requires three to four Maxi Panels, placing material costs between £162.00 and £236.00.

Hiring a professional fitter typically doubles the total cost but guarantees a watertight result. The speed of panel installation, often completed in a single day versus several days for tiling, offsets much of the labour expense. You will also need adhesive, silicone, and trim, which Wetwall Wonders supplies alongside the panels.
Small Shower Renovation Ideas: Visual Tricks That Work
Small shower renovation ideas that work focus on tricking the eye into seeing more space. A high-gloss white panel on the back wall maximises light reflection. Running panels vertically draws the eye upward, emphasising ceiling height. Keeping the colour palette consistent across all walls eliminates visual breaks that fragment the space.
But there is a second, often-overlooked dimension to a small shower renovation: the physical load your walls can bear. This is where many generic guides fall short.
Weight-Bearing Capacity: The Hidden Constraint
A 10mm PVC panel weighs roughly 4-5kg per square metre, so a 900mm x 2400mm panel comes in at around 10-12kg, light enough for any wall structure. However, a limestone-core composite panel (like the Elegance range) is significantly denser: a 300mm x 2400mm plank can weigh 8-10kg, and a full 900mm-wide version would be over 25kg. That weight is not the issue for the wall itself, the adhesive spreads the load, but it is a problem for the installer and the substrate.
In many UK homes built before the 1970s, internal bathroom walls are solid brick or block, which is fine (historicengland.org.uk). But in newer builds and conversions, walls are plasterboard partitions on timber studs. A 25kg panel plus adhesive is a substantial point load on a single stud if not properly supported. The risk is not the wall collapsing; it is the plasterboard flexing over time, which can crack the adhesive bond and cause the panel to bow or joints to open.
Visual Expansion Techniques That Go Beyond Gloss
Beyond the standard 'gloss reflects light' advice, specific pattern and colour strategies make a small footprint feel larger:
- Horizontal veining on a large-format panel: A marble-effect panel with horizontal veining draws the eye across the wall, making a narrow shower feel wider. This works better than vertical veining, which can make a small, tall space feel like a lift shaft.
- A single dark feature wall: In a very small shower, a dark matt panel on the wall opposite the entrance can create a sense of depth. The dark surface recedes visually, making the space feel longer than it is. Pair it with gloss white on the adjacent walls to maintain brightness.
- Continuous floor-to-ceiling panels: Avoid cutting panels to stop at a dado rail or mid-height point. A continuous run from the shower tray to the ceiling eliminates horizontal lines that visually chop the room in half and make the ceiling feel lower.
The 'Less is More' Principle for Fixtures
In a small shower, the wall panel is the dominant visual element. A busy, heavily patterned panel will fight with the shower head, controls, and shelving for attention. The most effective renovations use a plain or subtly textured panel on the main walls and reserve any bold pattern for a single, small feature area, such as the recess behind the controls, creating a focal point without overwhelming the senses.
Sustainability Considerations for Small Showers
PVC panels are durable and long-lasting, which is a sustainability positive, but PVC production has a higher environmental footprint than some alternatives (the EPA). If this is a concern, look for panels with high recycled content or those that are fully recyclable at end of life. Some manufacturers now offer panels with a polypropylene core, which is lighter and has a lower carbon footprint than PVC.
:::takeaway For a small shower, prioritise wide 900mm panels to minimise seams, choose gloss finishes to amplify light, and always use mould-resistant silicone at every joint to keep moisture out. But before you buy, check the weight of the panel against your wall construction, a heavy composite panel on a flimsy stud wall is a recipe for future problems.
Common Installation Mistakes to Avoid
The most frequent error is skipping substrate preparation, panels installed over damp or uneven walls will fail within months. Another mistake is over-tightening the tongue and groove joint, which can bow the panel and create a gap at the seam.
Failing to leave an expansion gap at the top and bottom of each panel is another common problem, PVC expands and contracts with temperature changes, and without a gap, panels can buckle. Finally, never use standard bathroom sealant where the panel meets the shower tray; use a dedicated mould-resistant silicone and allow it to cure fully before exposing it to water.
Final Verdict: Which Panel Should You Pick?
For most small showers, the Decorwall Maxi Panel Gloss White is the best choice because the 900mm width minimises seams and the gloss finish maximises light. If water spots are your main irritation, choose the Matt Misty Stone instead. Narrow or awkward walls call for the 250mm Elite Print planks, which cut cleanly and fit tight dimensions.

The best bathroom wall panels for small showers share one trait: they eliminate the maintenance burden of grout while creating a seamless, waterproof barrier. Every Decorwall panel recommended here delivers that with a 5-year guarantee and straightforward tongue and groove installation.
Frequently Asked Questions
Are PVC or composite panels better for small shower enclosures?
For most small enclosures, PVC panels are the practical choice. They are lightweight, easy to cut with standard tools, and simple for a confident DIYer to fit. Composite panels with a limestone core are denser and more impact-resistant, but they weigh more and demand a perfectly flat substrate. In a compact space where you may be working around pipework and uneven walls, 8mm or 10mm PVC panels like the Decorwall Maxi range are easier to handle and less likely to cause fitting headaches.
Does panelling make a small bathroom look bigger?
Yes, if you choose the right finish. High-gloss panels reflect light, which makes a small shower feel more open. A large-format panel with minimal visible joints also removes the visual clutter of grout lines, creating a cleaner, uninterrupted surface. Stick to light colours like white, beige marble or soft grey, and avoid busy patterns that can overwhelm a compact space. The Decorwall Gloss White or Bianco Gold panels are strong options for maximising light reflection in a tight enclosure.
What are the downsides of shower wall panels?
The main downsides are the need for a flat, sound substrate and the fact that panels can be damaged by impact, though they are generally durable. Unlike tiles, a deep scratch in a panel is difficult to repair invisibly. You also need to seal joints and edges properly with a quality sealant to prevent water getting behind the boards. Costs can be higher than basic ceramic tiles per square metre, but you save on grout, adhesive and labour if you fit them yourself.
How much does it cost to install bathroom wall panels in a small shower?
For a standard small enclosure, expect to pay between £100 and £250 for the panels themselves, depending on the finish and size you choose. For example, a Decorwall Maxi Panel at £54 to £59 covers 2.16 square metres, so a typical shower with three walls may need two or three panels. If you hire a professional fitter, labour typically adds £150 to £300. DIY installation costs roughly £30 to £50 for adhesive, sealant and trim, making it a significantly cheaper route.
Choosing the right panels for a compact shower enclosure comes down to width, finish, and honest assessment of your DIY skill level. Wetwall Wonders stocks the full Decorwall range alongside the adhesives, silicones, and trims needed to complete the job in one order, so you will not be chasing supplies from multiple suppliers mid-installation. Get started with Wetwall Wonders and transform your small shower into a low-maintenance, waterproof space this weekend.
This article was written using GrandRanker

