
How to Cut Shower Wall Panels: A Step-by-Step Guide
Table of Contents
- What You'll Need Before Cutting Shower Wall Panels
- How to Measure Shower Wall Panels Accurately
- Best Saw for PVC Wall Panels: Choosing Your Cutting Tool
- How to Cut Shower Panels Without Chipping: Technique and Setup
- Step-by-Step Cutting Instructions for Shower Wall Panels
- Post-Cut Finishing and Edge Treatment
- Common Cutting Mistakes and How to Avoid Them
- Conclusion
Last Updated: August 16, 2026
What You'll Need Before Cutting Shower Wall Panels
Gather the right equipment before starting. You'll need a measuring tool (tape measure or t-square), pencil or marker, cutting tool, stable work surface, and clamps to keep the workpiece steady.
Safety equipment is essential: safety goggles protect your eyes from dust and fragments, a dust mask prevents inhalation of PVC particles, and work gloves protect your hands from sharp edges. If using power tools, wear hearing protection.
For finishing, keep 120-150 grit sandpaper on hand to smooth rough edges after cutting. Wetwall Wonders stocks Decorwall Panel Adhesive Pro (£9.00) and Decorwall Megabond Adhesive (£9.00) for bonding panels, and GP200 General Purpose Silicone Sealant (£24.00 for a pack of three) for sealing joints and edges.


How to Measure Shower Wall Panels Accurately
Accurate measurement determines success or failure. Measure the space where panels will go at least three points vertically and three horizontally, as walls are rarely perfectly square. Write everything down.
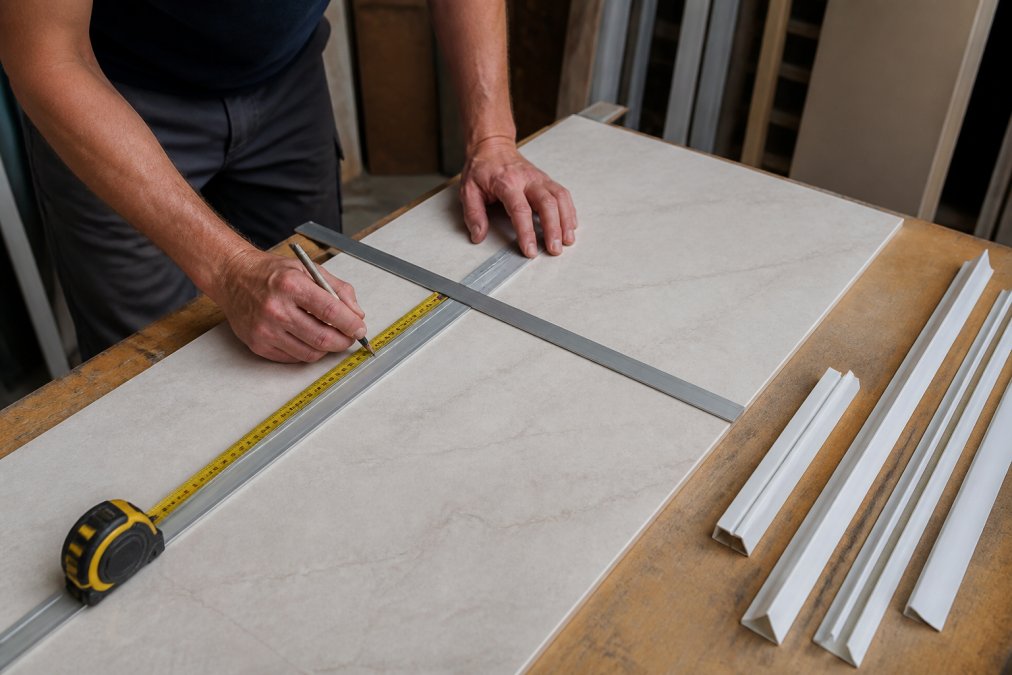
Transfer measurements to the panel using a pencil and straight edge or t-square. For straight cuts, use a t-square clamped to the panel to ensure perpendicular lines. For pipe holes or outlet cutouts, measure carefully from reference points both horizontally and vertically. Double-check these measurements before cutting.
Best Saw for PVC Wall Panels: Choosing Your Cutting Tool
The right cutting tool depends on the type of cut and your comfort level with power tools.
Fine-tooth handsaw for manual cutting
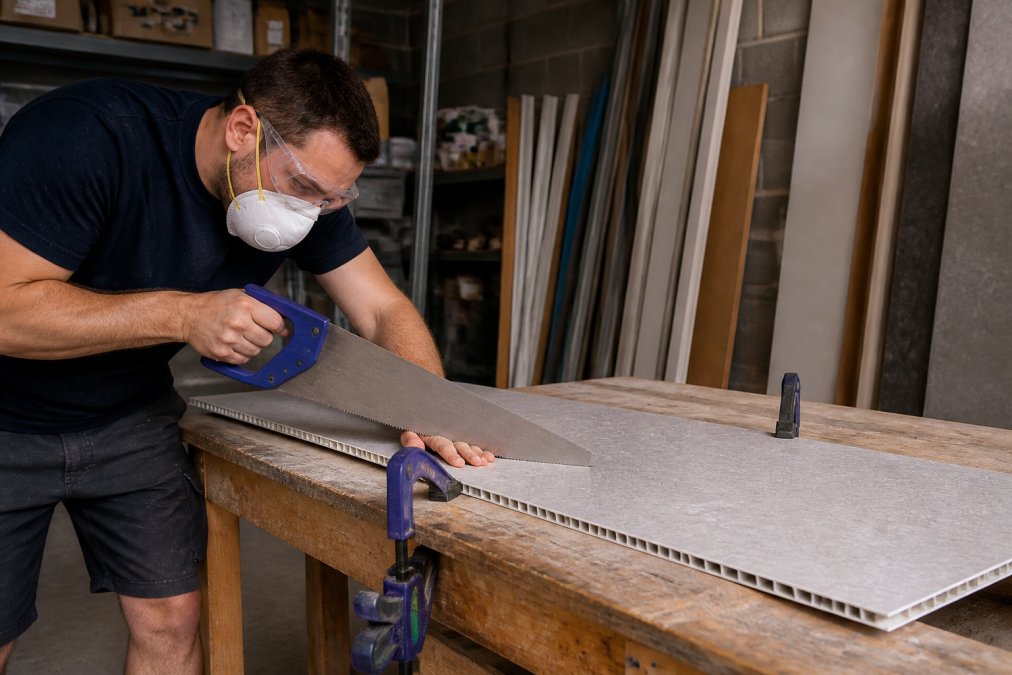
A fine-tooth handsaw (10-12 teeth per inch) cuts cleanly through PVC without chipping. Position the panel on a stable surface with the decorative side facing up and clamp it securely. Use light pressure and let the saw do the work; aggressive pressure causes binding and rough edges. Handsaws are ideal for straight cuts and smaller jobs, though they're slower than power tools.
Jigsaw for curved cuts and pipe holes
A jigsaw excels at curves and circular cutouts for pipes. Mark the hole diameter, drill a pilot hole large enough for the blade, then cut around the marked circle, keeping the blade perpendicular to the panel. Jigsaws produce more dust and noise than handsaws, so wear a dust mask and hearing protection.
Circular saw for straight, efficient cuts
A circular saw cuts straight lines quickly and cleanly. Set the blade depth to cut through the panel with about 5mm clearance below to prevent binding. Clamp the panel securely and use a straight edge guide to keep the cut true. Circular saws produce significant dust and noise; proper dust management and hearing protection are essential.
How to Cut Shower Panels Without Chipping: Technique and Setup
Chipping happens when the blade tears the decorative surface as it exits the cut. Prevention requires proper technique and the right blade.
Positioning your panel on a stable surface
Stability is essential. Position the panel on a workbench with the decorative side facing up and clamp it on both sides of the cut line so there's no flex. For a jigsaw, cutting from the decorative side generally produces cleaner edges. For a circular saw or handsaw, the blade exits from the bottom, so chipping occurs on the underside.
Marking lines with precision
Use a pencil rather than a pen for marking lines. For straight cuts, use a t-square or straight edge. Some cutters score the surface lightly with a utility knife along the marked line before sawing, which helps the blade follow the line and reduces chipping.
Score and snap method for straight edges
For straight cuts parallel to panel edges, score along the marked line with a utility knife using firm, controlled pressure. Make multiple passes to create a deep groove. Clamp the panel at the score line with the scored side facing up and apply downward pressure on both sides. The panel should snap cleanly along the scored line. This method produces very clean edges with minimal chipping and requires no power tools.
Step-by-Step Cutting Instructions for Shower Wall Panels
Step 1: Clamp the workpiece securely
Position your panel on a stable work surface. Clamp it on both sides of where you'll cut, leaving the cut line accessible. Tighten clamps firmly so the panel doesn't shift. For a circular saw, use a straight edge as a guide clamped along your marked cut line.
Step 2: Cut along marked lines with controlled pressure
Position yourself comfortably for your chosen tool. For a handsaw, stand at a slight angle to the cutting direction for better control. Begin with light strokes to establish the blade in the marked line, then use full-length strokes with steady, moderate pressure.
For a jigsaw, start with the blade off the surface, then lower it into the cut. Move smoothly along the marked line without forcing the blade. For a circular saw, let the blade reach full speed before guiding it along the straight edge with steady forward pressure.
Step 3: Make pipe holes using a jigsaw
Mark the hole location and diameter carefully from reference edges. Drill a pilot hole slightly larger than the jigsaw blade inside the marked circle. Insert the jigsaw blade and cut slowly around the marked circle, keeping the blade perpendicular to the panel. Smooth the edge with sandpaper once complete.
Post-Cut Finishing and Edge Treatment
After cutting, sand the edges lightly with 120-150 grit sandpaper to remove burrs or rough spots. Sand in one direction rather than back and forth. For visible edges, sand thoroughly and consider using a small file to smooth remaining roughness.
Sand the interior edge of pipe holes as well to prevent sharp edges from damaging seals. For edges that will be sealed with silicone, light sanding helps silicone adhere better. After sanding, wipe cut edges with a damp cloth to remove dust before applying adhesive or silicone.
Common Cutting Mistakes and How to Avoid Them
Measuring from the wrong reference point. Measure from the actual installation point, accounting for any overlap or trim that will cover edges.
Cutting with a dull blade. A dull blade requires more pressure, creates rough edges, and chips the decorative surface. Replace or sharpen blades regularly.
Clamping too close to the cut line. Position clamps at least 100mm away from the cut line on both sides to avoid interference and chipping.
Ignoring the decorative side. Position cuts so any chipping occurs on the back or hidden edge, not on the visible decorative surface.
Not accounting for panel thickness. Hollow-core panels (5-8mm) cut easily with hand tools. Solid or reinforced panels (10mm or thicker) benefit from power tools.
Rushing the cut. A cut that takes five minutes carefully is far better than a rushed cut that ruins the panel.
Conclusion
Cutting shower wall panels correctly transforms a potentially frustrating task into a straightforward one. Proper measurement, the right tool for your cut type, stable setup, and controlled technique deliver clean edges and panels that fit perfectly.
When you're ready to install your cut panels, Wetwall Wonders provides everything you need. Our Decorwall Panel Adhesive Pro bonds panels securely, and our GP200 General Purpose Silicone Sealant seals joints and edges against moisture. We stock comprehensive panel sizes and styles, including Dumawall tile effects and Linerio slatwall options. Get started with Wetwall Wonders and complete your bathroom renovation with panels designed to last.
Frequently Asked Questions
Can you cut shower wall panels to size?
Yes, shower wall panels can be cut to size using the right tools and techniques. Most PVC panels, including hollow core and laminate varieties, can be trimmed with a fine-tooth handsaw, jigsaw, or circular saw. Measure twice, mark your cutting lines clearly, and support the panel on a stable surface to ensure a clean cut. Always wear safety goggles and a dust mask when cutting.
What is the best tool to cut wall panels?
The best tool depends on your cut type. For straight edges, a fine-tooth handsaw or circular saw works well. For curved cuts or holes, use a jigsaw. A Stanley knife can score panel faces for the score-and-snap method on thinner panels. Circular saws offer the fastest results but require more experience. Handsaws provide better control for detailed work and are safer for beginners.
Do I need to seal the edges after cutting shower panels?
Yes, sealing cut edges is essential to prevent water infiltration and mold growth. After cutting, apply silicone sealant to exposed edges, particularly around the decorative side and joints. Use a quality sealant like GP200 General Purpose Silicone Sealant to create a waterproof barrier. This step protects hollow core panels from water damage and ensures your installation remains durable for years.
How do I cut holes for shower pipes in wall panels?
Use a jigsaw to cut holes for pipes. Mark the hole location using a tape measure, then drill a pilot hole. Insert the jigsaw blade and cut carefully around the marked circle, maintaining steady pressure. For larger diameter holes, consider using a hole saw attachment on a power drill for precision. Always measure from the same reference point to ensure accuracy, and wear safety goggles during the process.
This article was written using GrandRanker

