
Best Waterproof Adhesive for Shower Panels: 2026 Guide
Table of Contents
- Why Waterproof Adhesive Matters for Shower Panel Installation
- Surface Preparation for Bathroom Wall Panels
- Top Waterproof Adhesives for Shower Panels
- How to Install Shower Wall Panels with Adhesive
- Curing Time for Shower Panel Adhesive
- Adhesive Compatibility with Panel Materials
- Preventing Mould and Water Damage Behind Panels
- Common Mistakes When Installing Shower Panel Adhesive
Last Updated: August 15, 2026
Why Waterproof Adhesive Matters for Shower Panel Installation
Installing shower panels without proper waterproofing leads to mould, structural damage, and costly repairs within months. The best waterproof adhesive for shower panels creates a moisture barrier that keeps water in the shower tray, not behind your walls. Poor adhesive choices result in panel failure, mould growth, and water damage that spreads beyond the bathroom. A quality waterproof adhesive bonds panels securely whilst resisting moisture infiltration, mould colonisation, and thermal expansion from daily temperature swings in humid bathrooms.
At Wetwall Wonders, we've seen countless installations fail due to wrong adhesive selection or skipped surface preparation. The difference between a shower lasting 15 years and one failing in 3 comes down to two things: the adhesive you choose and how you apply it.
Surface Preparation for Bathroom Wall Panels
Surface preparation determines whether your adhesive bonds properly or fails within months. Remove all loose material: scrape off old tiles, sand down flaking paint, and strip wallpaper. The substrate must be solid, clean, and dry. If installing over existing tiles, rough up the surface with coarse sandpaper (80-120 grit) to break the gloss and improve mechanical grip.
Degreasing is critical. Bathroom walls accumulate soap residue, body oils, and mildew that create an invisible barrier between adhesive and substrate. Use a degreasing cleaner or white vinegar solution, then rinse thoroughly and allow to dry completely. Even damp walls will cause adhesive failure.
For glossy tiles, oil-based paint, or porous materials, consider a primer to fill micro-voids and improve adhesive grip. Check the wall for plumb and flatness. Large deviations (more than 5mm over 2 metres) may require shimming or wall preparation to prevent gaps and uneven stress distribution that weakens adhesive bonds.
Top Waterproof Adhesives for Shower Panels
Decorwall Panel Adhesive Pro: Fast-Setting Water-Based Bond
Decorwall Panel Adhesive Pro is purpose-built for bathroom panel installation. This water-based adhesive delivers initial grab strength in 1 hour, allowing same-day positioning and sealing. It cures fully in 24 hours whilst maintaining flexibility to accommodate substrate movement and thermal expansion. It works on insulated boards, trim, cornices, and standard drywall, making it versatile for various bathroom configurations.
The white colour blends seamlessly with bathroom panels, hiding excess squeeze-out. Application is straightforward: apply beads across the panel back, press firmly, and hold for 60 seconds. The adhesive is solvent-free and low VOC, which matters in small ensuites with limited ventilation. For standard installations in well-ventilated bathrooms, Decorwall Panel Adhesive Pro at £9.00 per 310ml cartridge is excellent value.
Decorwall Megabond Adhesive: Hybrid Polymer Strength
Decorwall Megabond Adhesive uses hybrid polymer technology to bond a wider range of materials: glass, marble, brick, acrylic, and PVC panels. Its standout feature is the ability to cure under damp conditions. Whilst water-based adhesives struggle in humid environments, Megabond maintains bond strength even if moisture is present during curing. This matters in bathrooms where humidity spikes during showers before ventilation kicks in.
Hybrid polymers offer superior waterproofing compared to pure water-based formulas, preventing moisture migration behind panels and the delamination that occurs when water seeps between panel and substrate. Application is similar to water-based adhesives: bead application, firm pressure, and 24-hour full cure. At £9.00 per 295ml cartridge, it costs the same as Decorwall Panel Adhesive Pro but delivers higher performance in challenging conditions.
GP200 General Purpose Silicone Sealant: Mould-Resistant Protection
GP200 is a multi-purpose, high-modulus silicone with built-in fungicide, specifically formulated for wet areas. The fungicide prevents mould and mildew colonisation along joints where moisture accumulates. Panel joints are where water infiltration begins, so proper sealing is crucial.
GP200 cures quickly and remains permanently flexible, accommodating movement as panels expand and contract with temperature changes. It bonds well to glass, glazed ceramic, acrylic, and most plastics. A pack of 3 cartridges costs £24.00, roughly £8.00 per cartridge. Application requires a caulking gun and a steady hand. Run a neat bead along all panel joints, smooth with a wet finger, and allow 24 hours for full cure before water exposure.
How to Install Shower Wall Panels with Adhesive
Step 1: Prepare and Degrease the Substrate
Strip the wall back to a clean, solid surface. If covering existing tiles, leave them in place if firmly bonded. Rough them up with 80-grit sandpaper to break the gloss and improve mechanical grip. If tiles are loose or crumbling, remove them completely and repair any damage to the underlying wall.
Degrease thoroughly using a bathroom cleaner or white vinegar solution, scrubbing with a stiff brush. Rinse multiple times until water runs clear. Allow the wall to dry completely, at least 4 hours in normal conditions, longer in high-humidity bathrooms. Check the wall for plumb using a spirit level. If the wall leans more than 5mm over 2 metres, consider shimming behind panels or using a skim coat of filler.
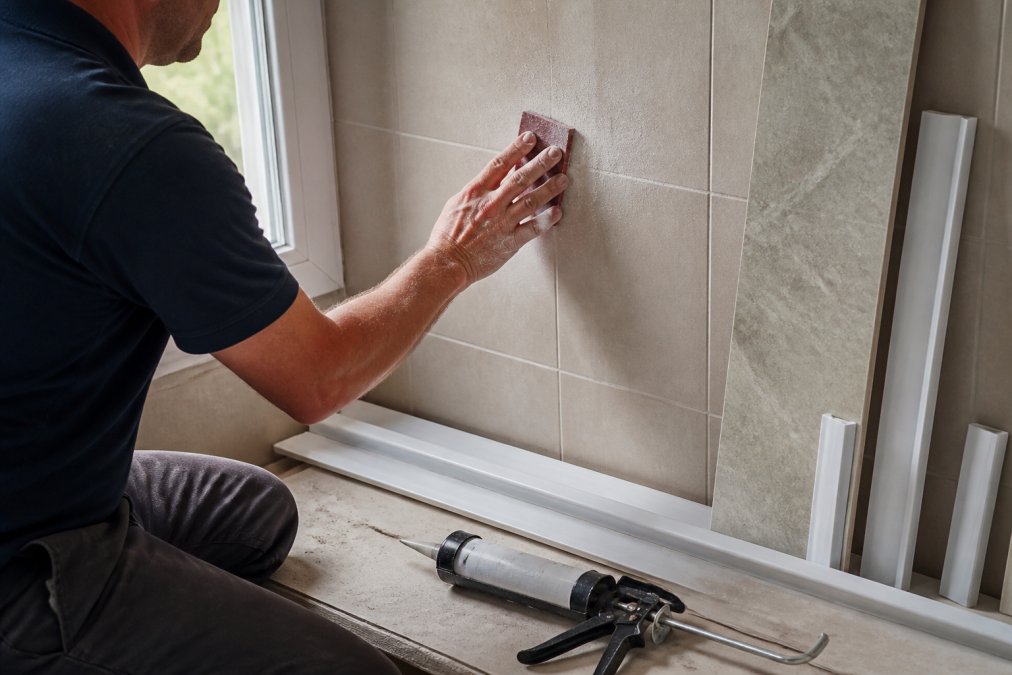
Step 2: Apply Adhesive Using Bead Application
Load your caulking gun with the chosen adhesive cartridge. Cut the nozzle at a 45-degree angle to create a bead roughly 10mm in diameter. Apply adhesive in vertical beads spaced approximately 150mm apart across the entire panel back. Do not apply a continuous line, as this traps air and creates voids that weaken the bond. Use staggered beads in a checkerboard pattern so pressure is distributed evenly when the panel is pressed into place.
Step 3: Position Panels and Apply Pressure
Position the panel against the wall, starting at the top and working downward. Press firmly as you go. The initial grab strength is sufficient to support panel weight if you press properly. Apply firm, even pressure across the entire panel surface for at least 60 seconds.
Check for plumb as you install each panel using a spirit level. Ensure joints are tight and even. Gaps wider than 3mm will be visible and harder to seal effectively. Stagger panels vertically if possible to avoid continuous vertical joints that can act as water pathways.
Step 4: Seal Joints with Silicone
Once adhesive has cured (typically 24 hours), seal all panel joints with silicone sealant. Load a caulking gun with GP200 or equivalent silicone, cut the nozzle at a 45-degree angle, and run a neat bead along each vertical and horizontal joint. Smooth the bead with a wet finger or silicone tool, working from top to bottom. Allow 24 hours for full cure before exposing to water.

Curing Time for Shower Panel Adhesive
Initial grab is the time required for the adhesive to develop enough strength to support panel weight without slipping. For Decorwall Panel Adhesive Pro, this is 1 hour. During this window, you can position panels and apply pressure. Initial grab allows same-day installation.

Full cure is when the adhesive reaches maximum strength and water resistance, typically 24 hours for water-based adhesives and hybrid polymers. During the cure period, avoid exposing panels to running water or heavy moisture. In a well-ventilated bathroom, 24 hours is usually sufficient. In poorly ventilated spaces, allow an extra 12-24 hours before taking showers.
Temperature and humidity affect cure time. Cold bathrooms (below 10°C) cure slower. If installing in winter or poorly ventilated spaces, add 25% to the stated cure time. Do not rush this. Premature water exposure causes adhesive failure and panel delamination.
Adhesive Compatibility with Panel Materials
PVC panels are the most common choice for shower installations. They're lightweight, durable, and water-resistant. PVC bonds well with both water-based and hybrid polymer adhesives. Ensure the PVC surface is clean and slightly roughened, as PVC is naturally slippery.
Acrylic panels require careful adhesive selection. Acrylic is sensitive to certain chemicals and can crack if incompatible solvents are used. Water-based adhesives and hybrid polymers are safe choices. Avoid solvent-based adhesives or those containing acetone.
Glass panels bond well with hybrid polymer adhesives and silicone sealants. Glass is non-porous and requires mechanical grip from a textured surface. Ensure it's clean and dry before application.
Composite and fibre-cement boards are more porous and bond well with both water-based and hybrid adhesives. If they've been exposed to water, seal or prime them before adhesive application.
When in doubt, test the adhesive on a scrap of your panel material before full installation.
Preventing Mould and Water Damage Behind Panels
Mould behind shower panels develops when water seeps behind panels and sits in the gap between panel and substrate, creating a dark, damp environment where mould thrives.
Prevention starts with proper adhesive selection. Waterproof adhesives that resist moisture penetration are your first line of defence. The second line is silicone sealant. All panel joints must be sealed with a mould-resistant sealant like GP200, which contains fungicide. Run sealant along all vertical and horizontal joints, paying particular attention to corners and edges where water collects.
Ventilation matters significantly. A well-ventilated bathroom reduces humidity and dries residual moisture quickly. Mould requires sustained dampness to establish. If your bathroom is poorly ventilated, consider installing an extractor fan before installing panels.
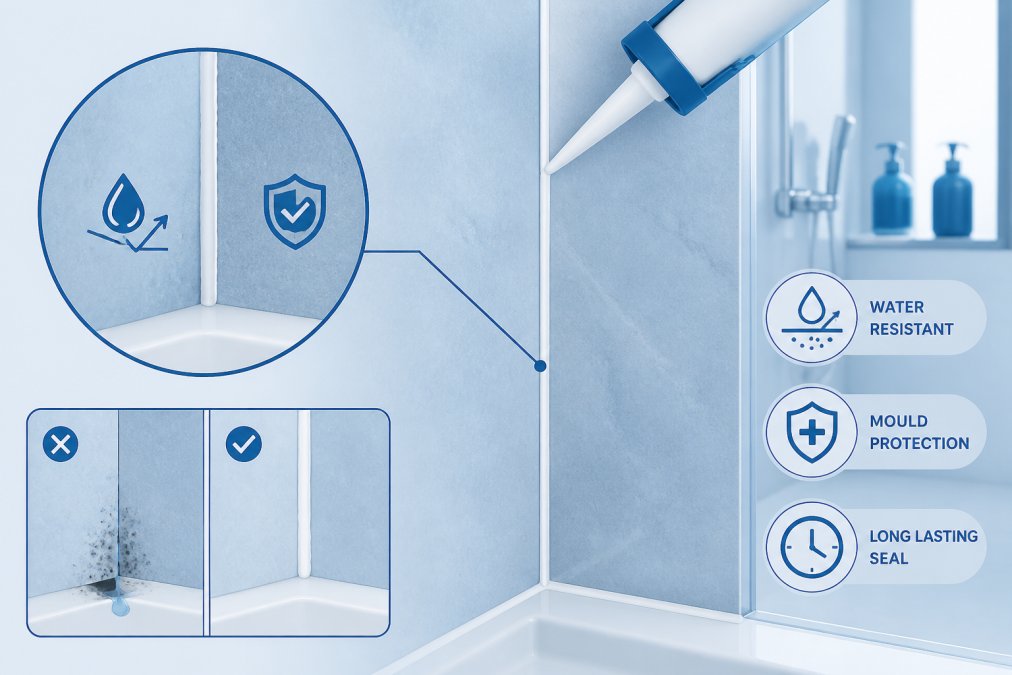
Inspect panels regularly, annually is reasonable. Look for signs of water staining, discolouration, or soft spots suggesting water infiltration. If you spot early signs of mould or water damage, remove affected panels, dry the substrate thoroughly, treat any mould with fungicide, and reinstall with fresh adhesive and sealant.
Common Mistakes When Installing Shower Panel Adhesive
Skipping surface preparation is the most common mistake. Installers rush to apply adhesive without properly cleaning and roughening the substrate, resulting in poor adhesion and early failure. Spend 2-3 hours on surface prep.
Using the wrong adhesive type is equally costly. Applying silicone sealant as panel adhesive or using general-purpose construction adhesive leads to panel sagging, joint failure, and water infiltration. Match the adhesive to the application.
Applying adhesive in continuous lines instead of beads traps air and creates voids that weaken the bond. Use spaced beads roughly 150mm apart.
Insufficient pressure during installation leaves gaps between panel and substrate. Press firmly for at least 60 seconds to ensure good contact and maximum adhesive transfer.
Exposing panels to water before full cure weakens the bond and can cause panel failure. Plan your installation to allow at least 48 hours before showering.
Neglecting to seal joints leaves water pathways behind panels. Every joint must be sealed with mould-resistant silicone.
Installing over damp substrates prevents proper adhesive cure and creates an environment where mould establishes quickly. Ensure the wall is completely dry before applying adhesive.
Choosing the best waterproof adhesive for shower panels depends on your specific substrate, climate, and bathroom conditions. For most installations, Decorwall Panel Adhesive Pro offers excellent speed and performance at competitive cost. For challenging conditions or uncertain substrate compatibility, Decorwall Megabond provides extra insurance. Pair either with GP200 silicone sealant to create a complete waterproofing system that prevents mould and water damage for years.

Wetwall Wonders supplies all three products alongside a complete range of shower panels and installation accessories. Starting with quality adhesive, proper surface preparation, and thorough sealing sets the foundation for a bathroom renovation that lasts. The difference between a shower that fails in 3 years and one that performs flawlessly for 15 comes down to these fundamentals.
Frequently Asked Questions
What is the best waterproof adhesive for shower panels?
The best waterproof adhesive depends on your panel type and installation location. For internal bathroom use, Decorwall Panel Adhesive Pro offers fast initial grab (1 hour) and complete curing in 24 hours at £9.00 per 310ml cartridge. For hybrid strength on challenging substrates like glass or marble, Decorwall Megabond Adhesive (£9.00 for 295ml) provides polymer-based bonding that sets under moisture. Pair either adhesive with GP200 General Purpose Silicone Sealant (£24.00 for a 3-pack) to seal joints and prevent water ingress, ensuring long-term mould resistance.
How long does shower panel adhesive take to cure?
Curing time varies by product type. Decorwall Panel Adhesive Pro reaches initial grab strength in 1 hour, allowing you to position panels safely, with full cure in 24 hours. This means you can apply silicone sealant the following day. GP200 Silicone Sealant cures faster, typically setting within 24-48 hours depending on humidity and temperature. Never expose newly installed panels to water spray or steam before full cure is complete, as moisture can compromise the adhesive bond and create gaps where water penetrates behind panels.
Do I need to prepare the wall surface before applying adhesive?
Yes, surface preparation is essential for adhesive success. Remove old tiles, paint, or wallpaper completely, then degrease the substrate with a suitable cleaner to remove soap residue, dust, and oils. Sand rough surfaces lightly to create a stable base. Ensure the wall is dry before adhesive application; moisture traps air bubbles and weakens bonding strength. For PVC or acrylic panels, check that the substrate is flat within 3mm over 2 metres, high spots prevent full adhesive contact and cause panel rocking or water seepage around edges.
Can I use standard silicone instead of waterproof adhesive for shower panels?
No. Standard silicone alone is not suitable for holding panels in place; it lacks the structural bonding strength of panel adhesive and will fail under panel weight and thermal expansion stress. However, silicone is essential as a secondary step: use waterproof adhesive (such as Decorwall Panel Adhesive Pro or Megabond) to bond panels to the substrate, then apply GP200 Silicone Sealant to all joints and edges. This dual approach provides both structural integrity and waterproofing, preventing water ingress that causes mould growth and adhesive failure.
How do I remove shower panels if I need to replace them?
Removing panels bonded with waterproof adhesive requires patience. Use a sharp putty knife or scraper to carefully cut through the adhesive bead along panel edges, working slowly to avoid gouging the substrate. For stubborn adhesive, apply a solvent-based adhesive remover according to product instructions, or use a heat gun to soften the bond slightly. Once panels are free, scrape away remaining adhesive with a plastic scraper, avoid metal tools that damage wall surfaces. Clean the substrate thoroughly with a degreaser before installing replacement panels, ensuring the surface is dry and flat for optimal new adhesive performance.
This article was written using GrandRanker

