
Best Adhesive for Shower Wall Panels: 2026 Guide
Table of Contents
- Why Choosing the Right Shower Wall Panels Adhesive Matters
- Substrate-Specific Compatibility: Matching Adhesive to Your Wall
- Top Adhesives for Shower Wall Panels Reviewed
- Tools Needed for Shower Panel Installation
- How to Install Shower Wall Panels Step by Step
- How Long Does Shower Panel Adhesive Take to Dry
- Panel Removal and Avoiding Wall Damage
- Conclusion
Last Updated: August 7, 2026
Choosing the best adhesive for shower wall panels can make or break an entire bathroom installation. Get it wrong and panels bow, bubble, or peel within months. Get it right and the bond outlasts the panels themselves. This guide provides a technically grounded framework for selecting the right product for your substrate, panel material, and environment.
Why Choosing the Right Shower Wall Panels Adhesive Matters
The adhesive is the structural foundation of any wall panel installation. Shower environments are particularly demanding: steam cycles create repeated thermal expansion and contraction, humidity is constant, and water ingress at poorly sealed edges creates localised pressure behind panels. An adhesive lacking flexibility will crack under stress; one lacking moisture resistance will lose bond strength over time.
The right adhesive delivers three things simultaneously: high initial grab to hold the panel during installation, a flexible cured bond that accommodates thermal movement, and full waterproof integrity for the long term.
Adhesive vs Sealant: Understanding the Difference
Adhesive is a bonding agent applied to the back of a panel to fix it permanently to the wall substrate. Its job is structural: it bears the panel's weight and resists shear forces.
Sealant is applied to joints, edges, and seams after panels are fixed. Its job is waterproofing: it prevents water from tracking behind the installation. Both are required for a complete, watertight shower installation.
Some hybrid polymer products, such as the Decorwall Megabond Adhesive, perform both functions, simplifying installation. However, even when using a hybrid product as the primary adhesive, a dedicated silicone sealant should still be applied to all external corners and panel joints.

Solvent-Free Formulas and VOC Safety
Solvent-based adhesives contain volatile organic compounds that off-gas during application and curing. In confined bathroom spaces, this creates health risks from inhalation and chemical compatibility risks with certain panel materials.
PVC panels are particularly susceptible to solvent attack. A solvent-based adhesive applied directly to PVC can cause crazing, warping, or delamination, one of the most common causes of panel failure.
Solvent-free, water-based adhesives eliminate both risks. They are safe to use in enclosed spaces without specialist respiratory protection and are chemically non-corrosive to PVC, acrylic, and polystyrene substrates. According to Health and Safety Executive guidance on VOCs in confined spaces, adequate ventilation is still required, but solvent-free formulations significantly reduce exposure risk.
Substrate-Specific Compatibility: Matching Adhesive to Your Wall
The substrate determines almost everything about adhesive selection. A product that performs brilliantly on plasterboard can fail on glazed tile. Understanding the substrate first is the starting point for every installation decision.
Plasterboard and Porous Surfaces
Plasterboard is the most common substrate in UK bathrooms. It is porous, meaning adhesive penetrates the surface layer and creates both mechanical and chemical bonds.
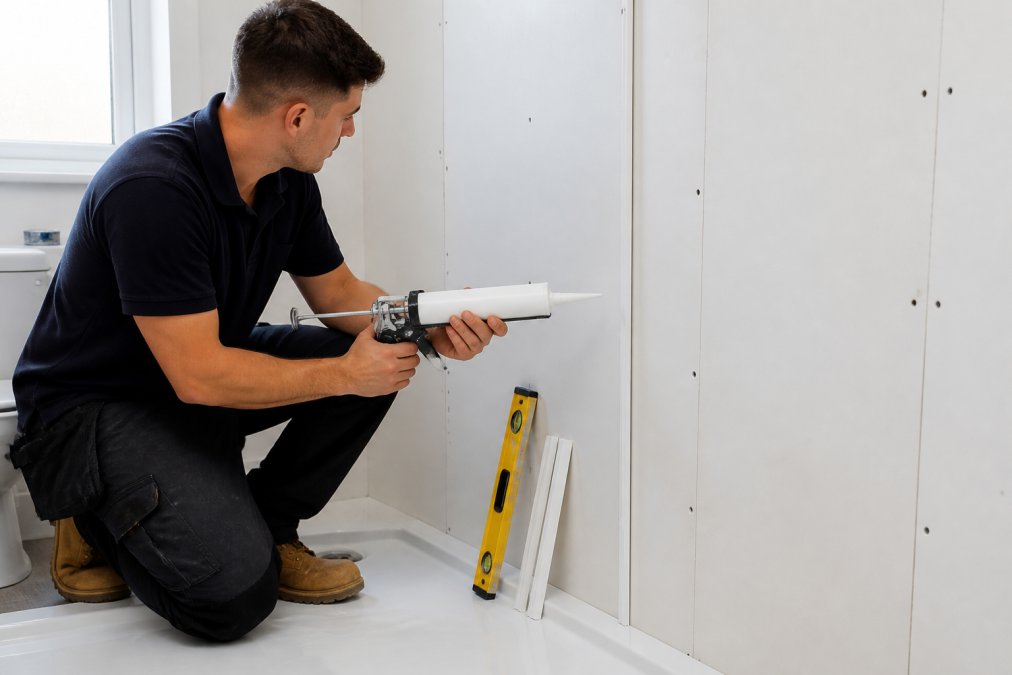
Most water-based, solvent-free grab adhesives bond well to plasterboard. The key requirement is that the plasterboard must be moisture-resistant grade (MR board or green board) in wet areas. Apply a full-coverage bead rather than spot bonding, as spot-bonded panels can flex and eventually detach at unbonded areas.
Other porous surfaces include bare plaster, brick, and concrete. These accept water-based adhesives well, though highly porous surfaces may benefit from a primer coat to reduce excessive absorption before the adhesive forms a proper bond.
Tile-Over-Tile and Non-Porous Surfaces
Tile-over-tile installation is increasingly common as a way to avoid removing existing ceramic or porcelain tiles. The challenge is that glazed tile surfaces are non-porous, meaning standard water-based adhesives cannot achieve the same mechanical bond they would on plasterboard.
For non-porous surfaces, a hybrid polymer or MS polymer adhesive is the better choice. These formulations achieve adhesion through chemical bonding rather than mechanical penetration, making them effective on glazed tiles, glass, metal, and other smooth surfaces.
Surface preparation becomes even more critical on non-porous surfaces. Any contamination, soap residue, limescale, or grease, will prevent the adhesive from making direct contact with the substrate and will cause bond failure. Thorough degreasing is essential.
PVC vs Acrylic Panels: What Changes
PVC panels are solvent-sensitive. Any adhesive containing solvents will chemically attack the panel material, causing surface crazing or structural delamination. Always use a solvent-free, water-based adhesive with PVC.
Acrylic panels are generally more resistant to solvents than PVC, but solvent-free adhesives remain the safer choice. Acrylic has a higher coefficient of thermal expansion than PVC, meaning it expands and contracts more with temperature changes. The adhesive must have sufficient flexibility after curing to accommodate this movement without cracking.
For both materials, the adhesive should have good sag resistance for vertical application to prevent the panel from sliding out of position before the adhesive sets.
Top Adhesives for Shower Wall Panels Reviewed
Both products below are available from Wetwall Wonders and are specifically suited to shower panel installation. The choice comes down to the substrate and the performance requirements of the job.
| Product | Volume | Price | Best For | Bond Type |
|---|---|---|---|---|
| Decorwall Panel Adhesive Pro | 310 ml | £9.00 | Porous substrates, PVC panels | Water-based, solvent-free |
| Decorwall Megabond Adhesive | 295 ml | £9.00 | Mixed substrates, heavy panels | Hybrid polymer |
Decorwall Panel Adhesive Pro (310 ml), £9.00
The Decorwall Panel Adhesive Pro is a water-based, solvent-free bonding agent designed for panel installation across many surfaces. At £9.00 for a 310 ml cartridge, it is accessible without compromising technical requirements for shower environments.

The water-based formula is safe for use on PVC panels without solvent attack risk and is low-odour, which matters in small, enclosed bathroom spaces. The product bonds to plasterboard, plaster, concrete, timber, and most common building substrates.
For standard shower panel installations on plasterboard or bare plaster, this is the straightforward, reliable choice. Like all water-based adhesives, curing time is affected by ambient temperature and ventilation. In cold, poorly ventilated bathrooms in winter, allow additional curing time before applying load or exposing the installation to water.
Decorwall Megabond Adhesive (295 ml), £9.00
The Decorwall Megabond Adhesive uses hybrid polymer technology, offering significantly broader substrate compatibility at the same £9.00 price point for a 295 ml cartridge.
Hybrid polymer formulations bond effectively to both porous and non-porous surfaces, making the Megabond the right choice for tile-over-tile installations or mixed substrates. The formula also acts as a sealant, providing additional waterproofing at the bond line. This dual function is particularly useful in shower enclosures where the margin for water ingress is zero.
The Megabond is also the better choice for heavier panels. Its high-strength bond and superior initial grab reduce the need for temporary supports while the adhesive cures, speeding up installation on larger panels.
Tools Needed for Shower Panel Installation
Having the right tools before you start is the difference between a clean, professional result and a frustrating installation. For shower panel installation, you will need:
- A cartridge gun (standard 310 ml frame) for applying adhesive
- A tape measure and pencil for marking panel positions
- A spirit level for ensuring panels are plumb and level
- A fine-tooth panel saw or jigsaw for cutting panels to size
- A notched spreader or trowel for spreading adhesive on larger panels
- A clean cloth or degreasing wipe for surface preparation
- Masking tape for protecting edges during silicone application
- A silicone smoother or wetted finger for finishing sealant joints
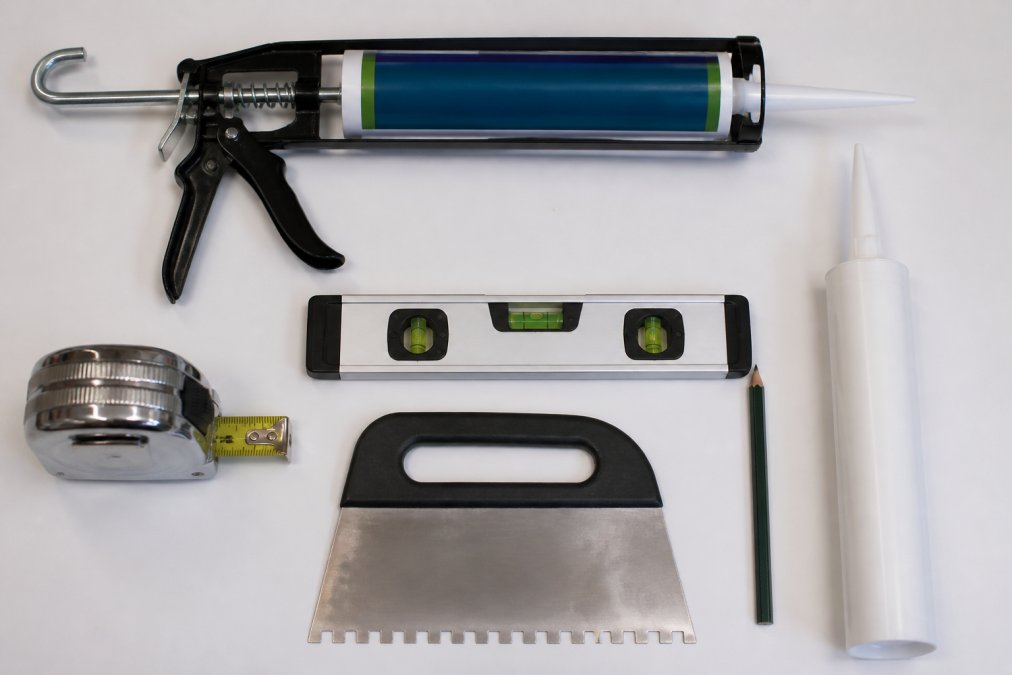
A mid-range cartridge gun with a smooth drive mechanism is worth the investment, as cheap guns make it difficult to apply a consistent bead.
How to Install Shower Wall Panels Step by Step
Installing shower wall panels is a manageable DIY task if preparation is thorough and steps are followed in the correct sequence. Rushing any stage, particularly surface preparation and curing, is where most installation failures originate.
Surface Preparation and Degreasing
Surface preparation is the single most important step. An adhesive can only bond to what it touches, and any contamination between the adhesive and the substrate will create a weak point.
Remove all soap residue, limescale, dust, and grease from the wall surface using a dedicated degreasing product or sugar soap solution, then allow the surface to dry completely. On tiled surfaces, check that all tiles are firmly fixed and there are no hollow areas. Sand any high spots or protruding grout lines that would prevent the panel from sitting flat.
Bead Application and Panel Positioning
Cut panels to size before applying any adhesive. Dry-fit each panel to confirm the fit and make any adjustments needed before adhesive is involved.
Apply adhesive to the back of the panel in a continuous serpentine bead pattern, keeping the bead approximately 25-30 mm from all edges. For larger panels, add additional horizontal beads across the centre at roughly 300 mm intervals. This coverage pattern distributes the load evenly and prevents panel edges from lifting.
Press the panel firmly against the wall, applying even pressure across the entire surface. Pull the panel away slightly, allow the adhesive to become tacky for approximately 60-90 seconds, then press it back into position. This brief open time allows the adhesive to transfer to both surfaces and significantly improves final bond strength.
Use a spirit level to confirm the panel is plumb before the adhesive begins to set. For panels requiring temporary support while the adhesive cures, use masking tape across the panel face to hold it in position.
Sealing Edges and Finishing
Once all panels are fixed and the adhesive has cured sufficiently to hold the panels without support, seal all internal corners, external corners, and panel-to-tray joints with a sanitary silicone sealant. The GP200 General Purpose Silicone Sealant from Wetwall Wonders includes a fungicide, which is important in shower environments where mould growth at joints is common.
Apply masking tape to both sides of each joint before applying silicone. This creates clean, straight lines and prevents smearing on the panel face. Smooth the silicone bead with a wetted finger or silicone tool, then remove the masking tape immediately before the silicone skins over.
According to British Standards guidance on wet room installation, all internal corners in wet areas should be sealed with a flexible sealant rather than rigid grout, as thermal movement will cause rigid joints to crack over time.
How Long Does Shower Panel Adhesive Take to Dry
Shower panel adhesive typically reaches handling strength within 30-60 minutes for most water-based formulations. Full cure, where the bond achieves its rated strength and moisture resistance, generally takes 24-48 hours depending on the product, temperature, and ventilation conditions.
The installation should not be exposed to running water until full cure is achieved. Exposing an uncured adhesive bond to water before it has fully cured can wash out the adhesive, weaken the bond, and cause premature panel failure.
Hybrid polymer adhesives like the Megabond typically have faster initial strength build-up than water-based products, which is one of their practical advantages for professional installers.
Temperature Fluctuations and Thermal Expansion
Temperature has a direct effect on both the curing process and long-term adhesive bond performance. Most adhesives cure more slowly in cold conditions and more quickly in warm ones. The minimum application temperature for most shower panel adhesives is around 5°C; below this, curing slows significantly and bond strength can be compromised.
More importantly for long-term performance, shower panels expand and contract with every hot shower. PVC and acrylic both have meaningful thermal expansion coefficients, and over years of use, this cyclic movement accumulates. An adhesive that cures to a rigid, inflexible state will eventually crack at the bond line or cause the panel to buckle.
This is why flexible bond formulations, particularly hybrid polymer and MS polymer products, are preferred for shower environments over rigid construction adhesives. The flexibility accommodates thermal movement without stressing the bond.
As noted in guidance from CIBSE technical guidance on thermal movement in building materials, thermal expansion in plastic materials is significantly greater than in ceramic or masonry, and installation specifications must account for this differential movement.
Panel Removal and Avoiding Wall Damage
Panel removal may be needed for access to plumbing, repair of water damage, or aesthetic updates years down the line. The most important principle for damage-free removal is that the adhesive bead pattern matters. Panels bonded with a full-coverage skim are extremely difficult to remove without destroying either the panel or the substrate. Panels bonded with discrete beads have small unbonded areas that allow a thin pry tool to be worked behind the panel progressively.
For removal of bonded panels, use a thin-bladed tool, such as a flexible scraper or oscillating multi-tool with a scraper blade, to work behind the panel at the unbonded areas between adhesive beads. Apply slow, steady pressure rather than sharp force. On plasterboard substrates, some surface damage is almost inevitable, but it can be minimised by working carefully.
Residual adhesive on the wall can be removed with a scraper once the panel is off. Hybrid polymer adhesives, once fully cured, are more difficult to remove than water-based products, which is a trade-off against their superior bond strength. For installations where future panel removal is realistic, a water-based adhesive used with a bead pattern rather than full coverage gives the most practical balance between bond strength and removability.
Selecting the wrong adhesive is one of the most avoidable causes of shower panel failure. The Decorwall Panel Adhesive Pro and Decorwall Megabond Adhesive, both available at £9.00 from Wetwall Wonders, cover the full range of substrate and panel combinations you are likely to encounter in a UK bathroom renovation. Pair either product with the GP200 Silicone Sealant for a complete bonding and waterproofing solution. Browse the full range of installation accessories at Wetwall Wonders and get everything you need for your shower panel project in a single order.
Frequently Asked Questions
What is the best adhesive for shower wall panels?
A solvent-free, waterproof grab adhesive or hybrid polymer formula is the best choice for shower wall panels. Products like Decorwall Panel Adhesive Pro and Decorwall Megabond Adhesive are specifically suited to bathroom environments, offering a strong initial grab, moisture resistance, and a flexible bond that handles the thermal expansion common in shower enclosures. Always confirm the adhesive is compatible with your specific panel material, whether PVC or acrylic, before applying.
Can I use silicone to stick shower wall panels?
Silicone sealant alone is not recommended as the primary bonding agent for shower wall panels. Its main role is sealing joints, edges, and corners to prevent water ingress rather than providing structural adhesion across the full panel. For a secure installation, apply a dedicated panel adhesive across the back of the panel first, then finish all seams and perimeter edges with a fungicide-grade silicone sealant such as the GP200 General Purpose Silicone Sealant.
How long does shower panel adhesive take to dry?
Most solvent-free grab adhesives reach a workable initial set within 30 to 60 minutes, but full cure typically takes 24 to 48 hours depending on temperature and humidity. In cold or damp conditions, curing slows considerably. Avoid running water over newly bonded panels for at least 24 hours. Hybrid polymer adhesives like Decorwall Megabond may achieve a stronger bond faster, but always follow the specific curing guidance on the product datasheet before exposing the installation to moisture.
What adhesive is safe to use on PVC shower panels?
Only solvent-free adhesives are safe on PVC shower panels. Solvent-based products can chemically attack PVC, causing it to warp, craze, or delaminate. Water-based or hybrid polymer formulas, such as Decorwall Panel Adhesive Pro, bond securely to PVC without damaging the substrate. Check the product label for explicit PVC compatibility before use. This is especially important when fitting panels over existing tiles, where the adhesive must grip a non-porous surface without compromising the panel face.
How do you prepare a wall before fitting shower panels?
Thorough surface preparation is critical for a lasting bond. Remove any loose paint, old sealant, or flaking plaster. Clean the substrate with a degreasing solution to eliminate dust, grease, and soap residue, then allow it to dry fully. On plasterboard, check for any soft or damp areas and repair them before proceeding. On tile-over-tile applications, sand glazed surfaces lightly to improve adhesion. A clean, sound, and dry substrate gives the adhesive the best possible chance of forming a permanent, waterproof bond.
This article was written using GrandRanker

