
Choosing the Right Sealant Colour for Bathroom Panels
Last Updated: October 22, 2026
Quick Summary
Choose a sealant colour that disappears into the joint by matching it to the dominant surface first, then checking it against the grout and trim tones. White suits white panels and trims, clear suits stone effects and mixed materials, and matched dark colours suit dark panels. Always confirm your chosen colour comes in a bathroom-grade formula and run a cure test on an offcut before committing.
- Fresh silicone shifts slightly as it cures, and white is the worst offender.
- Check samples under your actual bathroom lighting, because shop-aisle matches often fail at home.
- Clear silicone is translucent, traps dirt along the bead edge and can yellow over time.
- Masking both sides of the joint and tooling in one pass gives a consistent bead.
- The GP200 General Purpose Silicone Sealant pack of three costs £24.00.
Table of Contents
- Why Sealant Colour Matters on Bathroom Panels
- What Colour Silicone Should I Use? A Simple Decision Path
- Clear vs Coloured Silicone Sealant: Which Suits Your Panels?
- Choosing the Best Sealant for Bathroom Panels
- How to Seal Bathroom Wall Panels for a Neat, Watertight Finish
- Common Mistakes and How to Fix a Poor Colour Match
- Conclusion
- Frequently Asked Questions
Why Sealant Colour Matters on Bathroom Panels
Sealant colour is the difference between a bathroom that looks finished and one that looks like a DIY job that ran out of time.
Colour is not a cosmetic afterthought. It decides how visible every joint becomes, and joints are where water gets in.
A panel wall is only as watertight as its weakest bead. Get the colour wrong and you will notice it every morning.
How Sealant Colour Changes as It Cures and Ages
Fresh silicone never looks the way it will in a month. Most sealants shift slightly as they cure, and white is the worst offender. It can read brighter and cooler straight from the cartridge, then settle into a warmer tone as it sets.
Age changes things further. Clear silicone can yellow over time, especially where sunlight reaches it. White can pick up grime and mould staining in wet corners.
What Colour Silicone Should I Use? A Simple Decision Path
The right silicone colour is the one that disappears into the joint. Rather than guessing from a cartridge cap, work through a short decision path that starts with the panel face and ends with a cure test. This method removes most of the trial and error.
Step 1: Identify the dominant surface at the joint
Look at the two surfaces the bead will touch. In most panel installations that is the panel face and either a tray, a trim, a tile upstand, or a painted wall. The dominant surface is the one with the largest visible area beside the joint. Match the sealant to that surface first, then check it against the second surface.
- White or off-white panel against white trim or tray: white silicone. It blends into both surfaces and hides small gaps.
- Coloured or patterned panel against a matching trim: clear silicone, unless the trim is white, in which case white gives a cleaner line.
- Two different coloured surfaces meeting: clear is usually safer because it picks up the surrounding tone, but see the limitations below.
Step 2: Check the grout and trim tones
Sealant does not sit in isolation. If your panels are a warm white and your grout is a cool grey, a brilliant white bead will read as a third colour. Compare the sealant against the grout line and the trim, not just the panel face. A common pattern is to match the sealant to the trim rather than the panel, because the trim is usually the narrower, more defined element and a mismatched bead against it is more noticeable.
Step 3: Account for lighting
Bathroom lighting changes perceived colour. A white that looks neutral in daylight can look blue under a cool LED and yellow under a warm one. Check your samples under the actual bathroom lighting if possible, or at least under a mix of daylight and artificial light. This is why a shop-aisle match often fails at home.
Step 4: Confirm the sealant range offers the colour in a bathroom-grade formula
Not every colour in a sealant range is formulated for wet areas. Check the technical data sheet or the cartridge label for sanitary-grade, mould-resistant, permanently flexible silicone. If the colour you want is only available in a general-purpose formula, choose the nearest bathroom-grade colour instead. Appearance should not override suitability.

Step 5: Run a cure test on an offcut
Buy one cartridge, run a short bead on an offcut of the panel or a hidden corner, and let it cure fully. Fresh silicone shifts slightly as it cures, and white is the worst offender. A ten-minute test bead beats scraping out a full run of the wrong colour. If the cured bead disappears into the surface, commit to the full installation.
Matching Sealant to Panel Brands, Trims and Sealant Ranges
Not every white is the same white. A brilliant white panel, a warm white trim and a white silicone can all sit slightly apart, and under bathroom lighting that difference shows. The fix is to match within a range.
If you are mixing suppliers, compare samples side by side in your own bathroom light before you commit. Check the technical data too.
Clear vs Coloured Silicone Sealant: Which Suits Your Panels?
Clear silicone sealant lets the panel colour show through the joint, so it blends into almost any surface. Coloured silicone hides the joint completely and gives a crisp, painted line. Which one wins depends on your panels, the joint width, and how the sealant behaves as it cures and ages.
How clear sealant actually behaves
Clear silicone is not optically invisible. It is translucent, and once cured it takes on the colour of whatever is behind it while adding a slight cloudiness of its own. On a narrow joint over a mid-toned panel, that cloudiness is barely noticeable. On a wide joint, a dark panel, or a busy pattern, the bead edge becomes visible as a slightly milky line.
How coloured sealant actually behaves
Coloured silicone hides the joint completely, but it only works if the colour matches. A white bead against a warm white panel shows as a grey line; a grey bead against a cool grey trim can read as green. Coloured sealant also shows up any inconsistency in bead width, because the eye follows the line. That makes preparation and tooling more important, not less.
A practical comparison for panel installations
- Clear suits stone effects, patterns and mixed materials where a single colour cannot match both surfaces. It is forgiving when tones do not quite match, but it is not invisible on dark, very light, or strongly patterned panels.
- White suits white panels, white trims and painted surfaces. It gives the neatest finish where everything is already light, and it hides small gaps better than clear.
- Coloured or grey suits matched trim and fixture ranges, where a defined line looks deliberate. It is the best choice when the panel and trim are from the same range and the colour is guaranteed to match.
Neither is universally better. The choice depends on the materials meeting at the joint, the joint width, and whether you can get a bathroom-grade formula in the colour you want.
GP200 General Purpose Silicone Sealant (Pack of 3) →
Where clear sealant falls short on patterned panels
Clear silicone is not a magic fix. On a busy pattern it can look slightly cloudy, and over time it may yellow, which shows up badly against dark or strongly coloured panels. It also traps dirt along the bead edge, where it is hard to clean. On a pale marble effect, a grubby clear bead looks worse than a clean white one.
Colour consistency across the bead
Whichever you choose, the bead must be consistent. A clear bead that varies in width looks uneven because the panel shows through differently at each point. A coloured bead that varies in width looks messy because the line wobbles. Masking both sides of the joint and tooling in one pass is the only reliable way to get a consistent result.
Choosing the Best Sealant for Bathroom Panels
The best sealant for bathroom panels is a permanently flexible, mould-resistant silicone made for wet areas. Flexibility matters because panels and trays move slightly, and a rigid seal will crack.
Look for these on the label:
- Fungicide or mould resistance for humid spaces
- Permanent flexibility to handle movement
- Strong adhesion to panels, tiles and trays
Our GP200 General Purpose Silicone Sealant is an acetoxy-cure silicone with fungicide, made for sealing and waterproofing in high-humidity areas. It bonds well to glazed surfaces, ceramic tiles, many plastics and most paints.
How to Seal Bathroom Wall Panels for a Neat, Watertight Finish
A neat, colour-consistent bead comes down to preparation and technique, not luck. Follow these steps for a clean line that keeps water out.
Total time: about 45 minutes for a standard shower wall. Difficulty: beginner.
What you'll need:
- Mould-resistant silicone in your chosen colour
- Cartridge gun
- Smoothing tool or silicone profiling tool
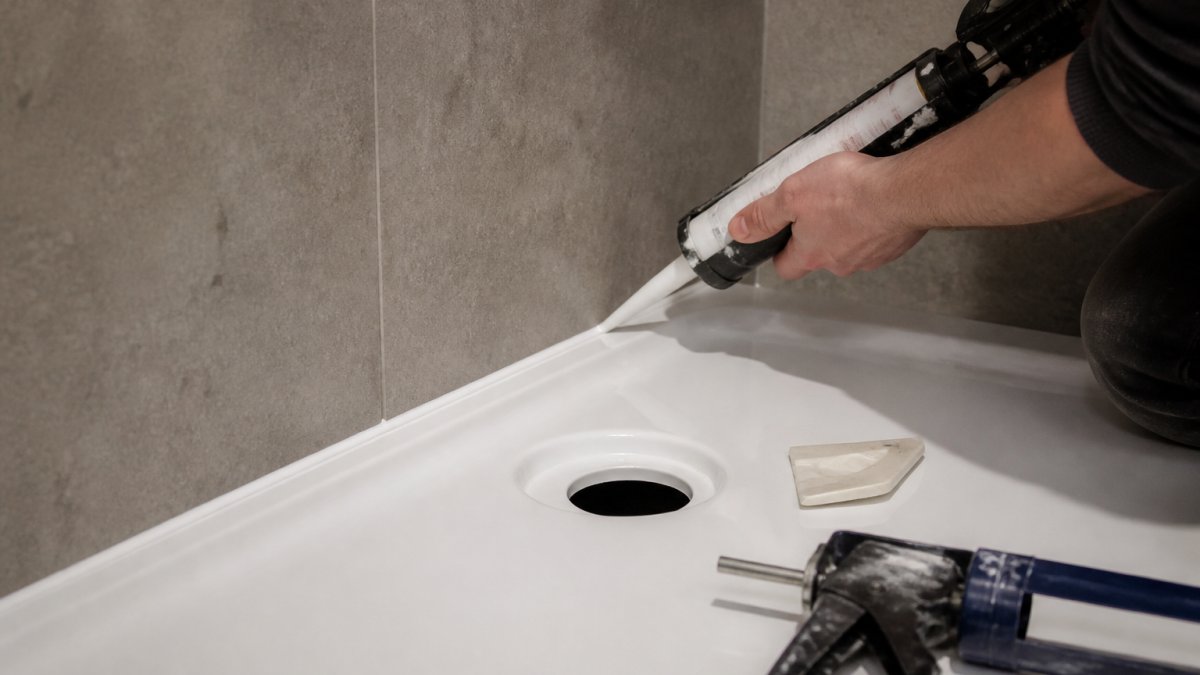
- Clean and dry the joint. Remove old sealant and wipe with methylated spirits. Silicone will not stick to damp or dusty surfaces.
- Check the gap. Joints wider than a few millimetres need backing rod first, or the bead will sink.
- Tape both sides. Masking tape gives a crisp edge and stops smear on textured panels.
- Run the bead. Cut the nozzle at 45 degrees and push, don't pull, at a steady speed.
- Smooth it once. Run a profiling tool along the bead in one pass. Don't keep going back over it.
- Peel the tape. Remove it while the silicone is still wet, pulling away from the bead.
- Leave it alone. Let it cure fully before any water hits it.
Expected result: a smooth, even bead in a colour that matches your panels, with no gaps at the tray or corners.
Common Mistakes and How to Fix a Poor Colour Match
The most common colour mistake is choosing silicone under shop lighting. Fluorescent light skews whites and greys, so a match that looked perfect in the aisle can look wrong in your bathroom.
Other frequent errors:
- Mismatched whites. A cool white silicone against a warm white panel shows as a grey line. Fix it by matching within one supplier's range.
- Clear sealant on a dark panel. It yellows and looks dirty. Replace it with a matched colour.
- Too much silicone. A fat bead looks messy whatever the colour. Use tape and a profiling tool.
If a bead has already gone wrong, cut it out fully with a sealant remover, clean the joint, and start again. Patching over a bad bead never looks right.
Conclusion
Getting the sealant colour right is a small decision with a big visual payoff. Match within one range, test before you commit, and prepare the joint properly.
If you are planning a panel upgrade, Wetwall Wonders stocks panels, trims and silicones. Our range includes Dumawall tile effects, Linerio slatwall and a full set of installation accessories. Browse the range and get everything for the job in one order.
Frequently Asked Questions
Should sealant match the bathroom panels or the shower tray?
Match the sealant to whichever surface the joint sits against most visibly. Where a panel meets a white shower tray, white sealant usually looks cleanest; where two differently coloured surfaces meet, clear sealant can be the better compromise. Pick one rule and apply it to every joint in the room so the finish looks deliberate rather than patchy.
Can you use clear silicone on bathroom wall panels?
Clear silicone works well on plain or neutral panels and on joints between two differently coloured materials. It struggles on patterned or strongly coloured panels, because the gap behind the bead shows through and the joint can look uneven. Check that the clear silicone you buy is mould resistant and permanently flexible, and confirm it is compatible with your panel material before applying.
Do bathroom panels need a colour-matched sealant?
Not always, but colour-matched sealant gives the tidiest result on visible joints, particularly where panels meet trims or a bath. A close match hides small variations in bead width that a contrasting colour would highlight. If you cannot find an exact match, choose the closest tone in the same product range rather than switching brands, since pigments vary between manufacturers.
Can the wrong sealant affect the finish of bathroom panels?
Yes. A sealant that does not bond properly can peel away and let water behind the panels, and a colour that yellows or discolours will spoil an otherwise clean installation. Use a mould-resistant silicone suited to high humidity, prepare the surface properly, and allow the correct curing time before exposing the joint to water.

