
How to Prevent Panel Peeling Issues
Table of Contents
- Why Panel Peeling Happens
- Surface Preparation to Prevent Panel Peeling
- Choosing the Best Adhesive for Bathroom Wall Panels
- How to Seal Bathroom Panels Properly
- Moisture Control and Ventilation
- Common Bathroom Wall Panel Installation Mistakes
- Long-Term Maintenance and Environmental Monitoring
- Conclusion
Last Updated: August 20, 2026
Why Panel Peeling Happens
Panel peeling occurs when the bond between your wall panels and substrate fails, allowing moisture to penetrate and adhesive to lose its grip. Understanding the root causes helps you prevent the problem before it starts.
Adhesive failure and poor substrate contact are the primary culprits. When panels aren't properly adhered to the surface beneath, they're vulnerable to movement, vibration, and thermal expansion. This creates gaps where moisture can seep in, further weakening the bond. The adhesive itself may fail if it's incompatible with your substrate, applying a water-based adhesive to a non-porous surface, for instance, won't create a lasting bond.
Adhesive failure and poor substrate contact
Adhesive failure happens when the bonding agent loses its grip on either the panel or the substrate. This occurs most commonly due to surface contamination, dust, grease, or old paint prevent the adhesive from making direct contact with the material beneath. Even microscopic debris can create a barrier that causes adhesion to fail months or years after installation.
Poor substrate contact is equally problematic. If your wall surface isn't smooth or level, panels will sit unevenly against it. Gaps form where the adhesive can't bridge properly. Over time, these weak points become failure points, particularly in bathrooms where moisture and temperature fluctuations put constant stress on the bond.
Moisture ingress and environmental factors
Moisture ingress is the silent killer of panel installations. Water that penetrates behind panels creates the perfect environment for adhesive degradation and structural damage. In bathrooms, humidity levels can reach 80-90% during and after showers, and if your ventilation system isn't adequate, that moisture lingers on surfaces.
Thermal expansion compounds the problem. Panels and substrates expand and contract at different rates as temperature changes. This constant movement stresses the adhesive bond, gradually weakening it. Combined with moisture exposure, thermal stress accelerates delamination, the separation of layers, making peeling inevitable without proper preventative measures.
Environmental humidity is the factor most people underestimate. A substrate that absorbs moisture swells, pushing panels away from the wall. When it dries, it shrinks, creating movement that flexes the adhesive bond. Repeat this cycle daily in a bathroom, and failure becomes a matter of time.
Surface Preparation to Prevent Panel Peeling
The difference between panels that last decades and those that peel within months comes down to surface preparation. This step determines whether your adhesive can actually bond to the substrate or merely sit on top of it.
Cleaning and degreasing
Start by removing everything on the surface that isn't the substrate itself. Dust, soap residue, grease, and old paint all prevent adhesion. Use a degreaser on any oily surfaces, bathroom walls accumulate soap film and body oils that create a slippery barrier.
For best results, clean with warm water and a mild detergent, then rinse thoroughly and allow the surface to dry completely. If your wall has been painted, check whether the paint is stable. Peeling or flaking paint must be scraped away entirely. A paint that's well-adhered to the substrate can stay, but test it first by applying tape and pulling sharply, if paint comes off, remove it all.
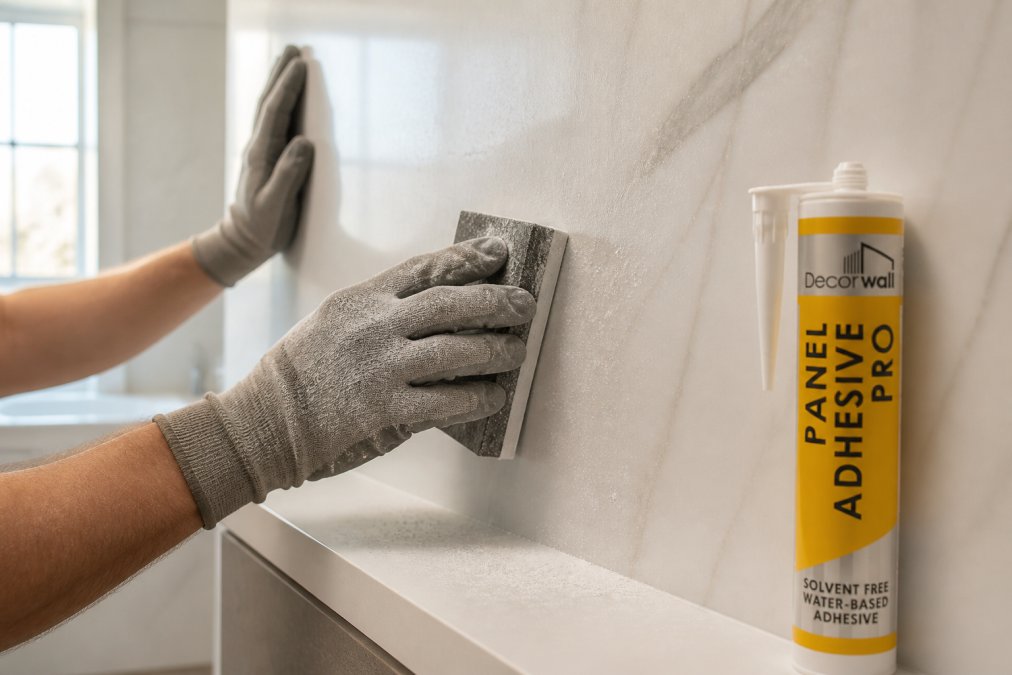
Sanding and smoothing
Once clean, sand the surface with 120-150 grit sandpaper. This removes any remaining gloss or coating that might inhibit adhesion, and it opens up the surface porosity so the adhesive can grip effectively. Sand in circular motions, working systematically across the entire area where panels will be installed.
Pay special attention to any bumps, ridges, or uneven spots. These become weak points where panels won't sit flush against the substrate. If you have significant irregularities, consider using a filler or levelling compound to create a smooth, even base. The smoother your substrate, the better your adhesive will perform.
Primer application
After sanding, apply a primer designed for your substrate type. Primer seals the surface, improves adhesion, and creates a uniform base for your adhesive to bond to. Different substrates require different primers, tile, drywall, and plaster all have specific requirements.
Allow primer to cure fully according to manufacturer instructions before applying adhesive. This typically takes 2-4 hours, but check your product's guidance. A properly primed surface dramatically improves adhesive performance and reduces the risk of peeling.
Choosing the Best Adhesive for Bathroom Wall Panels
Not all adhesives perform equally in bathroom environments. Moisture, temperature fluctuations, and substrate type all influence which adhesive will actually work for your installation.
Water-based versus hybrid polymer adhesives
Water-based adhesives are easy to apply and clean up, but they're vulnerable in high-moisture environments. They rely on water evaporation to cure, which is problematic in bathrooms where humidity can exceed 80%. If water can't evaporate efficiently, the adhesive won't cure properly, leaving a weak bond.
Hybrid polymer adhesives, by contrast, cure through multiple mechanisms, not just evaporation. They perform far better in damp conditions and maintain flexibility as temperature changes. For bathroom applications, hybrid polymers are the superior choice. The Decorwall Megabond Adhesive is a hybrid polymer formula specifically engineered for high-moisture environments, offering superior bond strength and flexibility compared to water-based alternatives.

Substrate compatibility and curing time
Match your adhesive to your substrate. Some adhesives bond well to tile but poorly to drywall. Others work across multiple surfaces but require longer curing times. Check the product's technical data sheet to confirm it's rated for your specific substrate.
Curing time matters more than application time. An adhesive that sets quickly to the touch might not achieve full strength for days. In bathrooms, don't expose panels to moisture until the adhesive has cured completely. Most quality adhesives require 24-48 hours before water exposure, though some hybrid formulations cure faster. Decorwall Panel Adhesive Pro offers reliable bonding across most bathroom substrates with a standard 24-hour cure window, making it practical for most DIY installations.
How to Seal Bathroom Panels Properly
Sealing panel edges and joints prevents moisture from infiltrating behind panels. This is where many installations fail, people skip or rush the sealing step, leaving gaps that allow water to penetrate.
Sealant application at edges and joints
Use a silicone-based sealant rated for bathrooms. Apply a continuous bead along every edge where panels meet the wall, the floor, or each other. The sealant creates a moisture barrier that directs water away from the substrate.
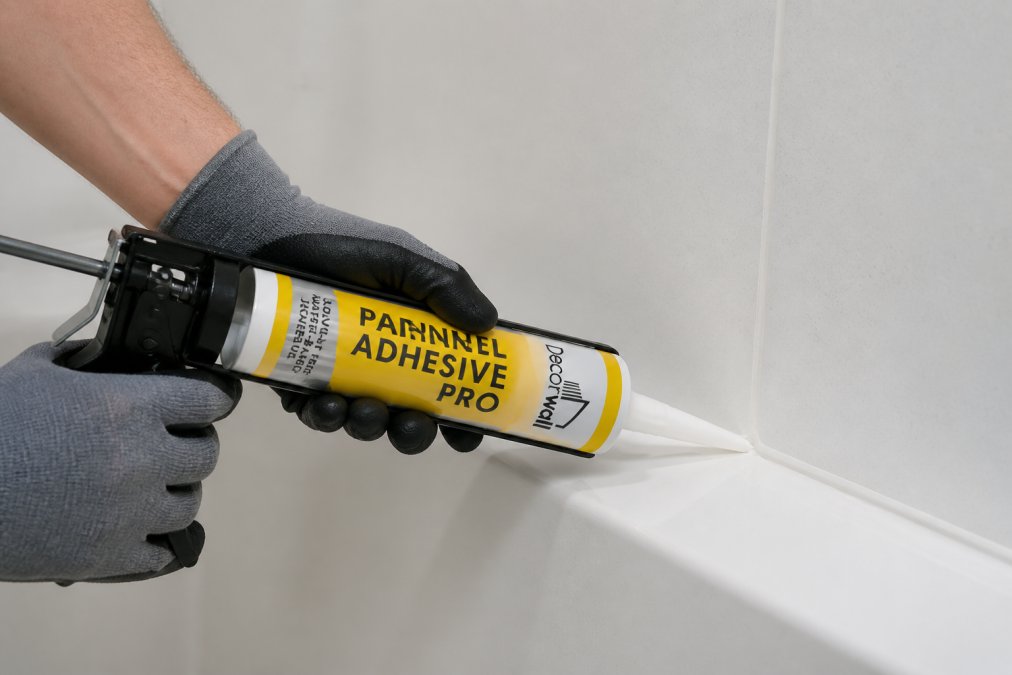
Use a caulking gun for precision and consistency. Apply the sealant at a 45-degree angle, creating a continuous line. Smooth it with a wet finger or caulking tool to ensure it fills the gap completely and bonds to both surfaces. Allow sealant to cure fully, typically 24-48 hours, before exposing it to water.
Creating moisture barriers
Beyond edge sealing, consider applying sealant along the bottom edge where panels meet the floor. This is where water pools during showers and is most likely to penetrate. A properly sealed bottom edge prevents water from wicking up behind the panels.
For panels installed over existing surfaces, ensure any gaps between the substrate and the panel are sealed. Water that gets behind panels will eventually cause peeling, so eliminate every pathway moisture can take. The GP200 General Purpose Silicone Sealant provides reliable, durable sealing for bathroom applications, with fungicide protection to resist mould growth in high-moisture areas.

Moisture Control and Ventilation
Even with perfect installation, excessive moisture will eventually cause problems. Managing humidity levels in your bathroom is essential for long-term panel performance.
Managing humidity levels
Humidity above 60% begins to stress adhesive bonds and promote mould growth. In bathrooms, humidity spikes during and after showers, often reaching 80-90%. Without adequate ventilation, moisture lingers for hours, keeping humidity elevated.
Aim to keep bathroom humidity below 50% during normal use. Run your exhaust fan during showers and for at least 30 minutes after, even if the bathroom feels dry. This removes moisture before it can penetrate behind panels or condense on surfaces.
Ventilation systems and dehumidification
An exhaust fan rated for your bathroom size is essential. A fan that's too weak won't effectively remove moisture. Check your fan's CFM (cubic feet per minute) rating and ensure it matches your bathroom's volume. In particularly damp bathrooms or those without windows, consider a dehumidifier as supplementary protection.
Ensure your exhaust ductwork vents to the outside, not into an attic or wall cavity. Venting moisture into your walls simply moves the problem elsewhere. Proper ventilation removes moisture from the building entirely, protecting not just your panels but your entire home's structural integrity.
Common Bathroom Wall Panel Installation Mistakes
Most peeling problems stem from mistakes during installation. Understanding these errors helps you avoid them.
Rushing curing time and applying too much adhesive
The most common mistake is exposing panels to water before adhesive has cured fully. Patience is critical. Even if adhesive feels dry to the touch after a few hours, it hasn't achieved full strength. Shower use within 24 hours of installation dramatically increases peeling risk.
Applying too much adhesive creates a different problem. Excess adhesive can't cure properly because moisture can't escape. It remains soft or tacky, providing a weak bond. Use the adhesive sparingly, enough to create a continuous bond, but not so much that it oozes out around panel edges.
Skipping surface preparation and ignoring substrate porosity
Surface preparation feels tedious, but skipping it is the fastest route to failure. Dust, grease, and old paint create barriers that adhesive can't penetrate. Even a seemingly clean surface may have microscopic contamination that prevents bonding.
Substrate porosity affects adhesive performance significantly. Porous surfaces like unsealed drywall or plaster absorb moisture from the adhesive, preventing proper curing. Non-porous surfaces like tile or glossy paint don't allow adhesive to grip. Understanding your substrate type and preparing accordingly is non-negotiable for reliable installation.
Long-Term Maintenance and Environmental Monitoring
Panel peeling isn't always sudden. Often it develops gradually as environmental stresses accumulate. Regular inspection and maintenance catch problems early, before they become visible.
Thermal expansion and UV degradation
Panels and substrates expand as temperature rises and contract as it cools. This movement is normal, but it stresses adhesive bonds. In bathrooms with fluctuating temperatures, cold mornings, hot showers, thermal stress accelerates over time.
UV exposure degrades some panel materials and can weaken adhesive bonds over years. If your bathroom has windows or skylights, UV protection becomes relevant. Many modern panels include UV-resistant coatings, but regular inspection helps identify any degradation early.
Regular inspection and preventative maintenance
Check panel edges and joints quarterly. Look for gaps, cracks in sealant, or any signs of bubbling or separation. Early detection allows you to reseal or address problems before they spread.
Keep bathroom humidity in check year-round. Maintain your exhaust fan, ensure it's venting properly, and consider upgrading it if it's undersized. Monitor for any signs of water penetration, discolouration on the substrate, soft spots, or musty odours, and address them immediately.
If you notice any peeling beginning, don't wait. Remove the affected panel, clean and prepare the substrate, apply fresh adhesive, and reinstall. Catching problems early prevents them from spreading to adjacent panels.
Panel peeling is preventable through proper installation and maintenance. The key is understanding that adhesive failure doesn't happen overnight, it results from accumulated stress: moisture exposure, temperature fluctuations, poor surface preparation, and inadequate ventilation. By addressing each of these factors during installation and maintaining your bathroom's environment afterward, you'll keep your panels secure and your bathroom looking fresh for years to come.
At Wetwall Wonders, we supply the adhesives, sealants, and panels you need to do this right. The Decorwall Panel Adhesive Pro and Decorwall Megabond Adhesive are engineered specifically for bathroom environments, and our GP200 General Purpose Silicone Sealant provides reliable moisture protection. Combine quality products with proper technique, and panel peeling becomes a problem you'll never experience. Search our full range of bathroom panels and installation materials to find everything you need for a professional, lasting installation.

Frequently Asked Questions
What is the best adhesive to prevent panel peeling?
Use a hybrid polymer or water-based adhesive specifically formulated for bathroom panels. Decorwall Panel Adhesive Pro (£9.00) bonds securely to most surfaces and cures reliably in humid conditions. Check the adhesive's compatibility with your substrate, tile, plasterboard, or existing paint, as surface porosity affects bonding strength. Always follow the manufacturer's curing time guidance before exposing panels to moisture.
Why do bathroom wall panels start to peel at the edges?
Panel edges peel when moisture ingress occurs behind the panel, breaking the bond between adhesive and substrate. Poor sealant application at joints and inadequate ventilation accelerate this. Ensure you apply silicone sealant along all panel edges and use mechanical fasteners at corners for added security. Maintain bathroom humidity below 60% to minimise delamination risk.
How do I prepare my walls to ensure panels don't peel?
Clean the surface thoroughly with a degreaser to remove soap residue, dust, and contaminants. Sand glossy surfaces to improve adhesive grip and substrate porosity. Apply a primer if the wall is porous or uneven. Allow adequate drying time between each step. This preparation ensures the bonding agent creates a strong, lasting contact with the substrate, preventing future peeling.
Should I use silicone sealant to stop panel peeling?
Yes, silicone sealant is essential for preventing moisture ingress at panel edges and joints. GP200 General Purpose Silicone Sealant (£24.00 for a pack of 3) provides a waterproof barrier that protects against humidity and thermal expansion. Apply sealant along all edges, corners, and seams after the adhesive has fully cured. This creates a moisture-resistant envelope around your panels, extending their lifespan significantly.
This article was written using GrandRanker

