
How to Remove Old Wetwall Panels Safely: Step-by-Step
Table of Contents
- What You'll Need Before You Start
- Tools for Removing Shower Panels Safely
- Step-by-Step: How to Remove Old Wetwall Panels Safely
- How to Remove Adhesive from Bathroom Walls
- Repairing Plasterboard After Panel Removal
- Disposing of Old Panels and Adhesive Waste
- Conclusion
- Frequently Asked Questions
Last Updated: September 25, 2026
What You'll Need Before You Start
Removing old wetwall panels safely comes down to three things: protecting yourself, protecting the wall behind the panels, and knowing what you're dealing with before you start pulling. This guide from Wetwall Wonders walks you through the full job, from the first screw you loosen to the last bag of waste you take to the tip.
Before you touch a single tool, gather the following:
- Safety gear: protective goggles, nitrile gloves, a dust mask, and old clothes with long sleeves.
- Tools: a utility knife, a putty knife, an adhesive scraper, a pry bar, a heat gun, and a Stanley Curved Claw Hammer for stubborn fixings.
- Consumables: bin bags for waste, masking tape, and a drop sheet.
- Clean-up kit: solvent or adhesive remover, sugar soap, and filler for any wall damage.
Tools for Removing Shower Panels Safely
The right tools for removing shower panels turn a frustrating job into a manageable one. You don't need a full trade kit, but you do need the right basics.

Here's what each tool does and why it matters:
- Utility knife: scores the silicone sealant so it releases cleanly instead of tearing the panel edge.
- Putty knife: slides behind trim pieces and thin panels without gouging the wall.
- Adhesive scraper: lifts leftover glue from the wall once the panel is off.
- Pry bar: gives you use on larger panels, but only after the sealant is cut.
- Heat gun: softens the adhesive so the panel releases with less force and less damage.
- Claw hammer: pulls out old nails or fixings that held the panel or trim in place.
Step-by-Step: How to Remove Old Wetwall Panels Safely
The safe method is simple: isolate, cut the seal, warm the glue, then pry. Skip any of those steps and you risk cracking panels, tearing plasterboard, or hurting yourself.

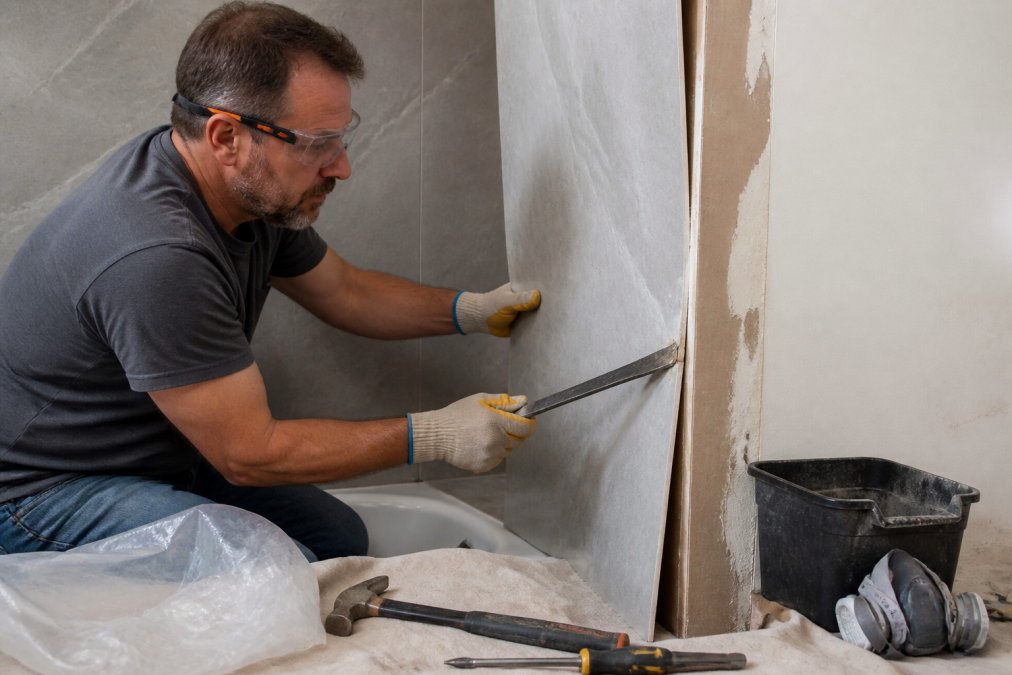
Step 1: Isolate the Area and Put On Safety Gear
Turn off the water supply to the shower and cover the tray or bath with a drop sheet. Put on your goggles, gloves, and dust mask before you pick up a tool.
Step 2: Score and Remove Silicone Sealant and Trim
Run your utility knife along every edge where the panel meets the wall, tray, or another panel. Cut through the silicone sealant rather than pulling it, because a clean cut stops the panel edge from tearing.
Step 3: Warm the Adhesive and Pry the Panels Free
Set your heat gun to a low setting and sweep it across the face of the panel. Move it constantly so you don't scorch the surface. Warm the whole panel, not just one corner.
How to Remove Adhesive from Bathroom Walls
Getting adhesive off the wall is the part most people underestimate. The trick is to identify what you're actually dealing with before you reach for a scraper, because silicone, solvent-based grab adhesive and water-based panel adhesive each need a different approach.

Step 1: Identify the adhesive
You can usually work out the type from feel, colour and smell before you commit to a method:
- Silicone sealant: rubbery, stretchy, peels in long elastic strings. Usually translucent, white or grey. Smells faintly of vinegar (acetoxy cure) or is odourless (neutral cure). It's the seal at the edges, not the bond behind the panel.
- Solvent-based grab adhesive (the classic 'no-nails' type): hard, brittle, often beige or brown, and snaps rather than stretches. Strong solvent smell even years after curing. This is the most common bond behind older wetwall panels.
- Water-based panel adhesive: lighter in colour, slightly flexible, and softens noticeably with heat. Low odour. Common on newer installations and on the Decorwall-style systems.
- Hybrid/MS polymer adhesive: rubbery but firmer than silicone, no strong solvent smell, and resists most household solvents. Increasingly common on modern installs.
Step 2: Match the solvent to the adhesive
| Adhesive | Best removal method | Notes |
|---|---|---|
| Silicone sealant | Silicone remover gel, or mechanical cut with a blade | Solvents struggle; cutting and peeling is usually faster |
| Solvent-based grab adhesive | White spirit, or a dedicated adhesive remover | Softens slowly; needs dwell time |
| Water-based panel adhesive | Warm soapy water and a scraper | No solvent needed |
| Hybrid/MS polymer | Specialist MS polymer remover, or mechanical scraping | Resists most DIY solvents |
A few practical rules that save time:
Decorwall Panel Adhesive pro (310 ml) →
- Test any solvent on a hidden patch first. White spirit will lift some paints and can stain porous plaster.
- Give solvent time to work. A common pattern is to apply, cover with cling film to stop it evaporating, and leave for 15-30 minutes before scraping. Rushing this is why people end up gouging the wall.
- Work in small sections, roughly a square metre at a time, so softened glue doesn't re-set before you wipe it.
- Wipe as you go with a rag, turning it frequently. Softened adhesive re-bonds if you smear it back onto the wall.
- Finish with sugar soap to remove oily solvent residue before you repair, prime or repaint. Paint won't adhere to a solvent film.
If you're planning a fresh install, using a purpose-made panel adhesive on the new job saves this clean-up headache next time. The Decorwall Panel Adhesive Pro is water-based, bonds to most surfaces, and sets in about an hour, which keeps the mess and the waiting to a minimum.
Repairing Plasterboard After Panel Removal
Plasterboard damage is the most common surprise in this job. Adhesive that's been on the wall for years often takes the paper face with it when the panel comes away.
Assess the damage in three tiers:
| Damage Level | What It Looks Like | Fix |
|---|---|---|
| Surface | Paper torn, glue spots | Sand, seal, prime |
| Shallow | Small craters, dents | Filler, sand smooth |
| Deep | Exposed board, soft patches | Cut out, patch, re-skim |
Disposing of Old Panels and Adhesive Waste
Old panels and adhesive waste need proper disposal, and this is the step most guides skip entirely. Most wetwall panels are PVC, laminate-faced composite, or acrylic, and none of those go in your household recycling bin. Plan disposal before you start ripping, because a full shower surround can easily produce several bags of awkward, sharp-edged waste.
Sort your waste into four streams
- Panels (PVC, acrylic, laminate-faced composite): not accepted in kerbside recycling. Take them to your local council household waste recycling centre, which usually has a dedicated 'construction and DIY waste' or 'rigid plastics' container. Some centres charge for DIY waste by weight or bag, check your council's site before you load the car.
- Sealant and adhesive tubes: these are classed as household hazardous waste because of residual solvent and curing agents. Many councils accept them at recycling centres in a hazardous waste bay; some require a separate booking. Do not put them in general rubbish or kerbside recycling.
- Silicone and adhesive residue scraped off the wall: bag it separately and treat it the same as the tubes. Small quantities can usually go in general waste once fully cured, but check your council's guidance.
- Trim and fixings: metal fixings, screws and aluminium trim can go in scrap metal recycling at most recycling centres. Plastic trim usually cannot and goes in general waste.
Larger jobs and licensed carriers
For a full bathroom strip-out, a licensed waste carrier is often the simplest route. In the UK, anyone transporting waste commercially must be registered with the Environment Agency (or the equivalent regulator in Scotland, Wales and Northern Ireland), and they should give you a waste transfer note as proof of proper disposal. Keep that note, it's your evidence that the waste was handled legally, and it protects you if the carrier is later investigated for fly-tipping.
Reducing waste before you start
A few habits cut the volume significantly:
- Bag small debris as you go so offcuts and adhesive crumbs don't spread through the house.
- Cut panels down to fit your car or skip more efficiently, a full-height panel is awkward to transport intact.
- Keep reusable trim and fixings if you're reinstalling a similar system; undamaged aluminium trim and stainless fixings are worth saving.
- Check whether your panel supplier runs a take-back scheme. Some manufacturers of composite and PVC panels operate recycling or take-back programmes for end-of-life product, though availability varies.
Once the waste is sorted and removed, you've cleared the last obstacle before repairing the wall and fitting new panels.
Conclusion
Removing old wetwall panels safely is a job of patience, not strength. Cut the seal, warm the glue, pry slowly, and clean the wall properly before you cover it again.
Frequently Asked Questions
How do I safely remove wetwall panels without damaging the plasterboard?
Work slowly and use a flat pry bar or putty knife to lever panels away in small increments. Warm the adhesive with a heat gun on a low setting to soften the bond before prying. Score along the silicone sealant with a utility knife first. If the panel resists, apply more heat rather than force. This approach keeps the plasterboard face intact and reduces the risk of pulling away the paper layer or gouging the board.
What tools do I need for removing shower panels?
You will need protective goggles, gloves, a utility knife for scoring sealant, a putty knife or adhesive scraper, a flat pry bar, and a heat gun. A claw hammer helps with stubborn trim pieces. For adhesive residue, have a solvent or adhesive remover ready. A dust sheet protects the floor and bath. Most of these tools are inexpensive and reusable for future renovation work.
How do I remove adhesive from bathroom walls after taking panels off?
Start by scraping off as much adhesive residue as possible with a putty knife or adhesive scraper. For water-based adhesives, warm soapy water and a scraper often lift the remainder. For stronger chemical bonds, apply a suitable solvent or adhesive remover, leave it to soften the glue, then scrape again. Wipe the wall clean and let it dry fully before any repair work or new panel installation.
Can I remove wall panels myself or do I need a professional?
Removing wetwall panels is a manageable DIY task for most homeowners. The main risks are damaging the plasterboard and not using safety gear. With the right tools, patience, and a heat gun to soften adhesive, you can remove panels without professional help. If the panels are behind heavy fixtures or the wall shows significant water damage, a qualified fitter or plasterer may be needed for repairs.

