
Shower Panel Trim and Corner Profiles: Complete Guide
Table of Contents
- Types of Shower Panel Trim and Corner Profiles
- Material Specifications: PVC vs Aluminium Trims
- How to Install Shower Panel Corner Trim
- Best Adhesive for Shower Wall Panels
- Matching Trim to Panel Thickness and Design
- Common Installation Mistakes and How to Avoid Them
- Conclusion
Last Updated: August 19, 2026
Shower panel trim and corner profiles transform a basic wall renovation into a professional-looking installation. Without the right trims, gaps appear between panels, water seeps behind edges, and the finish looks incomplete. This guide covers everything you need to select, install, and seal shower panel trim and corner profiles correctly.

At Wetwall Wonders, we supply the full range of trims, adhesives, and sealants required for seamless bathroom renovations. Understanding trim types and installation methods separates a polished result from costly mistakes.
Types of Shower Panel Trim and Corner Profiles
Shower panel trim and corner profiles serve different functions depending on where panels meet. Internal corners join two panels inside a corner. External corners finish the outer edge where panels end. End caps seal panel edges. Each type addresses a specific installation challenge.
Internal Corner Trims for Seamless Joins
Internal corner trims finish the corner where two shower panels meet at a 90-degree angle inside the bathroom. They bridge the gap between panels, prevent water from penetrating behind the joint, and create a clean visual line.
The most common internal corner profiles measure 10mm or 8mm, matching standard panel thicknesses. A 10mm internal corner trim sits flush against both panel faces, creating a seamless join. Installation starts by measuring the corner height and cutting the trim to length. Apply panel adhesive to both the trim and panel edges, then press the trim firmly into the corner, ensuring both panels sit fully into the channel. Use a spirit level to confirm the trim runs perfectly vertical, preventing water pooling at the top.

Wetwall Wonders supplies 10mm internal corner trim in white at £12.00 per 2600mm length, and the 8mm internal corner trim in white for thinner panel systems. Both are 100% waterproof PVC, designed for wet rooms and high-moisture zones.
External Corner Trims for Finished Edges
External corner trims finish the outer edge where panels end on external corners. These profiles protect the panel edge from impact damage and create a professional appearance where the wall transitions to an open edge.
External corner trims typically measure 15mm × 15mm, 20mm × 20mm, or 25mm × 25mm, depending on panel thickness. A 20mm × 20mm external corner trim sits over both panel faces, creating a visible trim line that frames the corner. Installation requires precise corner preparation. Cut panels to meet at the external corner, leaving a small gap (typically 2-3mm) for the trim to sit over both edges. Apply adhesive to the trim's inner faces and press firmly over both panel edges. A clamp or heavy object holding the trim in place for 24 hours ensures a permanent bond.
Wetwall Wonders stocks 20mm × 20mm external corner wall trim in white at £12.00 per 2600mm length, and the 15mm × 15mm external corner wall trim for slimmer profiles. Both are durable PVC, ideal for bathrooms and wet rooms.

End Caps and H-Trim Profiles
End caps seal the exposed edge of a single panel, typically where a wall panel ends before meeting a different wall surface or fixture. Without an end cap, the panel edge sits exposed, collecting moisture and looking unfinished.
End caps measure 8mm or 10mm to match panel thickness. H-trim profiles join two panels horizontally or vertically without corner angles, useful when joining panels of the same thickness in the middle of a wall. The H-profile has two channels, one for each panel edge, creating a narrow vertical or horizontal line where panels meet.
Wetwall Wonders supplies 8mm panel trim end caps in white at £12.00 per 2600mm length, 10mm panel trim end caps, and the 10.5mm wall panel H-trim in white for joining panels edge-to-edge. All are 100% waterproof PVC.
| Trim Type | Panel Thickness | Best Use | Profile Size |
|---|---|---|---|
| Internal corner | 8-10mm | Inside corners where panels meet | 8mm or 10mm |
| External corner | 8-10mm | Outside corners, edges | 15-20mm × 15-20mm |
| End cap | 8-10mm | Single panel edges | 8mm or 10mm |
| H-trim | 8-10mm | Horizontal or vertical panel joins | 10.5mm |
Material Specifications: PVC vs Aluminium Trims
Shower panel trim and corner profiles come in two primary materials: PVC and aluminium. Each offers different advantages depending on your aesthetic preference, durability requirements, and installation environment.
PVC trims are the most common choice for bathroom installations. They are 100% waterproof, require no maintenance, and cost less than aluminium alternatives. PVC does not corrode, stain, or require sealing. It comes in white, chrome, and brushed finishes, is lightweight, easy to cut with a handsaw, and bonds quickly with standard panel adhesive.
Aluminium trims offer a more premium aesthetic and superior durability in high-traffic areas. They are corrosion-resistant, lightweight, and available in polished chrome, brushed brass, and satin finishes. However, aluminium costs more, requires specialist adhesives, and can be difficult to cut without the right tools.
For most residential bathrooms and DIY installations, PVC is the practical choice. It handles moisture exposure identically to aluminium, costs less, and installation is simpler.
How to Install Shower Panel Corner Trim
Installing shower panel trim and corner profiles correctly prevents water ingress and ensures a professional appearance. The process involves measuring, preparing the corner, applying adhesive, securing the trim, and sealing joints with silicone.
Measuring and Preparing Your Corners
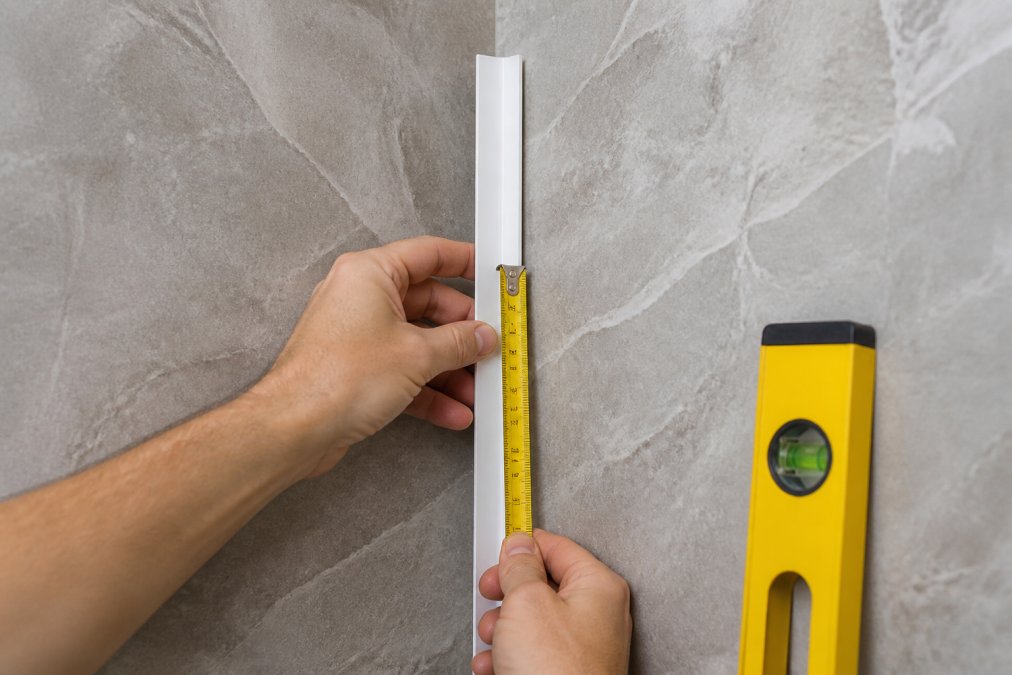
Begin by measuring the height of your corner from floor to ceiling or to the top of the panel area. Add 50mm to account for trimming at the top. Mark the trim with a pencil and cut it square using a handsaw or mitre saw. A clean, square cut ensures the trim sits flush at top and bottom.
Prepare the corner surface by ensuring both panel edges are clean, dry, and free of dust or debris. Any gaps larger than 2mm between panels should be closed before the trim is installed. Check that the corner is vertical using a spirit level. For external corners, measure the distance between the two panel edges and adjust panel positioning if the gap is too wide.
Applying Adhesive and Securing the Trim
Select a panel adhesive rated for wet areas. Apply adhesive to the back of the trim using a caulking gun, creating a continuous bead along both inner faces. For internal corners, apply adhesive to both the trim and the panel edges to be joined.
Position the trim carefully, ensuring it sits flush with both panel faces. Press firmly, working from bottom to top to avoid trapping air pockets. Allow the adhesive to cure for the time specified on the product packaging, typically 24 hours before exposing the joint to water.
Sealing Joints with Silicone
Once the adhesive has cured, apply silicone sealant along all trim joints, particularly where the trim meets the ceiling, floor, or adjacent walls. Use a caulking gun to apply a continuous bead of silicone along the joint. Smooth the sealant with a wet finger or caulking tool to create a uniform finish. Allow the silicone to cure for 48 hours before exposing the area to water spray or moisture.
For internal corners, seal the top edge where the trim meets the ceiling. For external corners, seal the top edge and any gaps where the trim meets adjacent wall surfaces. This secondary sealing step is critical for preventing water ingress in high-moisture zones.
Best Adhesive for Shower Wall Panels
The adhesive you choose determines whether your shower panel trim and corner profiles remain permanently bonded or begin to fail within months. Bathroom adhesives must withstand constant moisture exposure, temperature fluctuations, and the weight of water-saturated panels.
Panel adhesives formulated for wet areas are specifically designed to cure in high-moisture environments. Unlike standard construction adhesive, wet-area adhesives remain flexible after curing, allowing for minor panel movement without cracking or separating. They are typically solvent-free, non-toxic, and safe for use in enclosed bathroom spaces.
Many installers use silicone-based adhesives for initial trim bonding, then apply polyurethane sealants for final waterproofing. Silicone adhesives cure quickly (4-6 hours) and remain flexible. Polyurethane adhesives offer superior strength and waterproofing, curing more slowly (24 hours) but creating an incredibly durable bond that resists water penetration. For critical joints like internal corners, polyurethane is the preferred choice.
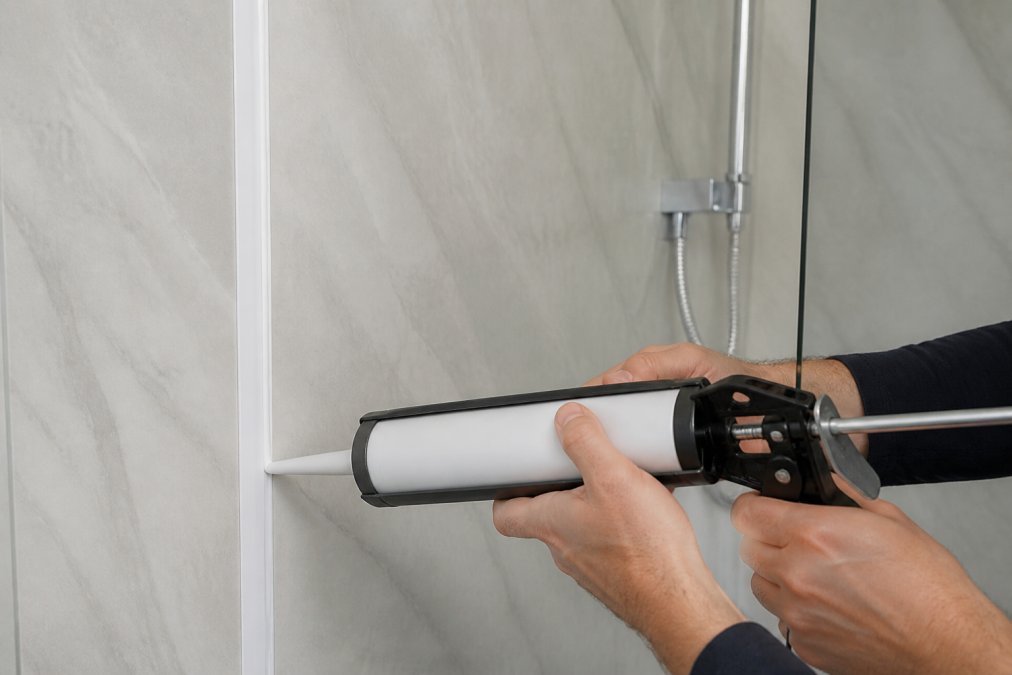
Wetwall Wonders supplies adhesives and silicones rated for bathroom installations. When selecting an adhesive, verify that it is waterproof, suitable for PVC and panel materials, and appropriate for the specific joint you are sealing. Always follow the manufacturer's curing time before exposing the joint to moisture.
Matching Trim to Panel Thickness and Design
Choosing the correct trim profile for your panel thickness is non-negotiable. A 10mm internal corner trim fits panels measuring 10mm thick. An 8mm trim fits 8mm panels. Mismatched trims leave visible gaps or sit too loose in the channel, compromising the waterproof seal.
Before purchasing trim, measure your panel thickness using a calliper or ruler. Most modern shower panels measure 8mm, 10mm, or 10.5mm. Confirm your panel thickness before ordering trim to avoid purchasing incompatible profiles.
Design aesthetics also influence trim selection. White PVC trims blend seamlessly with white or light-coloured panels, creating a minimalist appearance. Chrome or brushed brass trims add a metallic accent. For Dumawall tile-effect panels, white trims maintain the tiled appearance, while chrome trims create contemporary contrast. Narrow internal corners (8mm) suit compact bathrooms, while wider external corners (20mm × 20mm) create a bolder frame and are common in larger bathrooms or commercial wet rooms.
Common Installation Mistakes and How to Avoid Them
Even experienced installers encounter problems when installing shower panel trim and corner profiles. Understanding common mistakes helps you avoid costly rework and ensures a durable, professional result.
Misaligned panels before trim installation is the most frequent mistake. Panels that sit at different heights or angles create visible gaps in the trim joint. Before adhesive sets, check that both panels are vertical using a spirit level and adjust if necessary.
Applying adhesive only to the trim, not the panel edges leaves voids between the panel and trim channel. Water penetrates these voids, causing the trim to separate. Always apply adhesive to both the trim and the panel edges you are joining.
Failing to seal the top of the trim where it meets the ceiling or wall is a critical oversight. This joint is the most common water entry point. Silicone sealant applied along the top edge prevents water from running behind the trim and panels.
Cutting trim at an angle instead of square creates a poor fit at the top or bottom of the corner. Always cut trim square using a handsaw or mitre saw.
Using standard construction adhesive instead of wet-area adhesive results in bond failure when exposed to constant moisture. Bathroom adhesives are specifically formulated to cure and remain flexible in high-moisture environments.
Installing trim without allowing adequate curing time causes adhesive failure. Adhesive requires 24 hours to cure fully. Plan your installation schedule to allow full curing time before using the shower.
Conclusion
Shower panel trim and corner profiles are essential components of any professional bathroom installation. Selecting the correct trim type, material, and thickness ensures a waterproof seal, prevents water damage, and delivers a polished finish that lasts for years. The installation process is straightforward when you measure accurately, apply adhesive correctly, and seal joints thoroughly with silicone.
Wetwall Wonders supplies a complete range of internal corner trims, external corner profiles, end caps, and H-trims in PVC, white, and chrome finishes. Our 10mm internal corner trim and external corner wall trim are designed for seamless bathroom renovations, and our full range of adhesives and silicones ensures your installation remains waterproof for decades. Get started with Wetwall Wonders and transform your bathroom with professional-grade trims and installation materials.
Frequently Asked Questions
What is the difference between internal and external corner trims?
Internal corner trims finish the inside corner where two shower panels meet at 90 degrees, creating a neat join inside the corner. External corner trims finish the outside corner where panels meet on a protruding edge. Internal trims are typically 10-15mm, while external corner trims are 15-25mm depending on panel thickness. Both are essential for a watertight seal and professional appearance in high-moisture zones.
How do I choose the right trim size for my shower panels?
Trim size must match your panel thickness. For 8mm panels, use 8mm internal corner trim and 8mm external corner trim. For 10mm panels, choose 10mm trims. Most shower panels range from 8-10mm thick. Check your panel specifications before ordering. If unsure, measure your panel edge with a calliper. Wetwall Wonders offers 8mm, 10mm, and larger trims to suit different panel widths and installation requirements.
Can I use silicone instead of shower panel corner trim?
Silicone alone cannot replace corner trim. Silicone sealant fills gaps and prevents water ingress after trim installation, but trim provides structural support and a finished aesthetic. Trim protects panel edges from impact and moisture penetration at vulnerable corners. Use silicone to seal the joint between trim and panels for a complete watertight system. Both are necessary for durability in wet rooms and shower enclosures.
What is the best adhesive for shower wall panels?
Specialist panel adhesive designed for moisture-resistant applications works best. It must bond PVC or aluminium trim to panels while remaining flexible to accommodate minor movement. Look for adhesives that cure waterproof and resist mould growth in high-humidity bathrooms. Apply evenly along the trim back, then press firmly into place. Combine with silicone sealant at joints for maximum protection against water penetration.
This article was written using GrandRanker

