
Painting Wall Panels: A Step-by-Step Guide for UK Homes
Last Updated: November 5, 2026
Quick Summary
Painting wall panels takes a few hours of hands-on work for a standard room. Start by checking the panel material, then sand, fill and clean the surface. Prime it with one coat, apply two thin topcoats, and mask off edges before you begin.
- Choose your colour and finish before buying paint, since changing your mind means more coats.
- Use a paint rated for wet rooms and check the tin says it resists mould.
- Test a hidden 10cm square; if the paint lifts when scratched, use a bonding primer.
- Use two-part wood filler for any dent deeper than 3mm, since single-part filler shrinks.
- Apply two thin topcoats rather than one thick coat to avoid sagging on vertical panels.
Table of Contents
- Planning and Design: Choosing Colour and Finish Before You Start
- Tools Needed for Painting Wall Panelling
- How to Prepare Wall Panels for Painting
- Applying Primer and Choosing the Right Paint Finish
- Step-by-Step: Painting the Panels
- How Long Does It Take to Paint Wall Panels?
- Booking Your Wall Panels and Installation Materials from Wetwall Wonders
- Frequently Asked Questions
Painting wall panels is one of the most affordable ways to refresh a bathroom without tearing anything out. Many customers ask how to finish their panels properly once they are on the wall. This guide walks through the full process in plain steps, from choosing a colour to the final coat. Most standard rooms can be painted in a few hours of hands-on work, which makes this a realistic weekend job for a confident DIYer.
Planning and Design: Choosing Colour and Finish Before You Start
Pick your colour and finish before you buy a single tin. Changing your mind halfway through means more coats and more waste. Lighter shades make a small ensuite feel bigger, while deeper tones suit a larger room with good daylight.
Think about the finish too:
- Matt: hides small flaws but wipes clean less easily
- Eggshell: a soft sheen that suits most bathroom walls
- Satin or semi-gloss: easiest to wipe down, shows every bump
Bathrooms are damp, so choose a paint rated for wet rooms and check the tin says it resists mould. To compare paint against panels for a damp room, read mould-resistant paint vs wall panels: which works best.
Tools Needed for Painting Wall Panelling
You do not need specialist kit, but the right tools make the job faster and tidier. Gather these before you start:
- Fine sandpaper (around 120 to 180 grit)
- Wood filler and a filling knife
- Damp cloths and a mild cleaner
- Primer suited to wood or wood-effect surfaces
- A 250mm roller with a short-pile sleeve and a 50mm angled brush
- Masking tape and a dust sheet or drop cloth
- A spirit level and pencil for marking
A small roller tray and a stepladder will save your back and your floor.
How to Prepare Wall Panels for Painting
Preparation decides how the finished wall looks. Skip it and the paint will show every seam, scratch and bump. Work through the steps in order, and do not rush the filling stage; most poor panel paint jobs trace back to filler that was sanded too coarsely or not sanded at all.
Measuring the Wall and Checking Panel Material
Measure each wall so you know how much paint and primer to buy. If you are replacing rather than painting, see how to remove old wetwall panels safely before you start.
Next, check what the panels are made from. Look at the edge of a board or the back of a sample. Solid timber and MDF usually take paint well after priming.
Sanding, Filling and Cleaning the Surface
Start by wiping every panel with a damp cloth and a mild cleaner to remove grease and soap scum. Let it dry fully.
Lightly sand the surface to give the primer something to grip. Work along the grain, not across it. You only need to scuff the finish, not strip it. Wipe away the dust with a tack cloth before moving on.
Repairing Damaged Panels Before Painting
This is the step most guides skip, and it is the one that separates a professional-looking finish from an amateur one. Deal with damage before any primer goes on.
- Gaps at joints: rake out loose material with a filling knife, then press flexible acrylic filler into the gap and smooth it flush while it is still wet. Rigid filler will crack as the panels move with changes in humidity.
- Cracks and splits in the panel face: open the crack slightly with a craft knife, work wood filler into it with a filling knife, and leave it proud of the surface by about 1mm. Once dry, sand it back flush with 180-grit paper.
- Dents and nail holes: use a two-part wood filler for anything deeper than 3mm, because single-part filler shrinks as it cures and will leave a dimple under the paint.
- Filler mistakes: if filler dries harder than the surrounding panel, sanding can dish the panel surface. Seal the filled area with a coat of primer before sanding the whole panel, so the filler and the panel sand at the same rate.
- Mould or water staining: wash the area with a fungicidal wash, let it dry completely, then seal the stain with a stain-blocking primer. Painting straight over a water stain will let it bleed through the topcoat within weeks.
Once every repair is dry, sand the filled spots smooth with 180-grit paper, then finish with 240-grit to blend the edges. Wipe away all dust with a damp cloth and let the surface dry before priming.
Applying Primer and Choosing the Right Paint Finish
Primer is the step most people rush, and it is the one that matters most on panels. It seals the surface and stops the paint soaking in unevenly.
Apply one thin coat of primer with a brush or roller, working along the grain.
Then apply your topcoat. Two thin coats look better than one thick one. Choose the finish you picked during planning, and remember that glossier finishes highlight any flaws underneath.
Step-by-Step: Painting the Panels
Follow this order to keep the job clean and even. The sequence matters as much as the paint you choose, because panels have edges, grooves and profiles that a flat wall does not.
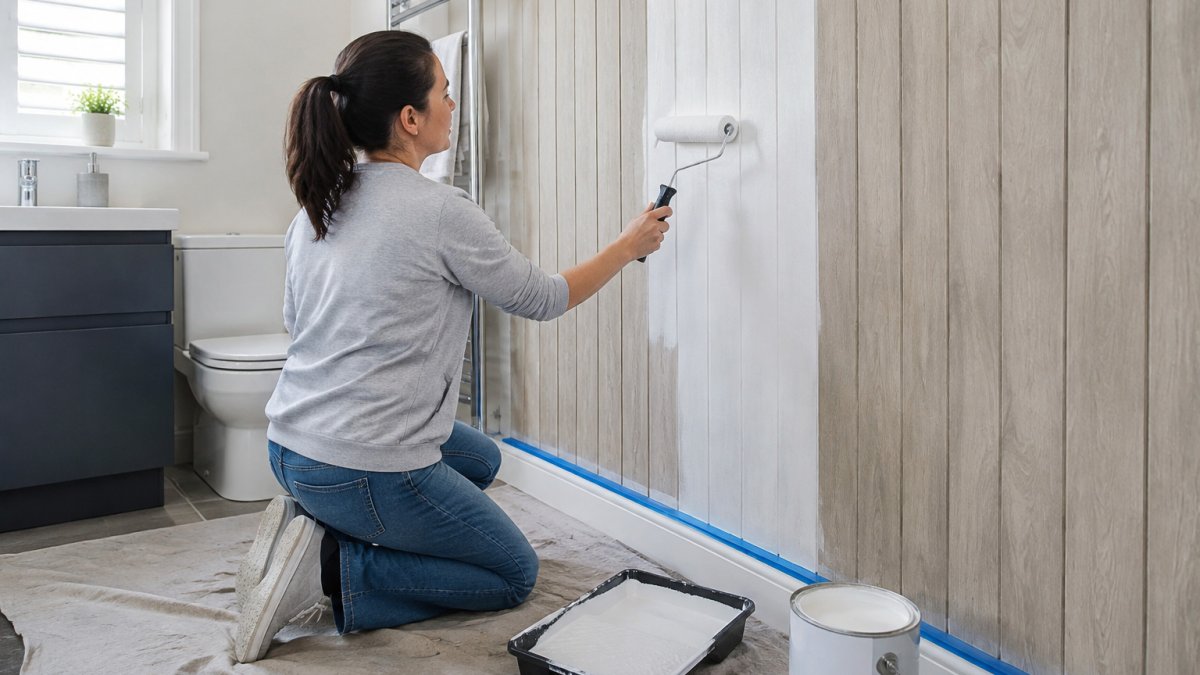
- Mask off the ceiling line, skirting, window frames and any fittings. Press the tape down firmly with a fingernail so paint cannot creep underneath.
- Lay down your dust sheet or drop cloth, and keep a damp cloth to hand for immediate drips.
- Use the brush to cut in around edges, corners and the joins between panels. Load the brush about a third of the way up the bristles and work in short strokes, because overloading is the main cause of runs on vertical surfaces.
- Roll the main areas with the roller, working in sections from top to bottom. On shaker-style or slatwall panels, roll the flat face first, then use the brush to work paint into the grooves and edges before the rolled section dries.
- Keep a wet edge by overlapping each stroke slightly, so you avoid visible lines. Work in sections no wider than about a metre, and finish each section before moving on.
- Let the first topcoat dry fully, then apply the second coat in the same way. Two thin coats look better than one thick one, and a thick coat on a vertical panel is more likely to sag before it cures.
- Remove the masking tape while the final coat is still slightly tacky, pulling it away at a low angle. If you wait until the paint is fully hard, the tape will tear the fresh edge.
Choosing the Right Roller and Brush for Panels
A 250mm roller with a short-pile sleeve is the right choice for flat panel faces, because a medium or long pile holds too much paint and leaves a stippled texture that shows under satin and eggshell finishes. For profiled panels, a 100mm mini roller gets into recesses faster than a brush. Use a 50mm angled brush for cutting in and for working paint into grooves, and keep a separate brush for primer so you are not cleaning it between every coat.
Avoiding Common Painting Faults on Panels
Watch out: painting when the room is cold or damp can cause the topcoat to bubble or stay tacky for days. Keep the room ventilated and above the temperature the tin recommends; most interior paints need at least 10°C, and some water-based products specify 15°C.
Other faults to guard against:
- Visible brush marks on the panel face: usually caused by paint that is too thick or by over-brushing. Add a little water to water-based paint, stir thoroughly, and lay off the final stroke lightly in one direction.
- Paint pooling in grooves: load the brush less and draw it along the groove in one continuous pass, then wipe the edge of the groove with a barely damp cloth before the paint sets.
- Patchy finish over filled areas: filler absorbs paint differently from the panel surface, so seal every repair with primer before the topcoat.
- Paint peeling at the edges: often the result of sanding dust left on the surface. Wipe down with a tack cloth immediately before painting.
Drying and Recoating Times
Drying time varies by product, so check the tin. Most water-based primers are touch-dry within one to two hours and ready to overcoat in four, while solvent-based primers typically need six to eight hours before recoating. Allow the full cure time, often several days for water-based paints, before the wall gets heavy use or a deep clean.
The sequence matters as much as the paint itself, so the main steps and their timings are summarised below.
| Step | What to do | Time or frequency |
|---|---|---|
| Mask off | Tape ceiling line, skirting and fittings | Before painting |
| Cut in | Brush edges, corners and panel joins | Load brush a third of the way up |
| Roll | Paint main areas top to bottom in sections | Sections no wider than about a metre |
| First topcoat | Apply first thin coat and let dry fully | Follow tin's drying time |
| Second coat | Repeat with a second thin coat | Same as first coat |
| Remove tape | Pull tape off at a low angle | While final coat is slightly tacky |
How Long Does It Take to Paint Wall Panels?
A standard room usually takes two to four hours of hands-on painting, based on industry benchmarks for DIY painting (Statista, 2026). Add extra time for preparation, drying between coats and cleaning up. Plan for a full weekend if the room has a lot of panelled walls.
Drying time varies by product, so check the tin. Most primers are touch-dry within a few hours, but allow the full cure time before the wall gets heavy use or a deep clean.
Booking Your Wall Panels and Installation Materials from Wetwall Wonders
If you are replacing old panels rather than painting them, Wetwall Wonders stocks wall panels in widths including 250mm, 300mm, 500mm and 900mm, plus Dumawall tile-effect and Linerio slatwall options. For guidance on keeping textured panels looking good, see how to maintain textured wetwall panels. Our installation accessories include silicones, adhesives and trims. Pricing depends on quantity, dates and delivery, so check the website or request a quote for current figures.
Frequently Asked Questions
Do I need to sand wall panels before painting?
Yes, in most cases. A light sand with 120 to 180 grit paper scuffs the surface so primer and paint can grip, and it removes any gloss or sealant that would otherwise cause peeling. Wipe away the dust with a damp cloth and let the panel dry before priming. Avoid heavy sanding on thin veneers, as it can cut through the surface layer and expose the substrate beneath.
What is the best type of paint for wooden wall panels?
A water-based acrylic eggshell or satin finish suits most wooden wall panels in the UK. It dries quickly, has low odour and resists scuffing in hallways and bathrooms. Use a primer designed for wood or a stain-blocking primer, then two thin topcoats. Oil-based paints give a hard finish but take longer to dry and yellow over time, so choose them only if you have a specific reason.
Should I use a primer on wall panelling?
Yes. Primer seals the surface, improves adhesion and stops tannins or knots in timber from bleeding through the topcoat. It also gives you a more even colour, which means you may need fewer topcoats. Apply one coat of primer, allow it to dry fully as the tin directs, and lightly sand before painting. Skipping primer is the most common cause of a patchy or peeling finish.
How many coats of paint do wall panels usually need?
Most wall panels need one coat of primer followed by two thin coats of topcoat. Thin, even coats dry harder and show fewer roller marks than one heavy coat. Check the drying time on the tin before recoating, usually two to four hours for water-based paint at room temperature, and lightly sand between coats if you spot any texture or dust nibs.


