

Prevent Mold Behind Wall Panels: A 2026 Guide
Table of Contents
- Why Mold Grows Behind Wall Panels
- Understanding Thermal Bridging and Surface Temperature
- Best Bathroom Wall Panel Adhesive for Moisture Prevention
- How to Seal Bathroom Wall Panels Against Moisture
- Bathroom Ventilation Requirements and Air Exchange
- Controlling Relative Humidity and Dew Point
- Installation Best Practices to Prevent Mold Behind Wall Panels
- Preventative Maintenance and Long-Term Monitoring
Last Updated: August 23, 2026
Why Mold Grows Behind Wall Panels
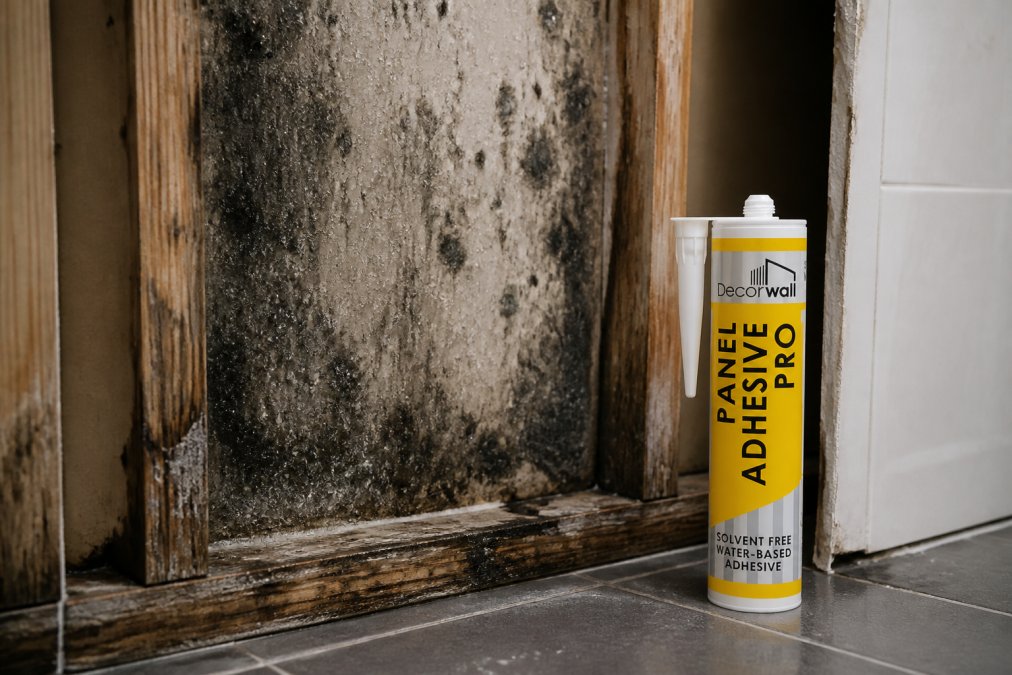
Mold thrives where moisture, warmth, and poor air circulation align, conditions almost guaranteed behind wall panels. The cavity between panel and wall traps condensation, particularly in bathrooms where humidity spikes regularly.
Condensation and moisture accumulation
When warm, humid air meets a cold surface, it condenses into liquid water. Behind wall panels, this happens constantly because the cavity traps air and prevents natural drying. The wall acts as a thermal barrier, keeping the panel's inner surface cooler than the bathroom air. Water droplets form on this cool surface and accumulate in unsealed gaps where panels meet walls and each other. The problem intensifies in poorly ventilated bathrooms where moisture-laden air has nowhere to escape.
Poor airflow creating ideal conditions
Stagnant air is mould's best friend. Behind wall panels, airflow is essentially zero, allowing spores to settle and germinate. Black mould thrives in these undisturbed, damp microclimates, feeding on dust, soap residue, and skin cells that accumulate in the cavity. Without active air circulation to dry the surface and remove spores, mould colonies establish themselves quickly.
Understanding Thermal Bridging and Surface Temperature
Thermal bridging occurs when materials with high thermal conductivity create pathways for heat to escape, causing cold spots on the inner panel surface. When the panel's inner surface temperature drops below the dew point of surrounding air, condensation forms automatically.
The dew point is the temperature at which air becomes saturated and water condenses. In a typical bathroom at 65% relative humidity and 20°C air temperature, the dew point sits around 12°C (peer-reviewed research). If your panel's inner surface is cooler than 12°C, condensation will form. Thermal bridging pushes surface temperatures below this threshold, making condensation inevitable.
Proper installation minimizes thermal bridging by ensuring continuous contact between adhesive and both wall and panel. Gaps in adhesive coverage create air pockets that allow the wall's cold temperature to reach the panel surface. Using a water-resistant adhesive like Decorwall Panel Adhesive Pro that bonds completely across the entire surface prevents these thermal weak points and maintains a warmer panel surface.

Best Bathroom Wall Panel Adhesive for Moisture Prevention
The adhesive you choose determines whether your panel installation resists moisture or becomes a mould factory. Not all adhesives perform equally in humid environments.
Choosing water-resistant adhesives
Water-resistant adhesives maintain their bond when exposed to moisture and don't absorb water into their matrix. Look for adhesives specifically rated for bathroom or wet-area use. The Decorwall Megabond Adhesive is a hybrid polymer sealant and adhesive designed to bond under wet conditions and maintain flexibility. This matters because rigid adhesives crack as materials expand and contract, creating pathways for moisture ingress. Quality moisture-resistant adhesives also don't provide organic compounds that fungal spores feed on, making them hostile to mould colonisation.

Application techniques that seal gaps
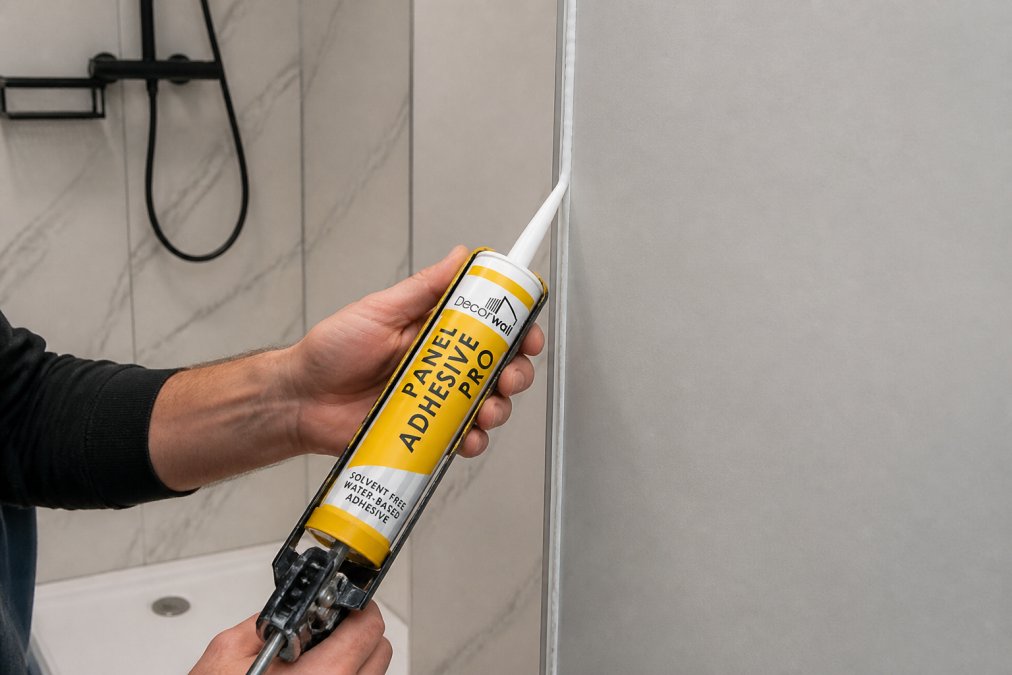
Adhesive application is where most installations fail. Thin, incomplete coverage leaves air pockets behind the panel where condensation collects. Apply adhesive in a continuous ribbon or grid pattern, never spot-bonding with isolated dabs. The ribbon should be thick enough (typically 3-4mm) that when the panel is pressed into place, adhesive squeezes out around the edges, confirming full contact.
Pay particular attention to the top edge of the panel, where moisture tends to accumulate. A continuous bead of adhesive along the top edge prevents water from wicking behind the panel at this critical point. Allow the adhesive to cure fully (typically 24 hours) before exposing the installation to moisture.
How to Seal Bathroom Wall Panels Against Moisture
Adhesive alone doesn't create a moisture-proof barrier. Sealing edges and joints is equally critical.
Sealing edges and joints with silicone
Silicone sealant creates a flexible, water-tight barrier at panel edges and joints. Unlike adhesive, silicone remains permanently flexible, accommodating movement as panels expand and contract. Apply silicone sealant to all external edges: top, sides, and bottom where the panel meets the wall or adjacent panels. Use a caulking gun to apply a continuous bead, then smooth it with a wet finger to create a concave profile that sheds water. The GP200 General Purpose Silicone Sealant includes fungicide in its formulation, actively preventing mould growth on the sealant itself.

Pay special attention to internal corners where panels meet, as water tends to accumulate there. A generous bead of silicone, properly smoothed, prevents water from pooling and wicking behind the panel.
Creating a vapour barrier
A vapour barrier resists water vapour transmission, preventing moisture from the wall substrate from migrating into the panel cavity and reducing condensation on cold surfaces. In practice, a continuous layer of silicone sealant around all panel edges functions as a vapour barrier. Moisture-laden air cannot pass through the sealed perimeter, so it cannot enter the cavity to condense. Complete sealing is non-negotiable; any gap defeats the vapour barrier entirely.
Bathroom Ventilation Requirements and Air Exchange
Ventilation is the primary mechanism for removing moisture from bathrooms. Without adequate air exchange, humidity accumulates regardless of how well-sealed your panels are.
Extractor fan sizing and placement
An extractor fan must move enough air to replace the entire bathroom atmosphere multiple times per hour. A typical bathroom requires 4-6 complete air changes per hour during and immediately after showering. Calculate the required fan capacity by multiplying the bathroom volume (length × width × height in metres) by the air changes per hour. A 2m × 2m × 2.4m bathroom (9.6 cubic metres) requires a fan rated for at least 38-58 cubic metres per hour.
Position the fan as far as possible from the shower or bath, ideally on the opposite wall. This forces moist air to travel across the room before being exhausted. Place the fan near the ceiling, where warm, moisture-laden air naturally rises. Ducting should be as short and straight as possible; rigid ducting is preferable to flexible. Ensure the duct terminates outside the building, not into an attic or cavity. A one-way damper on the external termination prevents outside air from flowing back into the bathroom when the fan is off.
Maintaining air circulation behind panels
Even with good ventilation, air behind panels remains stagnant unless you create circulation pathways. When panels are installed with a small air gap (typically 5-10mm) between the panel and the wall, natural convection can occur. Warm air rises behind the panel and exits at the top; cooler air enters at the bottom, creating gentle circulation that prevents moisture from settling.
This air gap must be created intentionally during installation using adhesive formulations designed to achieve specific thickness, or using spacers or shims. The gap should never be completely sealed at the top or bottom; leaving the edges unsealed allows natural air circulation to function.
Controlling Relative Humidity and Dew Point
Relative humidity is the amount of moisture in the air expressed as a percentage of the maximum moisture the air can hold at that temperature. The dew point is the specific temperature at which air becomes saturated. When they meet, condensation begins.
Monitoring moisture content with a hygrometer
A hygrometer measures relative humidity directly. Place one in your bathroom and monitor humidity levels over several days, particularly after showers. Humidity typically spikes to 80-95% immediately after a hot shower, then gradually decreases as ventilation removes moisture.
Ideal bathroom humidity sits between 30-60% relative humidity ([EXTERNAL_LINK: guidance from the UK's Health and Safety Executive | hse.gov.uk]). Levels consistently above 60% indicate inadequate ventilation or moisture generation exceeding the ventilation system's capacity. Track humidity patterns over time to determine whether your current system is working or where improvements are needed.
Using dehumidifiers for long-term control
A dehumidifier removes moisture from the air mechanically, lowering relative humidity when ventilation is limited. This is particularly useful in bathrooms with poor natural ventilation or during extended periods of high moisture generation. Position a dehumidifier in the bathroom for 2-4 hours after showers to remove the moisture spike before it condenses behind panels. Larger dehumidifiers (typically 10-20 litre capacity) are more effective than small portable units.
Installation Best Practices to Prevent Mold Behind Wall Panels
Proper installation is the foundation of a mould-free bathroom.
Proper wall preparation and surface treatment
Before adhesive touches the wall, prepare the surface thoroughly. Remove any existing mould, mildew, or fungicide treatments. Use a fungicide solution to kill existing spores, then allow the wall to dry completely. Ensure the wall surface is clean and free of dust, grease, and loose material. Wipe the wall with a damp cloth and allow it to dry completely.
Check the wall for flatness using a straightedge. Panels installed on uneven walls create gaps where they don't contact the wall surface. Minor unevenness (less than 3mm over 1 metre) is acceptable, but larger variations should be corrected to ensure proper panel adhesion.
Creating an air gap behind panels
An intentional air gap of 5-10mm between the panel and the wall improves moisture performance significantly by allowing natural convection to remove moisture. Achieve this gap using adhesive formulations designed to set at a specific thickness, or by using shims and spacers during installation. The gap must remain open at top and bottom edges to allow air circulation. If sealed at both ends, it becomes a trapped cavity where moisture concentrates rather than circulates.
Material-specific prevention techniques
Different panel materials have different moisture sensitivities. Solid acrylic or PVC panels resist moisture absorption and are inherently resistant to mould. For solid panel materials, focus on sealing edges and joints. For more porous materials, consider applying a moisture-resistant sealant to the back surface before installation. Dumawall tile-effect panels from Wetwall Wonders offer a solid, non-porous surface that resists moisture absorption, though proper sealing and ventilation remain essential.
Preventative Maintenance and Long-Term Monitoring
Installation is the foundation, but ongoing maintenance determines whether mould remains absent over years and decades.
Regular inspection routines
Inspect panels quarterly for signs of mould, water damage, or sealant degradation. Look for discolouration on the sealant, particularly at corners and edges. Check the silicone bead for cracks or gaps where water could penetrate. If you notice mould on the sealant surface, clean it immediately with a fungicide solution. If the sealant is cracked or degraded, remove the old sealant completely and apply fresh silicone.
Monitor humidity levels monthly using a hygrometer. If humidity consistently remains above 70% after showers, investigate whether your extractor fan is functioning properly and running for at least 20 minutes after showers. If the fan seems undersized, upgrading to a higher-capacity model may be necessary.
Cleaning and fungicide treatments
Prevent mould growth by keeping the bathroom environment hostile to fungal spores. Regular cleaning removes the organic matter that mould feeds on. Wipe down panels weekly with a damp cloth and dry them thoroughly. For preventative treatment, use a fungicide solution designed for bathroom surfaces. The GP200 General Purpose Silicone Sealant contains built-in fungicide, providing ongoing protection without requiring repeated applications. Never use bleach on silicone sealant, as it degrades the material and reduces its flexibility.
Preventing mould behind wall panels requires a systems approach: proper adhesive selection, complete sealing, adequate ventilation, and humidity control working together. Install panels using water-resistant adhesives like the Decorwall Panel Adhesive Pro, seal all edges with fungicide-containing silicone, ensure your extractor fan meets bathroom ventilation requirements, and monitor humidity regularly. At Wetwall Wonders, we supply all the materials you need, from specialist adhesives to fungicide-containing sealants, to create a moisture-resistant installation that stays mould-free for years. Get started with Wetwall Wonders and transform your bathroom into a space where mould simply cannot establish itself.
Frequently Asked Questions
Can mold grow behind bathroom wall panels?
Yes. Mold thrives behind wall panels when moisture becomes trapped and relative humidity exceeds 60%. Poor ventilation, thermal bridging, and inadequate sealing create ideal conditions for fungal growth. Black mold and mildew can develop within weeks if condensation accumulates and airflow is restricted. Proper installation with sealed joints, adequate ventilation, and moisture monitoring prevents this.
What's the best bathroom wall panel adhesive to prevent mold?
Water-resistant, fungicide-containing adhesives like Decorwall Panel Adhesive Pro (£9.00) or Decorwall Megabond Adhesive (£9.00) resist moisture ingress and inhibit spore growth. These hybrid polymer formulas bond securely while remaining flexible, preventing gaps where moisture can accumulate. Apply them consistently across the entire wall surface to eliminate air pockets that trap moisture and allow condensation to form.
How do I seal bathroom wall panels to stop water getting behind them?
Seal all joints and edges with silicone sealant containing fungicide, such as GP200 General Purpose Silicone Sealant (£24.00 for 3 cartridges). Apply a continuous bead along panel edges, corners, and where panels meet trim. Silicone creates a moisture barrier that prevents water ingress and resists mould growth. Caulk must cure fully (typically 24 hours) before exposure to moisture. Reapply annually if sealant shows gaps or cracking.
What bathroom ventilation do I need to prevent mold behind panels?
Install an extractor fan rated for your bathroom volume (minimum 60 litres per second for standard bathrooms). Run it during and for 20 minutes after showers to remove moisture-laden air. Ensure ducting exits externally, not into lofts. Combine mechanical ventilation with passive air circulation by maintaining a small air gap behind panels. Target relative humidity below 60% to inhibit mould spore germination and fungal growth.
This article was written using GrandRanker

