
Repairing Cracks in Bathroom Wall Panels: Step-by-Step
Table of Contents
- Identifying Panel Material and Type of Damage
- How to Repair a Hole in a Plastic Shower Wall
- Repairing Chips and Scratches in Shower Wall Panels
- Building a Bathroom Wall Panel Repair Kit
- Waterproofing and Leak Checks After Repair
- Replace or Repair a Cracked Shower Panel?
- Frequently Asked Questions
Last Updated: October 4, 2026
Identifying Panel Material and Type of Damage
Repairing cracks in bathroom wall panels starts with two questions: what is the panel made of, and what kind of damage are you looking at when repairing cracks? Get those wrong and the best repair kit will still fail. At Wetwall Wonders, we supply panels and the adhesives and silicones that go with them.
Most bathroom wall panels fall into three groups:
- PVC panels: hollow or foam-cored, common in shower surrounds and bath panels
- Acrylic panels: solid, glossy, and prone to scratching rather than cracking
- Fibreglass panels: layered and strong, but chips expose the fibres underneath
Damage type matters too: a hairline crack, a chip, a scratch, and a hole all need different treatment.
PVC, Acrylic and Fibreglass: Different Repairs
Match your method to the panel. PVC takes filler and sealant well and is easiest to patch. Acrylic needs a fine abrasive and polish rather than filler, because coarse sanding leaves a dull patch.
Before you start, press gently along the crack. If the panel flexes or the crack opens, the panel is loose behind the surface, and no surface repair will last until that is fixed.
How to Repair a Hole in a Plastic Shower Wall
A hole in a plastic shower wall is repairable if it is smaller than a 10p coin and the panel behind it is firm. Larger holes, or holes where the panel has gone soft, usually mean replacement. Here is the method we recommend:
- Switch off and dry the area. Water and sealant do not mix.
- Clean around the hole. Remove loose material, soap scum, and debris.
- Sand the edges lightly. Rough edges give filler something to grip.
- Back the hole if you can. A small offcut of panel or waterproof tape stops filler falling through.
- Apply filler in thin layers. Build up slowly rather than one thick blob.
- Let it cure fully. Follow the product's stated cure time.
- Sand flush and smooth. Work from coarse to fine.
- Seal the repair. A bead of silicone keeps water out.
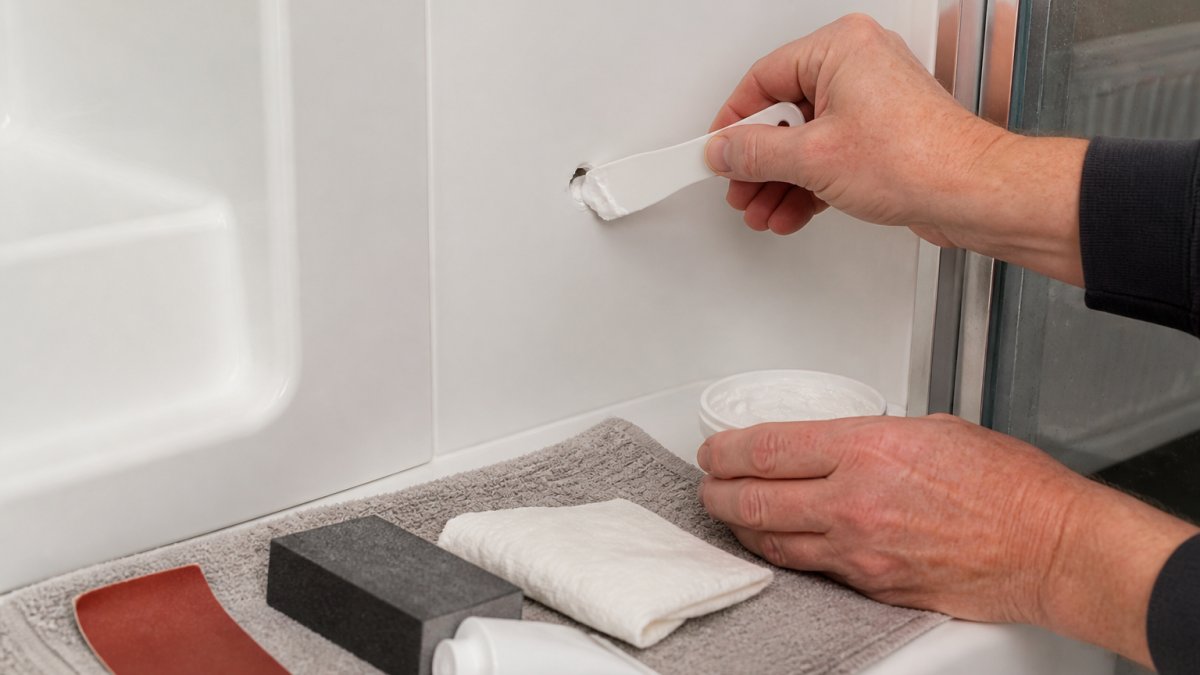
For bonding panels and trims, our Decorwall Panel Adhesive Pro (310 ml) is water-based, bonds most surfaces, and is ready in about an hour. For awkward spots, Decorwall Megabond Adhesive (295 ml) uses hybrid polymer technology and can even adhere under water.


Repairing Chips and Scratches in Shower Wall Panels
Before you touch the panel, work out what you are looking at, because a surface scratch, a stress crack, and impact damage each need a different approach, and on PVC, some cannot be repaired at all.
Diagnose the damage before you repair it
Run through this sequence with the panel dry and well lit:
- Surface scratch. A slight groove you can feel with a fingernail, but the panel is not split. These usually polish out.
- Stress crack. A fine, straight line, often running from a fixing point, corner, or joint, where the panel is under tension.
- Impact damage. A chip, star, or spider pattern with a clear point of contact. Material may be missing.
A useful test: press either side of the damage. If the crack opens and closes, the panel is moving and any filler will crack again within weeks. Fix the movement first.
Repairing scratches and chips on PVC panels
PVC is the most forgiving panel material, but it has limits. Shallow scratches polish out with a fine abrasive and plastic polish. Deeper scratches and small chips can be filled, but the repair will always be slightly visible on anything other than a plain white panel.
Work through it in this order:
- Clean first. Grime hides the true depth of the damage. Use a mild cleaner and let the surface dry.
- Assess depth. If you can catch a fingernail in it, it needs filler, not polish.
- Fill deep chips in thin layers, letting each dry before the next. A single thick blob will shrink, sag, and crack.
- Sand smooth with fine grit, keeping the surrounding surface flat. Stop as soon as the patch is level.
- Polish glossy panels to blend the repair in. A dull patch on a gloss panel is more obvious than the original chip.
When a PVC crack cannot be repaired
On PVC bathroom wall panels, repair is usually not viable when:
- The crack is a through-crack rather than a surface defect.
- The panel is hollow-cored and water has got into the core.
- The panel has gone soft, swollen, or delaminated around the damage.
In these cases, replacement is the honest answer. A patch may look acceptable for a few weeks, but it will not restore the waterproof layer, and water will find its way behind the panel.
Colour matching and finish expectations
Colour matching is where DIY repairs usually show. White panels are forgiving; patterned or tile-effect panels are not:
- Plain white PVC: a careful repair can be almost invisible from normal viewing distance.
- Coloured PVC: touch-up products rarely match exactly, especially once the panel has faded.
- Patterned or tile-effect panels: a patch will show. A trim strip, a shelf, or a replacement panel usually hides it better.
If the damage sits in a prominent spot on a patterned panel, weigh up whether a trim or replacement panel hides it better before spending time on a repair that will never blend in.
Repairing chips and scratches on acrylic and fibreglass
Acrylic and fibreglass need a different approach:
- Acrylic is solid and glossy. Fine scratches polish out with a plastic polish and a soft cloth. Deep chips need a specialist acrylic filler, polished back to a gloss or it will stand out. Coarse sanding leaves a permanent dull patch, so use the finest abrasive that will do the job.
- Fibreglass is layered. A chip exposes the fibres underneath, and those fibres must be sealed or water will wick into the laminate and the damage will spread. Fill the chip, then seal it with a waterproof resin or suitable sealant.
For both, check the product label first. Some fillers and sealants are formulated for PVC and are not suitable for acrylic or fibreglass, and some solvent-based products can attack the surface rather than repair it.
Building a Bathroom Wall Panel Repair Kit
A bathroom wall panel repair kit lets you clean, fill, seal, and finish a repair without a second trip to the shop. Building your own usually gives you better products for the same money. Here is what a complete kit should contain:
Decorwall Panel Adhesive pro (310 ml) →
| Item | Job It Does | Notes |
|---|---|---|
| Mild cleaner and cloths | Remove grime and loose material | Do this before anything else |
| Fine sandpaper (mixed grits) | Key the edges and smooth filler | Coarse to fine |
| Two-part filler or epoxy putty | Fill holes and deep chips | Sets hard, sands smooth |
| Plastic spatula | Apply filler evenly | Cheap and reusable |
| Silicone sealant | Waterproof the finished repair | Mould-resistant is better |
| Colour-matched touch-up | Blend the patch | Only for solid-colour panels |
Adhesives and Sealants That Work on Panels
Not every adhesive suits every panel. Solvent-based products can attack some plastics, so check the label first.
Silicone sealant is the right choice for waterproofing edges and joints. Our GP200 General Purpose Silicone Sealant (Pack of 3) is mould-resistant, fast-setting, and suitable for bathrooms and shower rooms, with good adhesion to glass, glazed surfaces, ceramic tiles, and many plastics.

For bonding rather than sealing, use a panel adhesive rather than silicone. Adhesives grip; sealants flex.
Waterproofing and Leak Checks After Repair
Waterproofing is the step most DIY repairs skip, and it is why so many fail. A patch that looks perfect can still let water behind the panel, where it causes mould and rot out of sight. Run this check once the repair has cured:
- Press along the repair. Any movement means it is not bonded.
- Check every joint and edge for gaps.
- Run the shower for several minutes.
If water is getting behind the panel rather than through the crack, the repair will not solve the problem. Find the source first.
Replace or Repair a Cracked Shower Panel?
This is the decision that matters most, and most guides leave it vague. "Repair small cracks, replace large ones" is not much help when you are standing in front of a panel wondering which yours is. Here are criteria you can apply.
Decision criteria: repair or replace?
Work through these in order. If any of the "replace" conditions apply, a repair is unlikely to last.
| Factor | Repair is viable | Replacement is the better answer |
|---|---|---|
| Crack length | Short, localised, and not running edge to edge | Runs edge to edge, or spans more than a small fraction of the panel |
| Crack type | Surface scratch, small chip, or shallow stress mark | Through-crack, split, or damage that lets light pass through |
| Panel movement | Panel is firm and does not flex when pressed | Panel flexes, the crack opens and closes, or the panel is loose behind the surface |
| Backing access | You can reach behind the panel to back the repair | No access, or the backing is soft, damp, or deteriorated |
| Waterproof layer | Intact, with no sign of water behind the panel | Compromised, or there is evidence of water behind the panel |
| Panel condition | Sound, dry, and not swollen or delaminated | Soft, swollen, crumbly, or delaminated around the damage |
| Visibility | Low-visibility spot, or a plain white panel | Prominent spot on a patterned or tile-effect panel |
| Cause | One-off impact damage on a stable panel | Recurring stress, movement, or water-related deterioration |
If you are on the fence, ask one question: can you restore the waterproof layer, or only hide the damage? If it is only hiding, replace the panel.
Durability and limitations of DIY repairs
A repaired panel is not the same as an intact one. Here is what to expect:
- Filler and sealant are not as strong as the original panel. A repaired area can crack again under heat, movement, or impact. That is the nature of a patch, not a failure of your work.
- Colour matching rarely survives close inspection. On plain white panels it can be very good. On coloured, patterned, or aged panels it will show.
- Seams and patches can be visible. A repair in a low-visibility spot may be invisible in daily use. The same repair mid-shower-wall will be noticeable.
A well-executed repair on a sound PVC panel in a low-stress location can last a long time. A repair on a moving, water-damaged, or hollow-cored panel may fail within weeks. Match your effort to the odds.
Safety and product compatibility
Before you buy, check that the product suits your panel material and wet-area use:
- Ventilate the room. Adhesives, sealants, and fillers can release vapours. Open a window or use extraction, and follow the manufacturer's instructions on ventilation and curing.
- Read the label for material compatibility. Some solvent-based products are not suitable for PVC, acrylic, or fibreglass and can attack the surface rather than repair it. Check before you commit, not after.
- Handle and store products safely. Keep adhesives, sealants, and solvents away from children and pets, store them as directed, and dispose of leftovers responsibly. For general guidance on safe handling of substances, see the Health and Safety Executive guidance on substances at work.
If replacement is the answer
If the criteria point to replacement, choose a panel that fits the space rather than forcing a standard size to work.
When you replace a panel, treat it as an opportunity to fix the cause. Check the wall behind it for damp, mould, or movement, and address any water ingress before the new panel goes on.
For more on safe sealing practice and preventing mould in the home, see NHS guidance on preventing mould in the home.
Frequently Asked Questions
Can a cracked plastic shower wall be repaired?
Yes, if the crack is short and the panel is still firmly attached to the wall. Clean the area, apply a thin bead of silicone or a two-part filler designed for plastics, then smooth it flush. For cracks longer than a few centimetres or those that run through the panel, replacement is usually the more reliable option.
How do you know whether a cracked bathroom wall panel needs replacing?
Replace the panel if the crack runs edge to edge, if the panel has become loose from the wall, or if water has already got behind it. Small surface cracks and chips that sit flat and dry can be repaired. If the crack keeps returning after a repair, the panel is moving and needs to come off.
What is the best repair paste for a crack in a bathroom wall panel?
A two-part epoxy filler or a colour-matched acrylic repair paste works well on PVC, acrylic and fibreglass panels. For a flexible repair that also seals, a hybrid polymer adhesive such as Decorwall Megabond Adhesive (£9.00) bonds most panel surfaces and stays waterproof once cured.
How do you stop water getting behind a cracked shower wall panel?
Seal the crack first, then run a bead of mould-resistant silicone along the base of the panel where it meets the shower tray. GP200 General Purpose Silicone Sealant (£24.00 for three) contains fungicide and is suitable for high-humidity areas. Check the seal every few months and reapply if it lifts.
A cracked panel is rarely a crisis, but it will not fix itself, and water behind a panel causes far more damage than the crack itself. If the damage is beyond a patch, Wetwall Wonders can help you replace it properly. Our panels come in a wide range of sizes, including 250mm, 300mm, 500mm, and 900mm, with tile-effect and slatwall styles to match your room. We also supply the adhesives, silicones, and trims so everything arrives together. Browse the range and get the job finished.

