

Is Bathroom Wall Panelling DIY Friendly? A Practical Guide
Table of Contents
- Is Bathroom Wall Panelling DIY Friendly?
- Bathroom Wall Panel Installation Tools You'll Actually Need
- How to Install Bathroom Wall Panels: Step-by-Step
- Can You Put Bathroom Panels Over Tiles?
- Tiling vs Bathroom Wall Panels: Which Is Right for You?
- Common Installation Mistakes to Avoid
- DIY vs Professional Installation: Cost and Time
- Conclusion
Last Updated: August 26, 2026
Is Bathroom Wall Panelling DIY Friendly?
Bathroom wall panelling DIY installation is achievable for homeowners with basic DIY experience. Success depends on proper surface preparation, the right tools, and understanding your substrate. Most DIY failures happen because people skip surface preparation, use the wrong adhesive, or misjudge how moisture moves behind panels.
Modern bathroom panels are designed with the DIYer in mind. They're lightweight, require no grouting, and are far more forgiving than traditional tiling. However, they demand respect for moisture management and substrate compatibility.
Bathroom Wall Panel Installation Tools You'll Actually Need
You don't need expensive power tools, but you do need precision tools that work properly.
Essential hand tools:
- Spirit level (at least 600mm, preferably 1200mm)
- Tape measure (5m minimum)
- Pencil or marker for layout
- Jigsaw with fine-tooth blade
- Coping saw for internal corner cuts
- Hammer (we recommend the Stanley Curved Claw Hammer)
- Utility knife for trimming
- Caulking gun for adhesive and silicone sealant
- Notched spreader (6-10mm) for adhesive application
- Rubber mallet for seating panels
- Sponge and bucket for cleanup
A spirit level is non-negotiable. Panels that aren't plumb will look visibly crooked. A jigsaw with a fine-tooth blade cuts cleanly without chipping. The notched spreader creates consistent adhesive ridges, ensuring proper coverage without excessive squeeze-out.
How to Install Bathroom Wall Panels: Step-by-Step
Installing bathroom wall panels follows a logical sequence: prepare the substrate, establish your starting point, apply adhesive, fit panels, and seal joints.
Surface Preparation and Substrate Compatibility
Your substrate determines whether panels will adhere properly. Bathroom wall panelling requires a solid, level, and dry surface. Suitable substrates include plasterboard, cement board, solid plaster, and existing tiles if firmly bonded. Unsuitable substrates include loose wallpaper, glossy paint, crumbling plaster, or damp walls.
Preparing different substrates:
For painted plasterboard, sand lightly with 120-grit paper to break the gloss and improve adhesive grip. Wipe away dust with a damp cloth and let dry completely.
Existing tiles can be panelled over if solid using a hybrid polymer adhesive like Decorwall Megabond Adhesive (£9.00). Remove any loose or cracked tiles first.

Cement board is an excellent substrate for wet rooms and requires no special preparation beyond ensuring it's properly fixed and dust-free.
Damp walls are a deal-breaker. If your wall shows signs of moisture, discoloration, soft plaster, or musty smell, address the damp problem before installing panels. Panels trap moisture, accelerating mold growth and adhesive failure (the CDC).
Leveling uneven walls:
Minor undulations (up to 5mm) are acceptable if you use sufficient adhesive (peer-reviewed research). Larger irregularities require shimming or skim-coating. Measure your wall at multiple points with a spirit level to identify high and low spots.
Measuring, Cutting, and Fitting Panels
Measure your wall height and width in multiple locations because bathrooms rarely have perfectly square corners. Use the largest measurements as your starting point.
Layout planning:
Sketch your wall on paper, marking each panel location, corners, and obstacles. If your wall width doesn't divide evenly by panel width, plan to cut panels on both edges rather than leaving a thin sliver.
Cutting panels:
Mark cut lines clearly on the panel face. For straight cuts, use a jigsaw from the back side to minimize chipping. For internal corners, use a coping saw. Always wear safety glasses and cut in a well-ventilated area.
Test-fit panels before applying adhesive. Check that panels sit flush and align with adjacent panels.
Adhesive Application and Waterproofing
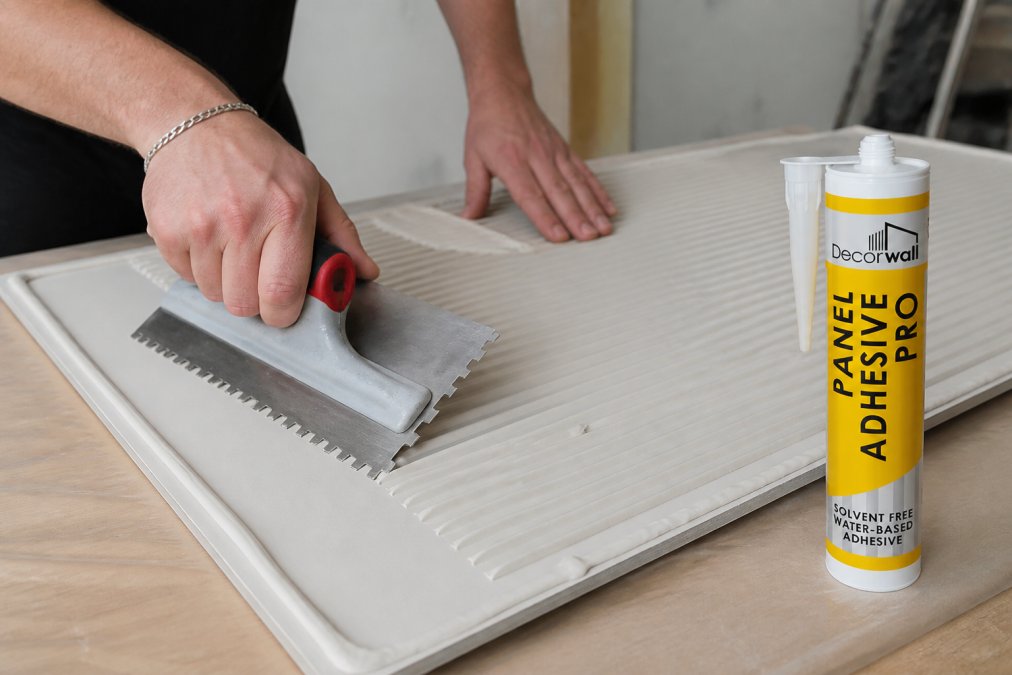
Use a water-based, flexible adhesive designed for wall panels. Decorwall Panel Adhesive Pro (£9.00) sets in 1 hour and cures fully in 24 hours.

Apply adhesive using a notched spreader in consistent ridge patterns across the substrate. Press the panel firmly into place using a rubber mallet. Check plumb as you go.
Waterproofing joints:
Seal all joints with silicone sealant, not grout. Grout cracks when panels flex with temperature changes. Use mold-resistant silicone like GP200 General Purpose Silicone Sealant (£24.00 for a pack of 3), which contains fungicide to prevent mold growth.

Apply silicone to all vertical joints between panels, horizontal joints where panels meet trim, and around penetrations. Smooth the bead with a wet finger before it sets. Allow 24 hours for full cure.
Can You Put Bathroom Panels Over Tiles?
Yes, you can install bathroom wall panelling over existing tiles if they're firmly bonded and you use the correct adhesive. Press on tiles with firm hand pressure; if any flex or sound hollow, remove them first.
Use a hybrid polymer adhesive that bonds to glazed surfaces. Standard water-based panel adhesives won't grip smooth tile adequately.
Prepare tiles by cleaning thoroughly to remove soap residue and mold. Sand lightly with 120-grit paper to improve adhesive grip.
Tiling vs Bathroom Wall Panels: Which Is Right for You?
Tiling advantages: Ceramic or porcelain tiles last 20+ years with minimal maintenance, are highly moisture-resistant, and offer unlimited design flexibility. However, tiling is labour-intensive, requires grouting and sealing, and mistakes are expensive.
Wall panelling advantages: Panels install faster than tiles, require no grouting, and are more forgiving of minor mistakes. They're lightweight, easier to cut, and available in numerous finishes including tile-effect designs. They're also easier to remove or replace later.
Panelling limitations: Panels aren't suitable for high-traffic areas where impact damage is likely. Lower-quality panels may show wear over 10+ years, though premium panels maintain their finish well. Panels require careful waterproofing through silicone sealing.
Cost comparison: Tiling typically costs more in labour. Wall panelling generally costs less overall because installation is faster and requires fewer specialist materials.
Maintenance: Tiles require periodic grout cleaning and sealing. Panelling requires only occasional cleaning with a damp cloth and inspection of silicone seals.
For most homeowners, the choice depends on budget, timeline, and aesthetic preference. Panelling is the stronger choice for a quick, modern refresh. Tiling is worth the investment if you prioritize maximum durability.
Common Installation Mistakes to Avoid
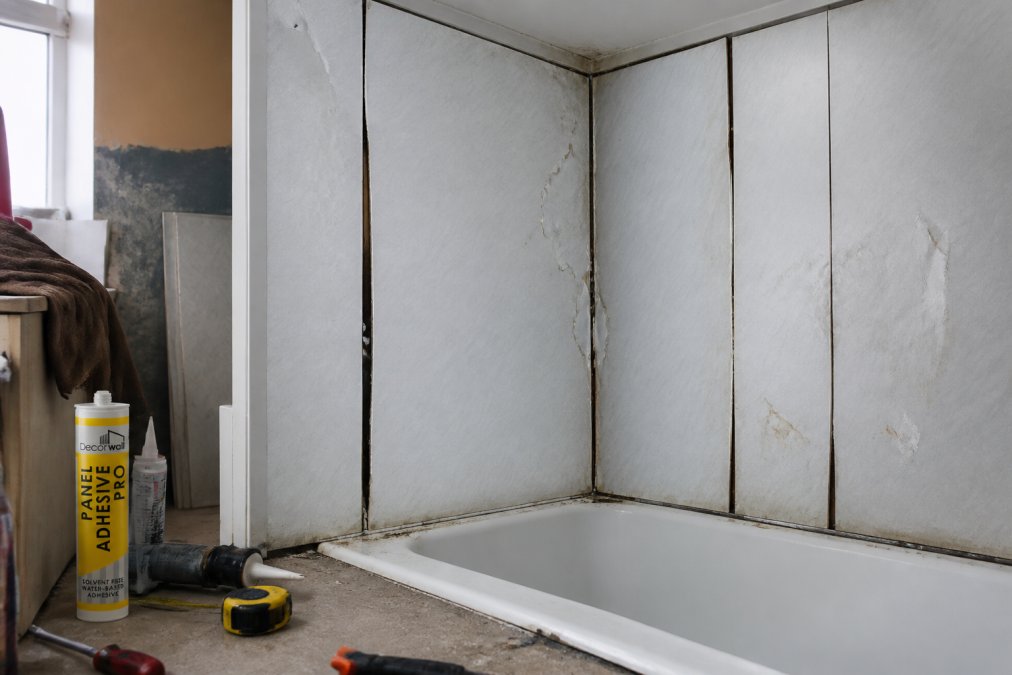
Skipping surface preparation: Rushing through wall assessment leads to adhesive failure and panels that peel away. Invest time in leveling the wall and ensuring the substrate is clean and dry.
Using the wrong adhesive: Panel adhesive isn't interchangeable. Hybrid polymers are necessary for non-porous surfaces. Check manufacturer recommendations for your substrate.
Insufficient adhesive coverage: Apply adhesive across the entire back surface using a notched spreader. Insufficient coverage creates hollow spots and eventual failure.
Panels not plumb: Check plumb frequently as you install. Adjust panels before adhesive sets.
Ignoring moisture and waterproofing: Seal all joints with silicone sealant and ensure the substrate is dry. In wet areas, consider applying a damp-proof membrane before panelling.
Cutting panels incorrectly: Use a sharp jigsaw blade and cut from the back side to produce clean edges that fit trim properly.
Over-tightening trim: Fit trim with gentle hand pressure. Over-tightening can crack panels or bend trim.
DIY vs Professional Installation: Cost and Time
DIY installation timeline: A small bathroom takes 2-4 days, including surface preparation, cutting, fitting, and sealing (diy.org). A larger bathroom may take 5-7 days.
Professional installation timeline: Experienced installers complete a small bathroom in 1-2 days, a larger project in 3-4 days.
Cost breakdown for DIY: Materials cost £300-600 for a small bathroom. Tools cost £150-300 if you don't already own them. Total investment is typically £450-900.
Cost breakdown for professional installation: Labour typically costs £400-800 for a small bathroom, plus materials. Total cost is usually £800-1,400.
When DIY makes sense: If you have moderate DIY experience, available time, and comfort with precision work, DIY installation saves money and gives you complete control.
When professional installation makes sense: If your bathroom has complex geometry, structural issues, or significant moisture problems, professional expertise is worth the cost. Professionals can troubleshoot substrate issues and guarantee their work.
Bathroom wall panelling DIY installation is achievable for homeowners willing to invest time in proper preparation and technique. The difference between success and failure comes down to substrate compatibility, adhesive application, and waterproofing. Wetwall Wonders supplies everything you need: high-quality adhesives like Decorwall Panel Adhesive Pro, waterproof silicone sealants like GP200, and panels in multiple sizes and finishes. Start with honest assessment of your wall condition, invest in the right materials, and take time with each step. The result will be a modern, durable bathroom you've completed yourself.
Frequently Asked Questions
What tools do I need to install bathroom wall panels myself?
Essential tools include a spirit level, jigsaw for cutting, tape measure, adhesive (such as Decorwall Panel Adhesive Pro or Decorwall Megabond Adhesive), silicone sealant like GP200 General Purpose Silicone Sealant, a notched trowel, and a hammer. A caulking gun, pencil, and straight edge are also helpful. Having the right adhesive and sealant products is critical, they bond panels securely and prevent moisture ingress.
How long does it take to install bathroom wall panels as a DIY project?
A single wall typically takes 3-5 hours for an experienced DIYer, depending on panel size, complexity of cuts, and wall condition. An entire bathroom (four walls plus shower surround) usually requires 1-2 days of work. Surface preparation adds 2-3 hours. Adhesive curing time is 24 hours before the wall is fully load-bearing, though panels are stable within 1 hour. First-time installers should allow extra time for measuring, cutting, and problem-solving.
Can I install bathroom panels over existing tiles?
Yes, you can install panels over tiles if they are firmly bonded to the wall and not cracked or loose. The tiled surface must be thoroughly cleaned and degreased. However, this approach adds height to the wall and may affect door clearances in small spaces. Removing tiles first is preferable for better substrate compatibility and a neater finish. If you do install over tiles, use a high-grip adhesive like Decorwall Megabond Adhesive and ensure proper waterproofing with silicone sealant at all joints and edges.
Are bathroom wall panels genuinely easier than tiling for a DIYer?
Yes, panels are significantly easier than tiling. Panel installation requires no grouting, no mixing compounds, and fewer specialist skills. Panels are quicker to fit and cut, and mistakes are less costly. However, tiling offers more design flexibility and a traditional aesthetic. Panels are lower-maintenance, moisture-resistant by design, and create a seamless, modern look. For DIY installers prioritising speed, durability, and simplicity, panels are the better choice. Tiling suits those with time, experience, and a preference for classic finishes.
This article was written using GrandRanker

