
Using 250mm Panels in Small Bathrooms: A DIY Guide
Table of Contents
- Why 250mm Panels Work in Small Bathrooms
- Preparing Your Walls for 250mm Panel Installation
- How to Cut Bathroom Wall Panels to Size
- Best Adhesive for Bathroom Wall Panels and Sealing
- Bathroom Wall Panel Installation Guide: Step-by-Step
- Design Ideas and Aesthetic Trends for Small Spaces
- Maintenance and Long-Term Durability
- Common Mistakes to Avoid
Last Updated: August 11, 2026
Why 250mm Panels Work in Small Bathrooms
Using 250mm panels in small bathrooms solves a genuine problem: traditional tiling creates visible grout lines that fragment compact spaces. A 250mm panel width strikes the right balance between coverage and manoeuvrability in tight spaces where larger panels become unwieldy.
The key advantage is visual continuity. Where a standard 300mm or 500mm panel might require awkward cuts or leave uneven gaps in an ensuite, 250mm panels align naturally with smaller room proportions. They're narrow enough to handle through doorways and around fixtures, yet wide enough to minimise vertical seams.
Small bathrooms also benefit from the grout-free nature of PVC wall cladding. You avoid maintenance headaches of grout degradation in high-humidity environments. Panels like Decorwall Elite Print in Arctic Grey or Aquarius finishes provide seamless, hygienic surfaces that resist mould and mildew far better than grouted tile.

Installation in confined spaces becomes manageable with 250mm widths. Contractors and DIY installers report fewer complications with substrate preparation, less pressure on adhesive, easier alignment, and simpler trimming around obstacles.
Preparing Your Walls for 250mm Panel Installation
Wall preparation determines whether your panels stay bonded or begin peeling within months. This is where most DIY installations fail.
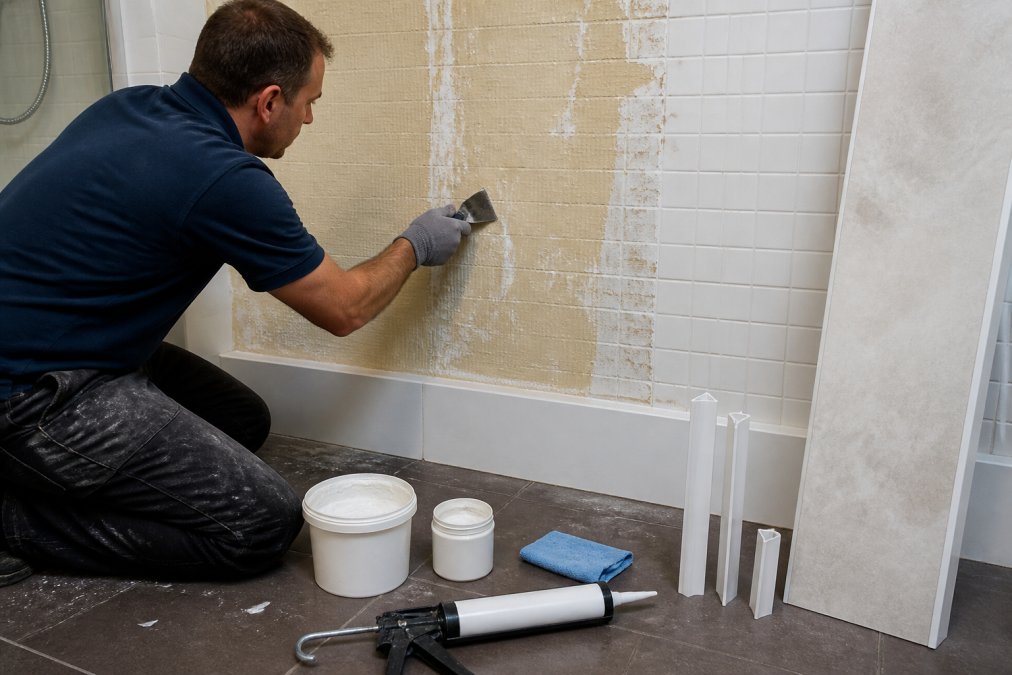
Start by removing existing finishes completely. Strip old tiles, wallpaper, or paint until you reach solid substrate. Use a scraper or chisel to clear loose material. Don't sand smooth surfaces, sanding creates dust that weakens adhesive bond. Instead, wipe with a damp cloth and allow to dry fully.
Check for moisture problems before installing anything. If walls are damp or show water damage, you have a substrate issue that panels alone won't fix. Ensure adequate ventilation and a working extractor fan, non-negotiable for small bathrooms. Many lack proper air movement, leading to condensation buildup behind panels.
The wall surface must be reasonably flat. Run a straight edge across your wall. Gaps larger than 3mm require filling with flexible bathroom-grade filler. Allow filler to cure completely (typically 24 hours) before priming.
Prime the wall with bathroom-grade primer or sealer. This creates a consistent surface that helps adhesive spread evenly and cure uniformly.
How to Cut Bathroom Wall Panels to Size
Cutting 250mm panels accurately requires the right tools and a methodical approach.
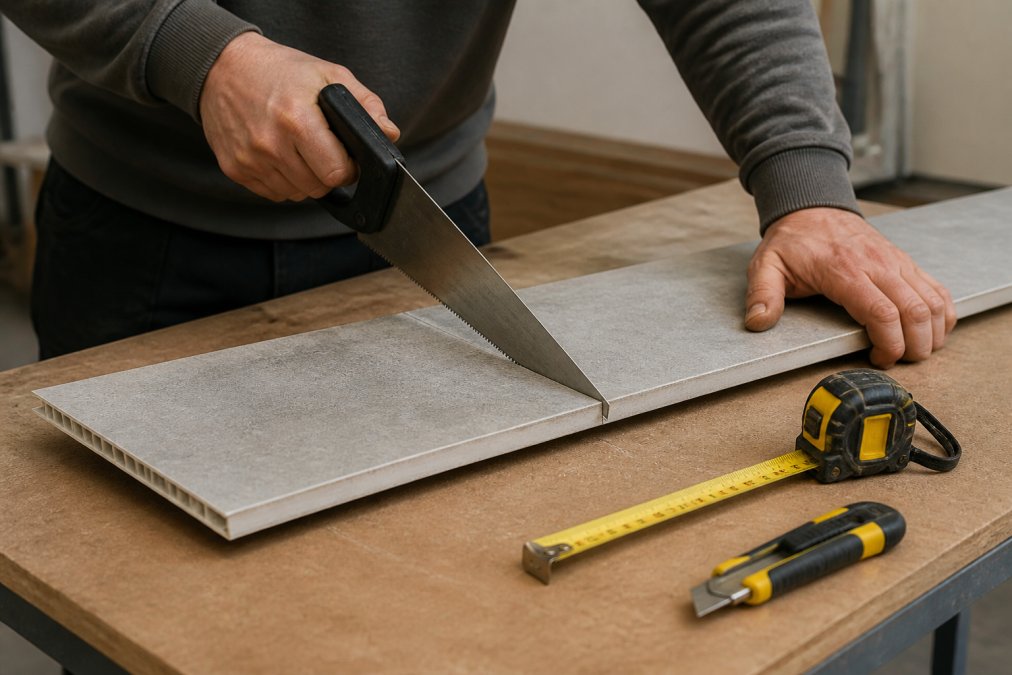
Measure twice, cut once. Mark your cut line using a pencil and straight edge. For lengthwise cuts, a fine-tooth saw works best. PVC panels cut cleanly with steady, even strokes. Avoid rapid sawing, which causes chipping. A circular saw with a fine-tooth blade produces cleaner cuts with less effort.
For cross-cuts around door frames or corners, a utility knife and straight edge often suffice. Score the panel deeply along your marked line with multiple passes. Snap the panel over a workbench edge, the scored line will break cleanly if cut deep enough.
Around fixtures like pipes or outlets, measure the hole location carefully from the panel edge. Mark it, drill a pilot hole from the back, then use a hole saw of appropriate diameter. This prevents splitting around the hole.
Sand rough edges with fine-grit sandpaper (120-150 grit). This removes burrs and creates a cleaner surface where the cut edge meets silicone sealant or corner trim.
Store cut panels flat and protected from damage. Vertical stacking or exposure to moisture before installation causes warping.
Best Adhesive for Bathroom Wall Panels and Sealing
The adhesive you choose determines whether panels stay bonded in high-moisture environments.
PVC wall panels require flexible, waterproof adhesive specifically formulated for bathrooms. Standard tile adhesive or construction adhesive won't work, they're too rigid and don't accommodate expansion and contraction from temperature and humidity fluctuations. Wetwall Wonders supplies adhesives engineered for their panels, ensuring compatibility and performance.
Apply adhesive to the panel back using a notched trowel or applicator gun. Spread in vertical beads or a grid pattern, leaving small gaps between beads to allow air to escape as you press the panel into place. Continuous coverage creates air pockets that weaken the bond.
Press the panel firmly against the wall, starting from the top and working downward. Use a rubber mallet and wooden block to avoid damage. Apply consistent pressure across the entire panel. Allow adhesive to cure for the full recommended time (24-48 hours) before exposing panels to water.
Silicone sealant completes the waterproofing. Apply it along all joints, between panels, at corners, and around fixtures. Use bathroom-grade silicone, not acrylic caulk. Acrylic cracks in humid conditions. Silicone remains flexible and maintains a watertight seal.
Run a wet finger along the silicone bead to smooth it and create a concave profile that sheds water. Allow silicone to cure fully (24-48 hours) before showering.
Bathroom Wall Panel Installation Guide: Step-by-Step
Measuring and Planning Your Layout
Measure the wall you're covering in multiple places, walls are rarely perfectly square. Calculate how many panels you'll need by dividing total width by 250mm and rounding up. Account for waste from cutting around obstacles. Order 10-15% extra to cover mistakes and future repairs.
Plan your starting point. Most installers begin at an inside corner, working outward to hide misalignment. Alternatively, centre your first panel and work outward symmetrically for balanced appearance.
Mark a vertical plumb line where your first panel will go. Use a spirit level to ensure it's truly vertical. This reference line is critical, if your first panel is out of plumb, every subsequent panel compounds the error.
Applying Adhesive and Positioning Panels
Apply adhesive to the panel back using vertical beads or a grid pattern. Press the panel against the wall, aligning its edge with your plumb line. Use a rubber mallet and wooden block to seat it firmly. Check that the panel is plumb as you work downward.
Install subsequent panels by butting them tightly against the previous one. Small gaps are acceptable and will be sealed with silicone. Use spacers to maintain even gaps if needed.
Work methodically from bottom to top. Support each panel from below as you install it, gravity pulls it downward and adhesive needs time to set.
Finishing Trims and Silicone Sealing
Install corner profiles and finishing trims before sealing. They bridge joints between panels and walls or between two walls meeting at a corner.
Apply silicone sealant along all vertical joints between panels using a caulking gun. Run a bead along each joint, then smooth it with a wet finger or caulk tool. Create a concave profile that sheds water.
Seal the perimeter where panels meet ceiling, floor, and fixtures. These are critical moisture barriers. Allow all adhesive and sealant to cure fully (48 hours minimum) before exposing panels to water.
Design Ideas and Aesthetic Trends for Small Spaces
Choosing the right finish transforms a small bathroom from purely functional to visually appealing. 250mm panels offer surprising design flexibility.
Tile-effect finishes like Dumawall create the appearance of traditional tiling without maintenance burden. Subtle patterns add character without overwhelming the room.
Light colours expand perceived space. Arctic Grey and Sandstone finishes reflect light and create an airy feel, particularly valuable in bathrooms without natural windows.
Vertical installation of 250mm panels draws the eye upward, making ceilings appear higher. This visual trick is especially useful in bathrooms with low ceilings.
Mixing finishes is a modern approach. Install one finish on the shower wall and a complementary finish on remaining walls to create visual zones.
Slatwall designs like Linerio offer contemporary aesthetics that work well in modern bathrooms, adding texture and visual depth.
Maintenance and Long-Term Durability
PVC wall panels require minimal maintenance compared to traditional tiling. Regular cleaning with a damp cloth and mild detergent removes soap residue and dust. Avoid abrasive cleaners or scouring pads.
Inspect silicone seals annually. If silicone shows cracks, discolouration, or separation, remove and replace it. Silicone is inexpensive and easy to reapply, preventing water penetration behind panels.
Check for signs of moisture behind panels. Soft spots, bulging, or musty smells indicate water ingress and potential mould growth. Ensure your extractor fan runs during and after showers.
The adhesive bond typically lasts 15-20 years in a well-maintained bathroom. Panels themselves are durable indefinitely if kept dry. Premium finishes like Decorwall Elite Print resist fading and yellowing better than budget alternatives.
Common Mistakes to Avoid
Rushing wall preparation causes adhesive failure within months, forcing costly reinstallation. Invest time upfront.
Underestimating waste when ordering panels leads to incomplete installations. Order at least 10-15% extra.
Using wrong adhesive or sealing products creates false economy. Cheap adhesive or acrylic caulk fails in bathroom humidity. Use products engineered for your panels.
Improper ventilation is a silent killer. Install or upgrade ventilation before installing panels.
Cutting panels incorrectly wastes material and creates weak points. Rough-cut edges don't seal properly with silicone.
Failing to allow proper curing time causes premature failure. Adhesive and silicone need full recommended time to set.
Not sealing all joints leaves gaps where water penetrates. Every joint must be sealed with bathroom-grade silicone.
Small bathroom renovations often feel constrained by space, but 250mm panels solve that problem by offering professional results in compact areas. The combination of easy installation, hygienic surfaces, and minimal maintenance makes them ideal for bathrooms where traditional tiling creates visual clutter.
Wetwall Wonders supplies complete solutions for panel installation, including adhesives and silicones engineered for bathroom environments. Their range of 250mm panels, including Decorwall Elite Print finishes in Arctic Grey, Aquarius, Palermo, and Sandstone, provides aesthetic flexibility alongside reliable performance. Start with proper wall preparation, use the right adhesives and seals, and your installation will remain watertight and attractive for decades. For guidance on bathroom moisture control and ventilation standards provides official recommendations for bathroom ventilation requirements that directly impact panel longevity.
Frequently Asked Questions
Will 250mm panels actually work in a narrow small bathroom without leaving awkward gaps?
Yes. The 250mm width is specifically designed for tight spaces because it creates fewer vertical seams than larger panels. In a narrow ensuite, you'll typically need just 3-4 panels across the wall, minimising visible joints. Proper wall preparation and accurate measuring prevent gaps. Start from a corner and work systematically across; if the final panel doesn't fit perfectly, trim it with a fine-tooth saw rather than forcing a gap.
What's the best adhesive for bathroom wall panels to prevent water damage?
Use a waterproof, flexible PVC adhesive specifically formulated for wet environments. Pair it with silicone sealant (not grout) at all joints and edges. Silicone remains flexible as walls move slightly, preventing water ingress behind the panels. Apply adhesive in a continuous bead or dabs across the back of each panel, then press firmly. Seal the top edge, bottom edge, and any internal corners with silicone to create a fully watertight envelope.
Are 250mm panels easier to install as a DIY project than larger sheets?
Yes, significantly. The narrower width makes them lighter to handle and position alone, reducing the risk of dropping or misaligning them. You have more control when pressing each panel into adhesive, and the smaller surface area means fewer air bubbles to chase out. Installation time per panel is roughly the same, but the reduced physical strain and lower error rate make them ideal for first-time installers in tight spaces.
How do I calculate waste and off-cuts when ordering 250mm panels for a small bathroom?
Measure your wall height and total width in millimetres. Divide the width by 250 to find how many panels you need lengthwise; round up. For height, most panels come in 2700mm lengths, which typically covers floor to ceiling with one cut per panel. Order 10-15% extra to account for cutting errors, damaged panels, and future repairs. Save all off-cuts; they're useful for filling awkward corners or around fixtures like towel rails.
This article was written using GrandRanker

