
How to Cut Holes for Shower Fixtures Without Cracking Tile
Last Updated: October 28, 2026
Quick Summary
Cut holes for shower fixtures by marking every opening from the valve body rather than old tiles, then sizing each hole to the trim plate and fixture instructions. Use a diamond hole saw run wet and slow, cut halfway from the front and finish from the back, and seal the penetration with sanitary silicone.
- Measure from the finished wall, not the bare board, since backer board, adhesive and panel thickness add up.
- Keep concealed valve holes at least 15mm inside the trim plate's outer edge on every side.
- Apply masking tape over the mark to stop the bit wandering on glazed tile.
- Drill a pilot hole first, then cut halfway from the front and finish from the back.
- Leave clearance around the valve body for a spanner and cartridge removal tool.
Table of Contents
- Step 1: Measure and Mark the Valve and Pipe Openings
- Step 2: Match the Hole Size to Your Shower Valve and Trim Plate
- Step 3: Pick the Best Drill Bits for Bathroom Tiles
- Step 4: Preventing Tile Cracks When Drilling
- Step 5: Cutting Circular Openings and Straight Cuts
- Step 6: Sealing Shower Fixture Holes Against Water Ingress
- Step 7: Dry Fit, Service Access and Finishing the Wall
- Order Panels, Trims and Silicones in One Go
- Frequently Asked Questions
Step 1: Measure and Mark the Valve and Pipe Openings
Getting the mark right is the whole job when installing shower fixtures.
Measure from the finished wall, not the bare board. Tile backer board, adhesive and panel thickness all add up, and a valve set 10mm too deep will not sit flush behind its trim plate.
Work through it in this order:
- Fit the panel or board dry against the wall first
- Mark the centre point of the valve body on the panel face
- Use a tape measure and spirit level, not guesswork
- Check the mark against the pipework from both sides
- Draw the circle with a template or a compass, then re-check it
A common mistake is marking from the old tiles. Old walls are rarely flat, so transfer every measurement from the valve body itself.
Step 2: Match the Hole Size to Your Shower Valve and Trim Plate
Hole size is decided by the trim plate, not the valve body. The opening only needs to clear the valve and its fittings; the trim plate covers the rest, so a hole that is too big leaves a gap no cover will hide. Most guides stop at that rule, but the reliable method is to size each opening from the fixture instructions and the escutcheon dimensions rather than from one generic hole size.
Work fixture by fixture:
- Concealed mixer valves, measure the widest part of the valve body, then add 5-10mm clearance so it slides in without forcing. Check the cartridge retaining nut and any isolating valves will pass through the opening, not just the body. Keep the hole at least 15mm inside the trim plate's outer edge on every side.
- Bar valves and exposed mixers, the pipe centres and the backplate usually set the opening. Mark the pipe positions from the valve body, then size the hole to clear the largest fitting on each pipe, typically 25-35mm for 15mm pipe with a compression nut.
- Shower arms and riser rails, a 25-30mm opening is common for a 15mm arm, but check the wall plate or flange diameter first; a flange smaller than the hole will not cover the cut.
- Concentric or slim trim plates, these leave no margin for error. Offer the plate against your marked circle before cutting and confirm the hole sits centrally, because a 5mm offset on a slim plate shows as a crescent gap.
Two details catch people out:
- Cartridge clips and retaining nuts need room to pass through, not just the body
- Service access, leave enough clearance around the valve body for a spanner and a cartridge removal tool. A hole sized only to the body can make a future cartridge change a wall-opening job.
If you are still deciding how the fixture will be framed once the panel is up, our guide to shower panel trim and corner profiles explains how the pieces work together.
Step 3: Pick the Best Drill Bits for Bathroom Tiles
The best drill bits for bathroom tiles are diamond hole saws for circular openings and carbide-tipped tile bits for small pilot holes. Standard masonry bits will wander across a glazed surface and chip the edge before they bite.
Diamond Hole Saws for Porcelain and Ceramic
Porcelain is denser and harder than ceramic, so it needs a diamond hole saw run wet and slow. Ceramic cuts more easily but chips just as readily if you push too hard. Keep the saw moving in a gentle circular motion and let the diamonds do the work.
Pilot Bits, Angle Grinders and Hand Saws
A pilot drill bit starts the hole without the saw skating across the glaze. For straight cuts, such as the base of a panel around a bath or a pipe run, an angle grinder with a diamond blade gives the cleanest line. A hand saw works for trimming panel edges where the cut will sit under a trim.
For a full rundown of what to have on the job before you start, see our list of tools for professional shower panel installation.
Step 4: Preventing Tile Cracks When Drilling
Preventing tile cracks when drilling comes down to three things: support behind the tile, a slow speed, and water. Most cracks start because the tile is unsupported and the bit grabs on breakthrough.
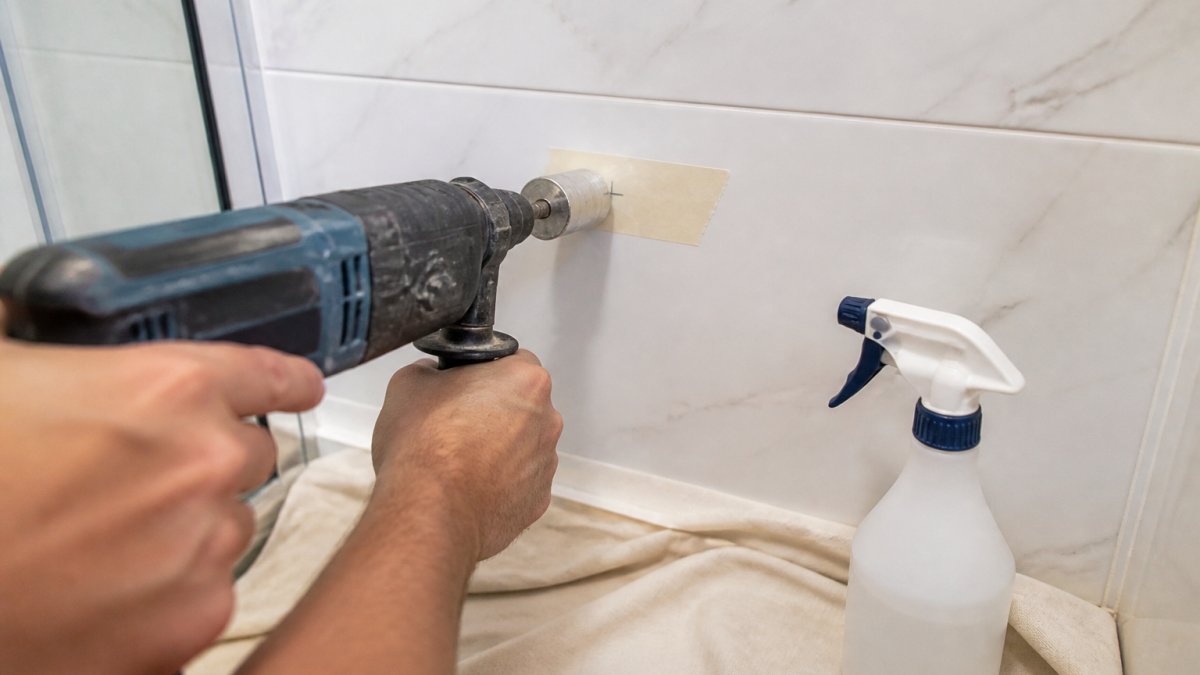
Follow these rules and chipping drops sharply:
- Apply masking tape over the mark to stop the bit wandering
- Start at a low speed with light pressure until the bit bites
- Keep the cut wet with a spray bottle or a ring of putty
- Support the back of the panel with a scrap board
- Ease off as the bit breaks through the far side
Watch out: cutting dry and fast is the single most common cause of a blown tile edge, and a chipped edge sits right where the trim plate cannot hide it.
Decorwall Maxi Panels-Beige Marble 2400mm x 900mm x 10mm →
Step 5: Cutting Circular Openings and Straight Cuts
Circular openings for valves and pipework are cut with a hole saw from the front face. Straight cuts, for pipe runs or the base of a panel, are cut with an angle grinder or hand saw after the panel is fixed or before it goes up. The choice of tool should follow the tile material and the shape of the opening, not habit.
Tool choice by material and hole shape
- Diamond hole saw, the default for ceramic and porcelain circular openings. Run wet and slow; porcelain needs a continuous-rim diamond saw and steady water feed.
- Carbide-tipped tile bit, for pilot holes and small fixings, not for valve openings.
- Angle grinder with diamond blade, for straight cuts and enlarging an opening. Keep the blade shallow and score the line first.
- Hand saw or pad saw, for trimming panel edges that will sit under a trim, where a power tool would be overkill.
A complete tile-to-wall sequence
Treat drilling and cutting as one sequence:
- Set out the panel and mark every opening from the valve body, not from old tiles.
- Drill the tile or panel face first, working from the front, and cut halfway through.
- Finish the cut from the back where you can reach it, to prevent breakout on the visible face.
- Cut the backer board or substrate to match, keeping the opening aligned.
- Dry-fit the valve and trim plate before any sealing.
- Seal the penetration, then fit the trim.
For a circular cut, drill a pilot hole first, then run the hole saw at low speed with water. Cut halfway from the front, then finish from the back if you can reach it. That prevents breakout on the visible face.
Straight cuts need a cutting guide clamped in place. Score the line first, then cut in one steady pass. Keep the blade shallow so it does not tear the panel's core.
For a deeper walkthrough on panel cuts, our step-by-step guide to cutting bathroom wall panels covers the technique in full.
Step 6: Sealing Shower Fixture Holes Against Water Ingress
Sealing shower fixture holes against water ingress means sealing the gap between the panel and the fixture, not just around the trim plate. Water tracks along the pipe and behind the panel if the penetration is left open.
Run a bead of sanitary silicone around the pipe where it passes through the panel. Fit the trim plate over the top, then seal its outer edge.
Our guide to the best sealant for shower wall panel edges covers which silicones hold up in a shower. For the wider picture on keeping moisture out of the wall build-up, read how to seal bathroom wall panels for moisture protection.
Step 7: Dry Fit, Service Access and Finishing the Wall
Dry fit every fixture before the final seal. Slide the valve through the opening, check the trim plate sits flat against the panel, and confirm you can reach the cartridge and isolating valves for future service.
Service access matters more than most guides admit. A valve that cannot be reached without cutting the wall open turns a ten-minute repair into a full refit. Leave enough clearance around the body for a spanner and a cartridge removal tool.
Finish with the trims:
- Fit end caps and corner trims before the final silicone bead
- Check every cut edge is covered
- Wipe the silicone smooth with a silicone tool, not a wet finger
Our Decorwall Maxi Panels, such as the Beige Marble 2400mm x 900mm x 10mm at £54.00, are 100% waterproof, making them a practical choice for a shower wall. Finish the joints with a 10mm internal corner trim at £12.00 and an 8mm panel trim end cap at £12.00.


| Step | Task | Time | Key Tool |
|---|---|---|---|
| 1 | Measure and mark | 15 min | Tape measure, level |
| 2 | Size the hole | 5 min | Trim plate, calipers |
| 3 | Choose the bit | 5 min | Diamond hole saw |
| 4 | Drill without cracks | 20 min | Drill, spray bottle |
| 5 | Cut circles and lines | 20 min | Hole saw, angle grinder |
| 6 | Seal the penetration | 15 min | Sanitary silicone |
| 7 | Dry fit and finish | 30 min | Trims, silicone tool |
Order Panels, Trims and Silicones in One Go
Cutting holes for shower fixtures is a job where the prep decides the result. Mark from the valve, size the hole to the trim plate, cut wet and slow, and seal every penetration before the shower goes back into use.
Our range includes 250mm, 300mm, 500mm and 900mm panel widths, Dumawall tile effects and Linerio slatwall.
Frequently Asked Questions
What size hole saw do I need for shower plumbing?
The hole saw must clear the valve body, not the trim plate. Measure the widest part of the valve body and add a few millimetres of clearance, then check the trim plate still covers the opening once fitted. A common approach is a 35mm opening for pipework and a wider cut, often 60mm to 80mm, for the valve body, but confirm against your own fixture's instructions. Cut too small and the valve will not seat; cut too large and the trim plate will not hide the gap.
Can you drill into shower wall panels?
Yes. Panels such as the Decorwall Maxi range are 10mm thick. Mark the centre point with a tape measure, drill a pilot hole first, then open it out to the valve size. Fit the trim plate over the opening and seal the edge with a suitable silicone. If you are fixing directly to a panel rather than tile, keep the hole tight so the cover plate sits flush.
How do you drill into a tile without cracking it?
Use a diamond hole saw or tile drill bit, never a masonry bit on porcelain. Mark the centre with tape to stop the bit wandering, start the cut at a low speed without hammer action, and keep the bit cool with water. Apply light, steady pressure and let the bit do the work rather than forcing it. Drill through the tile first and then switch to a standard bit for the backer board behind, which reduces vibration at the tile edge.
Do I need a diamond drill bit for shower wall tiles?
For porcelain, yes. Porcelain is denser and harder than ceramic, so a diamond hole saw is the reliable choice and reduces the risk of chipping. Ceramic tiles are softer and a carbide-tipped tile bit can manage smaller holes, though diamond still gives a cleaner edge. Avoid hammer-action masonry bits entirely on either material.


