
What Tools Do You Need for Professional Shower Panel Installation?
Last Updated: October 24, 2026
Quick Summary
Professional shower panel installation needs accurate measuring and marking tools, a controlled cutting setup, a drill with the right bits, and a decent skeleton gun for adhesive and silicone. The must-haves are a 5m tape measure, 600mm and 1.2m spirit levels, a fine-toothed hand saw or jigsaw, and safety gear; everything else is finishing.
- Mark your cutting line on masking tape, not directly on the panel face.
- A fine-toothed hand saw does the cleanest work on most panels.
- Hire power tools like a circular saw for a single enclosure rather than buying.
- Nothing goes behind a panel except a clean, flat, dry wall and the adhesive.
- Measure both diagonals of the enclosure; a difference means the walls are out of square.
Table of Contents
- The Core Toolkit for Shower Panel Installation
- How to Cut Shower Wall Panels Cleanly
- What Goes Behind Shower Panels Before You Fit Them
- Choosing Adhesive for Shower Wall Panels
- Silicone Sealant for Shower Panels: Getting Waterproof Joints Right
- Trims, Fixings and the Small Parts That Finish the Job
- Dust Control, Safety Gear and Accuracy Checks
- Ordering Your Full Shower Panel Installation Kit
- Frequently Asked Questions
The Core Toolkit for Shower Panel Installation
Professional shower panel installation starts with a short, honest tool list, not a van full of kit. At Wetwall Wonders, we supply panels and the consumables that hold them, and the fitters we work with carry a core set that fits in one toolbox.
The short answer: you need accurate measuring and marking tools, a controlled cutting setup, a drill with the right bits, and a decent skeleton gun for adhesive and silicone. Everything else is finishing.
Must-have versus optional: the professional checklist
Treat the list below as the working checklist a fitter runs through before leaving the van. The must-haves are the tools without which the job either cannot be done or will fail a quality check. The optional items speed up volume work or improve the finish but are not deal-breakers on a single enclosure.
| Category | Must-have | Optional / nice-to-have |
|---|---|---|
| Measuring and marking | 5m tape measure, 600mm spirit level, 1.2m spirit level for longer runs, pencil, masking tape, set square, straight edge | Laser level, chalk line for long runs |
| Cutting | Fine-toothed hand saw, jigsaw with fine-toothed blade | Circular saw with 60-tooth carbide blade for thick rigid boards, oscillating multi-tool for cut-outs |
| Drilling | Cordless drill, drill bits for pipe holes and fixings, hole saw for larger pipe penetrations | Diamond-tipped bits for very hard surfaces, step drill for enlarging holes cleanly |
| Fixing and sealing | Skeleton gun, silicone finishing tool, hammer for tapping trims and pins | Powered caulking gun for high-volume work, profile scraper for old sealant |
| Safety and dust | Safety glasses, dust mask rated for fine particles, gloves | Ear defenders for power-tool work, dust extractor or vacuum attachment |
Measuring and marking tools
Accuracy starts before anything is cut. A tape measure (5m minimum), a spirit level (600mm for walls, 1.2m for longer runs) and a pencil are the non-negotiables. Add a masking tape roll, a set square and a straight edge.
Mark your cutting line on tape, not directly on the panel face. Tape protects the surface and gives the saw teeth something to register against.
Cutting and drilling tools
For most panels, a fine-toothed hand saw does the cleanest work. For volume, a jigsaw with an upward-cutting blade or a circular saw with a fine blade speeds things up. You also need a drill with drill bits for pipe holes and fixings, a skeleton gun for adhesive, and a silicone finishing tool for neat joints.
A Stanley Curved Claw Hammer earns its place for tapping trims and pins home; its fibreglass core handle reduces vibration and the smooth face limits chipping.
Tool selection by panel material and thickness
Match the blade and bit to the board, not just the saw. Acrylic and laminate panels chip easily, so a fine-toothed blade with a high tooth count matters more than saw power.
| Panel type | Best saw | Blade | Drill bit notes |
|---|---|---|---|
| Acrylic panels | Hand saw or jigsaw | Fine-toothed, upward-cutting | Standard HSS bits at low speed; back the exit face with tape or scrap board |
| Laminate boards | Jigsaw | Fine-toothed down-cut | Masking tape over the drill point; withdraw the bit regularly to clear swarf |
| Waterproof panels | Jigsaw | Fine-toothed | Support both sides of the cut; use a hole saw for pipe penetrations |
| Thick rigid boards | Circular saw | 60-tooth carbide | Clamp and guide the cut; drill pilot holes before enlarging |
Thickness changes the method as much as the material. Thin panels flex and snag at the end of a cut, so support both sides and reduce feed pressure.
Hire versus buy for a one-off job
Most fitters buy the hand tools and hire the specialist kit. A jigsaw, drill, spirit levels and skeleton gun are worth owning because they earn their keep across many jobs. A circular saw with a 60-tooth carbide blade, a laser level or a dust extractor is often worth hiring for a single enclosure rather than buying outright. If you are fitting one bathroom and do not expect to fit another, hire the power tools and spend the saving on quality blades and sealant, which affect the finish far more than saw power.
How to Cut Shower Wall Panels Cleanly
Clean cuts come down to three things: the right blade, a taped line and a supported panel. Cut with the decorative face up on a jigsaw, down on a hand saw, and always support both sides of the cut so the panel does not snag or splinter at the end of the stroke.
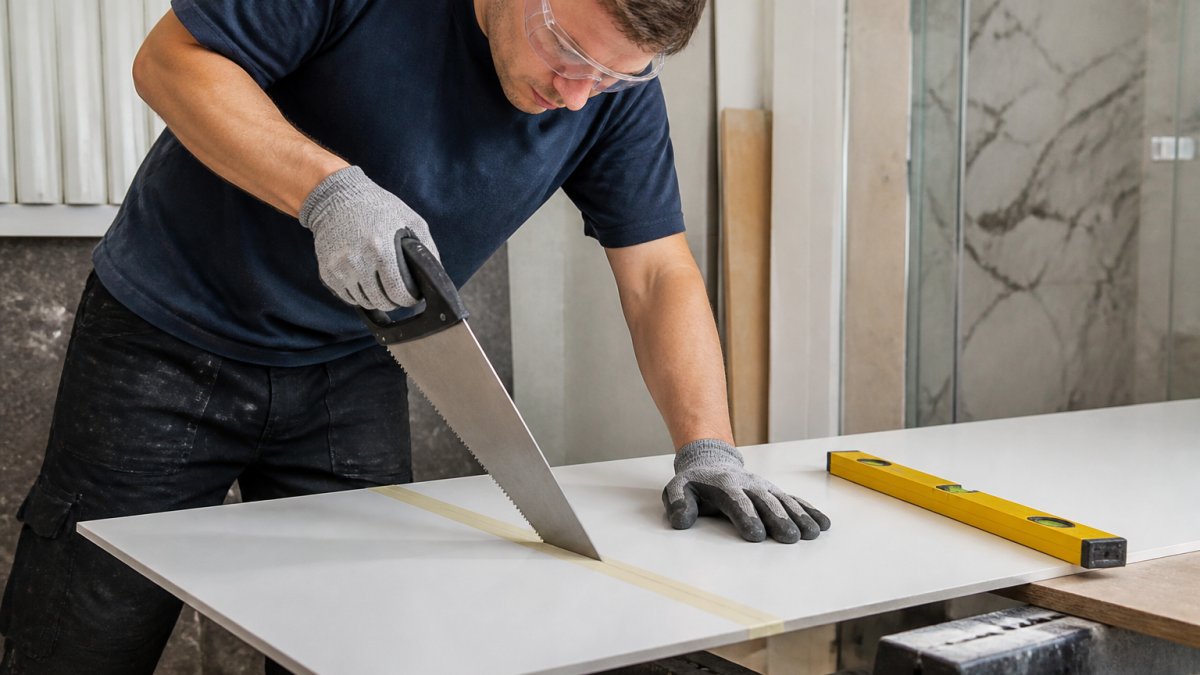
For the full technique, including blade choice and stroke control, our guide on cutting bathroom wall panels walks through it step by step.
Choosing the Right Saw and Blade by Panel Material
Match the blade to the board. Acrylic and laminate panels chip easily, so a fine-toothed blade with a high tooth count matters more than saw power.
| Panel Type | Best Saw | Blade | Notes |
|---|---|---|---|
| Acrylic panels | Hand saw or jigsaw | Fine-toothed, upward-cutting | Tape the line; slow feed |
| Laminate boards | Jigsaw | Fine-toothed down-cut | Cut face down to protect surface |
| Waterproof panels | Jigsaw | Fine-toothed | Support both sides of cut |
| Thick rigid boards | Circular saw | 60-tooth carbide | Clamp and guide the cut |
What Goes Behind Shower Panels Before You Fit Them
Nothing goes behind a panel except a clean, flat, dry wall and the adhesive itself. There is no need for battens or a full waterproof membrane if the substrate is sound and the joints are sealed correctly.
Check for damp, loose plaster or flaking paint first. Sand back high spots, fill hollows and let everything dry. A dusty or uneven wall is the most common reason panels lift or bubble later.
Choosing Adhesive for Shower Wall Panels
Use a solvent-free grab adhesive rated for panels, applied in vertical beads with a skeleton gun. Avoid dot-and-dab on large panels; beads give even pull and let you press the board flat against the wall.
Decorwall Panel Adhesive pro (310 ml) →
Our adhesive for shower wall panels guide covers which product suits which panel type. In our range, Decorwall Panel Adhesive Pro (310ml, £9.00) is water-based, ready in one hour and fully cured in 24, while Decorwall Megabond Adhesive (295ml, £9.00) uses hybrid polymer technology to bond glass, marble and brick and will adhere under water.
Silicone Sealant for Shower Panels: Getting Waterproof Joints Right
Water gets behind panels at the edges, not through the face. Seal every internal corner, the tray line and any cut edge with a mould-resistant silicone, then tool it smooth while wet.
Our silicone sealant for shower panels guide explains which product suits which joint. GP200 General Purpose Silicone Sealant (pack of 3, £24.00) is a high-modulus acetoxy cure with fungicide, fast setting and permanently flexible, and it carries UKCA approval.
Watch out: sealing a joint before the adhesive has cured traps solvent and moisture, and the silicone will fail within months.
Trims, Fixings and the Small Parts That Finish the Job
Trims do two jobs: they hide the cut edge and they finish the joint. An internal corner trim closes the meeting point of two panels, an external corner trim caps a protruding corner, an H trim joins two panels in line, and an end cap finishes a run against a wall or ceiling.
We stock all four in white PVC at 2600mm: 10mm internal corner trim at £12.00, 20mm x 20mm external corner trim at £12.00, 10.5mm H trim at £12.00 and 8mm end cap at £12.00. Our trim and corner profile guide explains which goes where.
Dust Control, Safety Gear and Accuracy Checks
Cutting panels makes dust and fine swarf, and silicone fumes need air. Wear safety glasses, a dust mask rated for fine particles and gloves, and cut in a ventilated space or outside where possible. Sheet dust sheets over the tray and any fittings you are keeping. Ear defenders are worth adding for power-tool work, and a vacuum attachment or dust extractor on the jigsaw keeps fine dust out of the room and off freshly sealed surfaces.
Professional accuracy and quality-control checks
Accuracy checks before you commit: measure the diagonals of the shower enclosure, confirm the panel is plumb with the spirit level, and dry fit every panel before adhesive goes on. A 2mm error at the top becomes a visible gap at the tray.
Run these checks in order, because each one catches a different class of error:
- Level and plumb: check the panel with the spirit level in both directions, not just vertically. A panel can be plumb but twisted.
- Square: measure both diagonals of the enclosure. If they differ by more than a few millimetres, the walls are out of square and the panel layout needs adjusting before cutting.
- Cut-edge quality: run a finger along the cut edge. Any roughness or chipping will show at a joint or under a trim, so re-cut or dress the edge before fitting.
Troubleshooting tool-related installation problems
Most installation faults trace back to a tool choice or technique, not the panel itself. The table below covers the common ones and how to prevent or fix them.
| Problem | Likely cause | Prevention or fix |
|---|---|---|
| Chipped cut edge | Blunt or coarse blade, fast feed | Use a fine-toothed blade, tape the line, slow the feed; dress minor chips before fitting |
| Inaccurate cut | Line marked on the panel face, panel unsupported | Mark on tape, support both sides, check the measurement twice |
| Oversized pipe hole | Drill bit wandered or hole saw without a pilot | Use a pilot hole, tape the drill point, step up in sizes |
| Uneven panel | Wall out of flat, adhesive applied in dots | Sand back high spots, use vertical beads rather than dot-and-dab |
| Poor silicone finish | Joint dusty or sealed before adhesive cured | Clean and dry the joint, tool while wet, wait for the adhesive to cure first |
Ordering Your Full Shower Panel Installation Kit
The fastest way to finish a job is to order everything in one go. Panels, adhesive, silicone, trims and fixings from one supplier means no waiting on a backorder while the bathroom sits half-finished.
Our sealants and adhesive collection covers the consumables a full kit needs. Order panels, trims and sealants together, check quantities against your measurements, and keep a spare cartridge of silicone on the van.
Frequently Asked Questions
Do I need special tools to fit shower panels?
No specialist power tools are essential. A tape measure, spirit level, fine-toothed hand saw, drill with the correct bits, skeleton gun and silicone finishing tool cover most jobs. A jigsaw or circular saw speeds up long cuts on thicker boards, but a hand saw with an upward-cutting blade gives a clean edge on most panels. Add masking tape to protect the surface while cutting and a soft mallet or hammer for tapping trims into place.
What do you put behind shower panels?
Panels bond directly to a sound, dry, flat wall using grab adhesive, so no plasterboard or backer board is usually needed. Check the wall is clean, free of loose tiles or flaking paint, and flat within a couple of millimetres across the panel width. In wet areas, seal any gaps around pipes and apply silicone where the panel meets the tray or bath. A primer may be needed on dusty or porous surfaces before adhesive goes on.
What tools do professionals use to cut shower wall panels?
Fitters typically use a fine-toothed hand saw with an upward-cutting blade for straight cuts, a jigsaw for pipe holes and notches, and occasionally a circular saw with a 60-tooth carbide blade for long, thick laminate boards. Masking tape along the cutting line reduces chipping, and cutting from the back of the panel hides any minor tear-out. Always cut in a well-ventilated area and wear eye protection and a dust mask.
How do you get a neat cut around shower pipes?
Measure the pipe centres from two fixed edges, mark them on the panel, then drill pilot holes before enlarging with a hole saw matched to the pipe diameter. For awkward positions, a jigsaw can cut a notch from the panel edge instead. Dry fit the panel before applying adhesive so you can adjust the cut. Finish with a bead of silicone sealant for shower panels around the pipe collar to keep water out.
What tools are needed to seal shower panels?
You need a skeleton gun for cartridges, a silicone finishing tool or profile scraper for smooth beads, and a clean cloth or spirit wipe for preparation. Use a mould-resistant silicone such as GP200 around tray edges, internal corners and pipe collars. Apply a continuous bead, smooth it in one pass, and leave it to cure fully before the shower is used. Masking tape either side of the joint gives the sharpest finish.
Most jobs go wrong not on the panel but on the small parts: the wrong blade, a missing trim, a silicone that will not cure. Get the kit right and the installation is straightforward. Wetwall Wonders supplies panels alongside the adhesives, silicones and trims that finish the job, so you can order the whole installation in one place. Browse the range and get your next bathroom project moving.


